
[d.i.y.] last minute halloween garland
so Halloween this year is on a weekend… meaning a bigger turn out for your Halloween daytime parties… meaning after a week of work… you have pretty much zero time to prepare original decorations….. today, i myself in the same dilemma came up with a easy DIY for a Halloween garland, to make your holiday home feel a little more festive with a little effort. (see parentheses for simpler options to make life a little easier for you!)
今年のハロウィンは、週末になりますね…. ハロウィンパーティーを企画している方は、たくさんの方が昼間からみえることでしょう。しかし、一週間のお仕事を終えた所で、明日の飾り付けとか考えるのもやっと… 私もそんなシチュエーションの真っ只中。なので、簡単、オリジナル、ハロウィンガーランドのDIYを考えました!(カッコ内は、シンプルな材料を書いております。)
![[D.I.Y.] HALLOWEEN GARLAND](http://www.peacelovetokyo.com/home/wp-content/uploads/2015/10/unnamed-18-300x400.jpg)
LET’S START! / 始めよう!
what you need / 材料:
orange patterned card stock (B4 size) x 5 / オレンジ色の柄の厚紙 (B4 size) x 5
(as long as it’s a rectangular shape, size is not essential. smaller paper will result in smaller flags. /
紙は、長方形であればいいです。サイズが小さければ、フラグが小さくなります。)
if you have extra time you can make your own patterned card stock:
時間があればオリジナルの柄をお作りください:
B4 size water color paper × 5 / B4 水彩画用紙 × 5
newspaper / 新聞紙
water colors (i used acrylic) / 水彩絵具(アクリル)
ruler / 定規
scissors / ハサミ
halloween colored washi tape (or black colored tape) / ハロウィン色和紙テープ適量 (もしくはシンプルに黒色テープ)
black card stock (or black marker) / 黒い厚紙 (もしくは、黒いマーカー)
glue / のりやボンド
twine / 麻紐
// makes 20 flags (14 for H A P P Y H A L L O W E E N + 1 between the two words + 2 for beginning + 2 for end = 19 plus 1 left over)
計 20 フラグ (H A P P Y H A L L O W E E N で 14枚 + 間に 1枚 + あたまの 2枚 + おわりの 2枚 = 19枚 と あまり1枚) //
![[D.I.Y.] HALLOWEEN GARLAND](http://www.peacelovetokyo.com/home/wp-content/uploads/2015/10/unnamed-13-400x300.jpg)
(SKIP THIS PROCESS IF YOU HAVE ORANGE PATTERNED PAPER / オレンジ色の柄の厚紙のご用意があれば、こちらを飛ばしてください)
1. if you decided to use water colors, dry the paint. / 水彩画で柄を作られた場合は、十分乾かしてください。
the first d.i.y flag garland i did also used water colors, for a softer feel. this time, i’m using water colors to play with the bold and soft contrasts. / 初めて作ったガーランドは、優しい印象のため水彩柄にしましたが、今回はカラーの強弱をつけるために水彩にしてみました。
![[D.I.Y.] HALLOWEEN GARLAND](http://www.peacelovetokyo.com/home/wp-content/uploads/2015/10/unnamed-101-400x300.jpg)
2. once your paper is dried and ready, fold them length-wise (hot dog style). / 紙が乾きましたら、長い辺に沿って半分に折る。
![[D.I.Y.] HALLOWEEN GARLAND](http://www.peacelovetokyo.com/home/wp-content/uploads/2015/10/unnamed-400x300.jpg)
3. measure and cut the folded paper into fourths. / 長い辺に沿って4当分に紙を切る。
![[D.I.Y.] HALLOWEEN GARLAND](http://www.peacelovetokyo.com/home/wp-content/uploads/2015/10/IMG_7351-400x300.jpg)
4. washi-tape (or black tape) the edges opposite of the folded side. / 短い辺同士を和紙テープ(もしくは、黒色テープ)で止める。
![[D.I.Y.] HALLOWEEN GARLAND](http://www.peacelovetokyo.com/home/wp-content/uploads/2015/10/unnamed-3-400x300.jpg)
(SKIP THIS PROCESS IF YOU HAVE A BLACK MARKER / 黒いマーカーのご用意がある場合はこちらを飛ばしてください)
5. sketch letters on black card stock. if using a pencil to sketch, i recommend drawing the letters (flip the letters horizontally for P, L, E, N) on the back so as not to leave pencil marks on the front side. / 黒い厚紙に文字を描く。できれば、裏面に描いた方が、仕上がり面に出ないのでよりきれいに仕上がります。(P、L、E、Nは、左右を逆に!)
![[D.I.Y.] HALLOWEEN GARLAND](http://www.peacelovetokyo.com/home/wp-content/uploads/2015/10/IMG_7350-400x300.jpg)
6. cut out and glue letters onto flags. if you have a black marker, draw your letters directly onto flags. / 文字を切り抜き、フラグにのりで貼る。マーカー使用の場合は、直接フラグに描く。
![[D.I.Y.] HALLOWEEN GARLAND](http://www.peacelovetokyo.com/home/wp-content/uploads/2015/10/IMG_7358-400x300.jpg)
7. thread the flags with twine. / 麻紐を通す。
![[D.I.Y.] HALLOWEEN GARLAND](http://www.peacelovetokyo.com/home/wp-content/uploads/2015/10/IMG_7359-400x300.jpg)
8. tape the twine to the inside of the flags on the folded side. / フラグの折れ目の内側に麻紐をテープで止める。
![[D.I.Y.] HALLOWEEN GARLAND](http://www.peacelovetokyo.com/home/wp-content/uploads/2015/10/IMG_7360-400x315.jpg)
(without the tape on the inside, the flags will go haywire… / テープで止めないと、フラグが重なって大変なことに…)
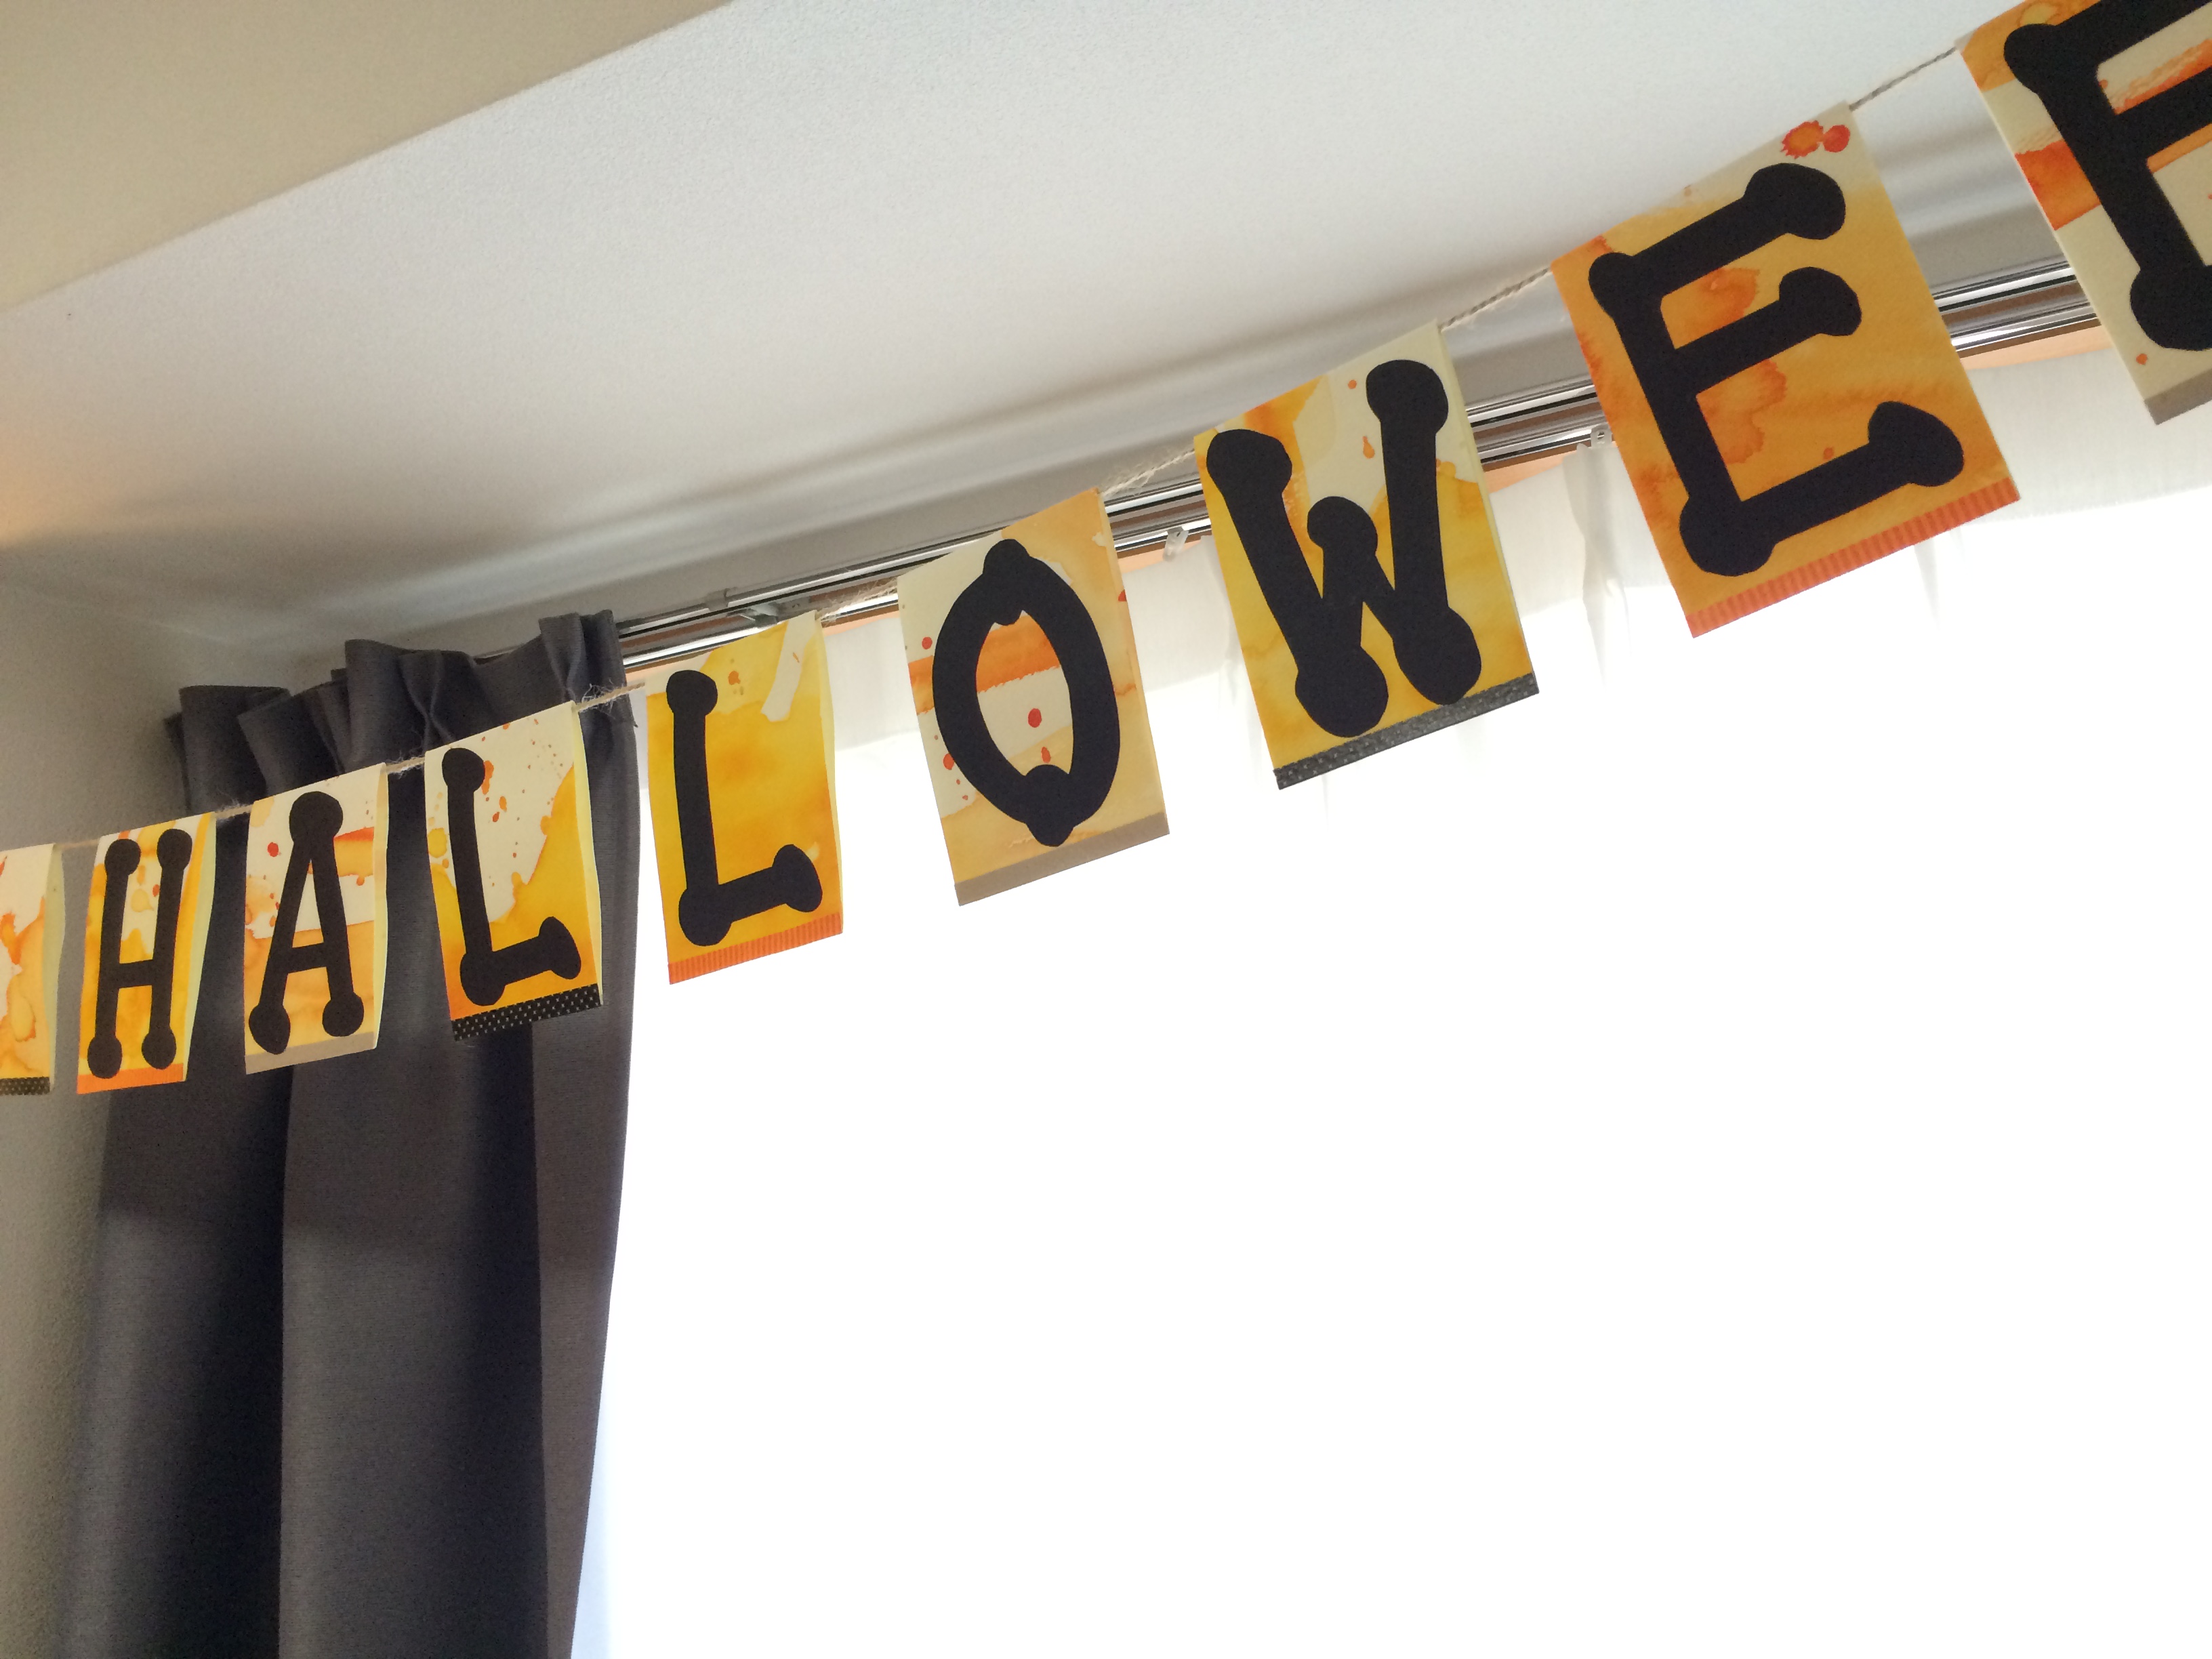
![[d.i.y.] halloween flag garland // ハロウィンフラグガーランド](http://www.peacelovetokyo.com/home/wp-content/uploads/2015/10/unnamed-のコピー-400x188.jpg)
FINISHED! / 出来上がり!
fast, easy, simple! i hope this helps to make Halloween preparations slightly easier for you! / 簡単、早い、シンプル!これで、少しでもハロウィンの飾り付けの準備が楽になるといいです〜