do it yourself

tie ribbon

[d.i.y.] baby shower favors

last month, i hosted a dual baby shower for two of my expecting friends. both of them are due around the same time, and both are boys! i was limited with set up time and decorations, so i made a volumy tassel garland that’s easy to put up and instantly brightens up any party space. i didn’t have time to take many photos but here’s what the garlands looked like.

先月、妊娠中の友人二人のために共同ベビーシャワーを開催しました。同時期の予定日に加え、二人とも男の子が産まれるとの事!レンタルスペースだったので、飾り付けをする時間と場所も限られていた為、飾りはタッセル風ティッシュペーパーガーランドを作りました。ボリュームたっぷりで軽いので、これだけでも存在感たっぷりになりました。当日のお写真を撮り逃したのですが、こんな感じです!
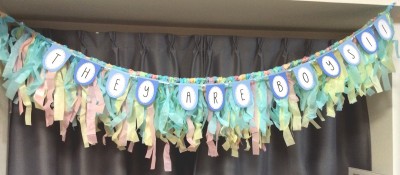
BABY SHOWER GARLAND

now onto the MAIN subject of this post. a simple and easy baby shower favor d.i.y.! i know i do a lot of “simple and easy”, but seriously not many of us have all the time in the world, and efficiency is key. as long as your heart goes into making these favors, your guests will truly appreciate the gesture!

そこで、本日のDIYのテーマへ!超簡単&シンプルなベビーシャワープチギフト。いつもいつも、簡単やらシンプルと歌っていますが、時間を有効に活用するのは重要ですよね。一番大事なのは、心を込めて手作りの一手間を加えて、ゲストの方々に温かみが伝わる事です。

LET’S START! / 始めよう!

what you need / 材料:
small paper gift bags / ギフト用紙袋
chocolates, candies, or other small wrapped snacks / 個別包装されたチョコレート、キャンディー、お菓子
washi tape / 和紙テープ
printed (or written) thank you message / 手描き、もしくは印刷されたサンキューメッセージ
scissors / ハサミ
ribbon / リボン
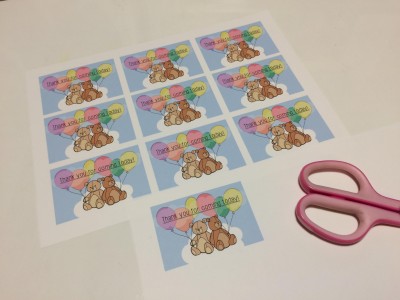
print
1. print and/or handwrite/draw a thank you message to match the width of gift bag. / 印刷もしくは手書き/描きのサンキューメッセージタグを作る。幅はギフトバッグに合わせて。
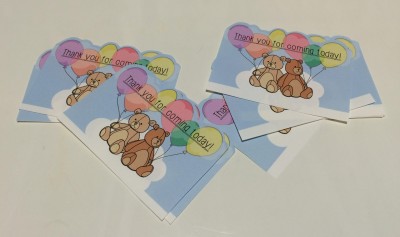
cut out
2. cut out thank you message tag. i left some white space at the bottom where the tape will go, but this is optional. for some extra fun details, cut top edges in a curved, scalloped, or zig-zag pattern! /
メッセージタグを切り抜く。下端の白紙部分はテープを貼るのり代として残しました。面白みを出すのに、タグの上端は、カーブやスカラップ、ジグザグで切り抜くと良いです⭐︎
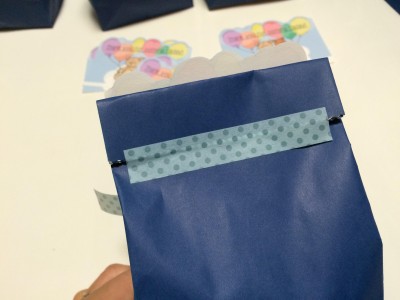
tape bag closed
3. fill gift bag with candies and snacks and tape closed. / ギフトバッグにお菓子を詰めて、テープで閉じる。
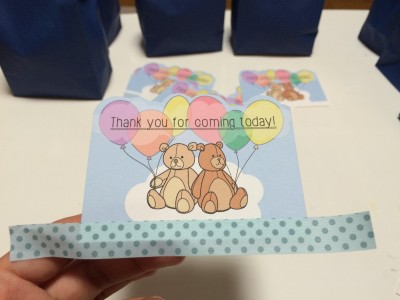
add tape to tag
4. tape washi-tape to the bottom edge of tag. make sure to leave about 1/3 inch of the tape from the bottom edge of the tag to attach to the gift bag. / メッセージタグの下端に和紙テープを貼る。ギフトバッグに貼り付ける分量を半分残す。
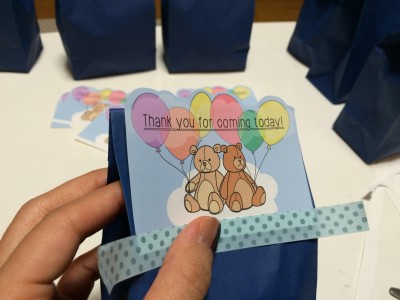
tape tag to bag
5. tape tag to gift bag. let the detailed top edge stick above the gift bag. / メッセージタグをギフトバッグに貼り付ける。先ほど不規則に切った上端は、紙袋の上から出るように配置してね♥
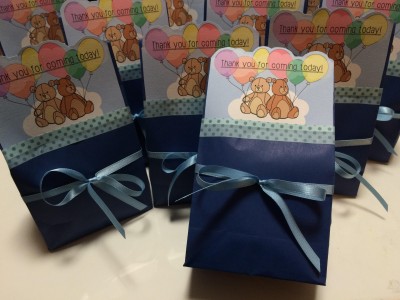
tie ribbon
6. finish with a ribbon! / 最後にリボンを結ぶ!

FINISHED! / 出来上がり!

completed closeup

[d.i.y.] starry night card stock garland

right smack dab in the middle of the holiday season, bustling around for presents, preparing the house for the freezing winter months and the streams of expected guests, i of course had to think up another diy decoration project (well it was more because i had come across these dreamy fairy lights that i’ve been looking for all year) and thanks to my overly ambitious creative mind, i always lose a lot of sleep … but the results are worth it.

クリスマスシーズン真っ只中の今、家族のプレゼント探しから、大掃除、クリスマスパーティの準備などなど、やる事が途絶えない師走のこの時期に、新しいDIYを思いついてしまいました。実を言うと、インスピレーション源は一年中探していたフェアリーライトを niko and… で見つけた事です。睡眠時間削ってでもどうしても作りたかったスターガーランドが完成しました。

LET’S START! / 始めよう!
*sample uses 5 sheets for 30 stars / サンプルは5枚=星30個使っています

what you need / 材料:
1 A4 size card stock (for 6 stars) / A4サイズ厚紙や画用紙1枚(星6枚)
white acrylic paint / 白いアクリル絵の具
sponge for painting / スポンジ
gold spray paint / ゴールドスプレーカラー
printed template (1 sheet=6 stars) / 型紙のプリント(1枚=星6個)
CLICK HERE FOR FREE TEMPLATE / 無料型紙は、こちらをクリック
all purpose glue / 糊
scissors / ハサミ
needle or pointed tool / 目打ち
ruler / 定規
cutter / カッター
cord / 紙紐
tape / テープ

paint card stock
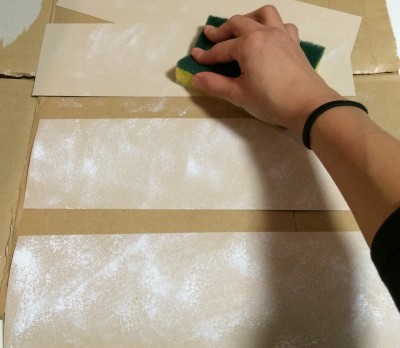
1. use a sponge to paint card stock. this adds a marble-type of effect for the first layer! then spray a thin layer of gold paint. (i used strips of leftover cardstock.) / スポンジでアクリルペイントを厚紙に叩くように塗る。マーブル調になります。次にゴールドのスプレーカラーを薄く塗る。(私は余り物の厚紙を使用しているので紙サイズが異なります。)

finished card stock
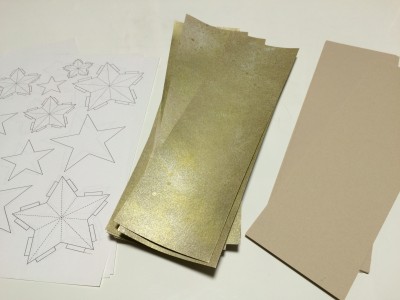
2. after at least 24 hours of drying the paints, the sheets are ready! i purposely left a couple of sheets uncolored. / 24時間ほどペイントを乾かしたら、紙の準備が終わります!あえて数枚ペイントをしないでいます。

paste individual star templates
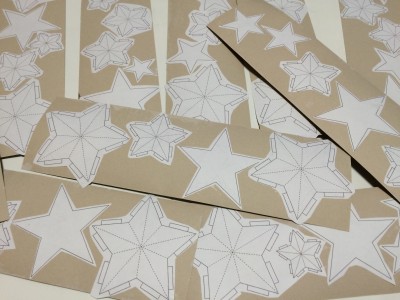
3. glue the template to the back of the prepared card stock. make sure to glue the entire surface of each star. since i had irregular sized strips i roughly cut the individual stars out. / 型紙のプリントを厚紙の裏に糊で貼る。しっかり星の中全体を糊付けする事がポイントです。私は余り物の紙を使っていたので、先に型紙を荒く切り分けてから貼りました。

cut individual stars
individual stars
individual stars back
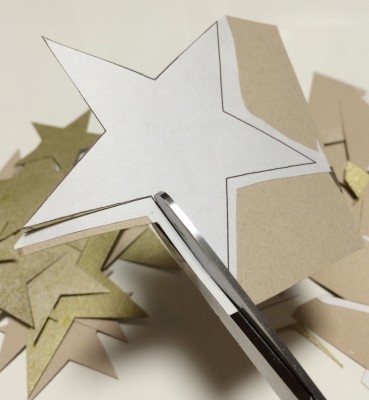
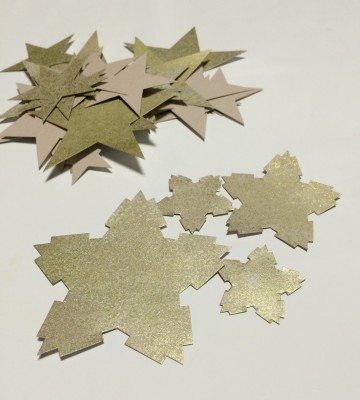
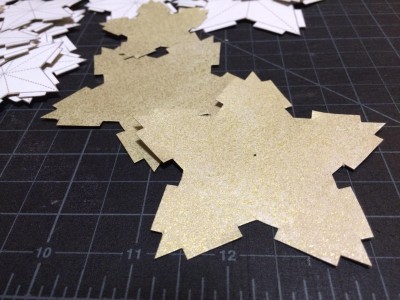
4. cut the individual stars along the outside lines. / 外側の線に沿って星を一つずつ切り抜く。

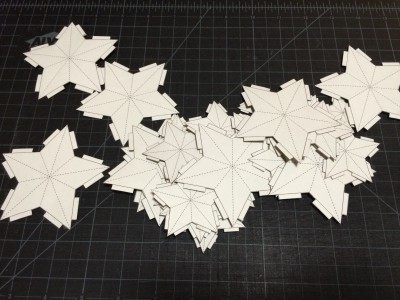
// set aside the B stars (the plain stars) and we will work on the A stars (the ones with glue tabs and dotted lines) for STEPS 5-7 //
// 一度 Bの星(無地のシンプルな星)をよけて、ステップ5〜7では、Aの星を加工します。//

hole in center
hole in center close up
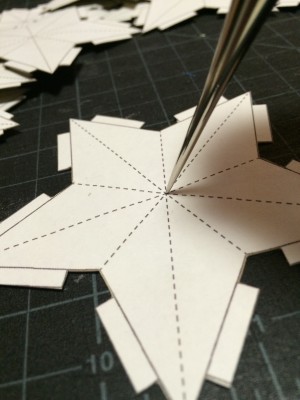
5. for the A stars (or the stars with tabs) poke a very small hole where the lines meet in the center of the star. / Aの星の線が重なり合う中心点に目打ちで小さく穴を刺す。

star score and fold directions
score
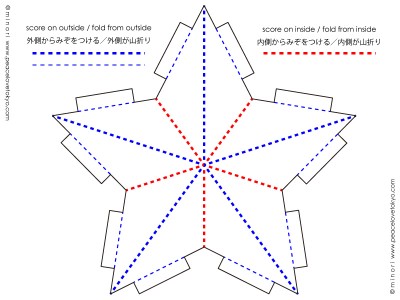
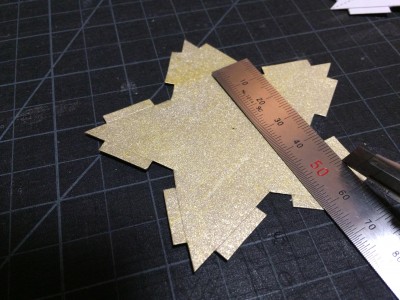
6. use a cutter to gently score along the lines as shown in above picture. for the lines that need to be scored from the outside, 1. score from the center hole to each of the five points of the star and 2. connect the two points of the glue tab folds. / 上記図の通りにカッターで優しく、浅く溝を切り込む。表面の線は、1. 中心の穴から星の5つの頂点まで一つずつ線を引く。2. のり代の折り線は、端点の間を線を引く。

fold scored lines
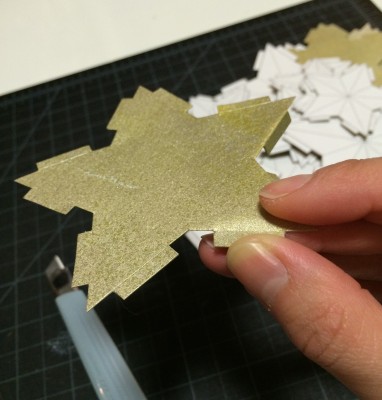
7. fold the scored lines. see the picture in step 6.: for the blue lines, the fold (or mountain fold) should be on the outside. for the red lines, the fold (or mountain fold) would be on the inside. / 溝に沿って折る。ステップ6.の図の青い破線は表面が山折りになります。赤い破線は内側が山折りになります。

tape cord
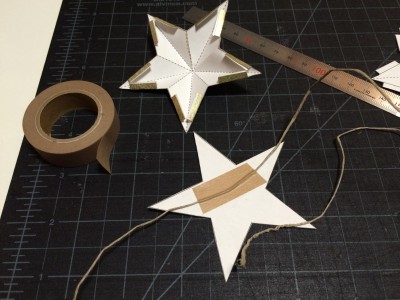
8. returning to the B stars (the plain ones), lay out your cord and plan where to attach the B stars. tape the garland cord onto the insides of these stars. / ここからBの星(無地タイプ)に戻ります。ガーランドの紐とBの星の位置を決めます。Bの星の内側に紐をテープで固定します。

star completed
completed star side
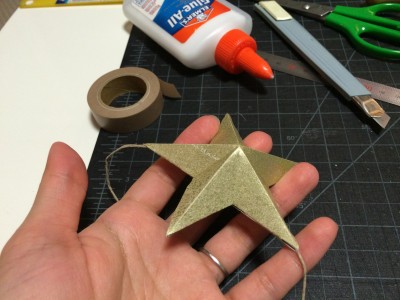
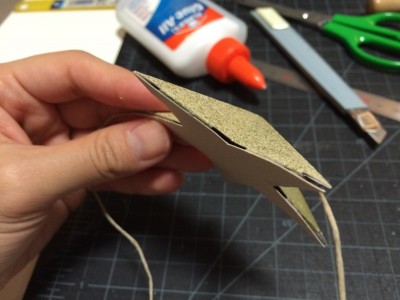
9. find the corresponding sized A star for each B star from step 8 (star sizes 1-3). place a small amount of glue on the glue tabs on both sides of a single star point and attach to B star. this step takes a lot of patience: hold the point in place for about 30 seconds to 1 minute. then move on to the next two glue tabs, and repeat until you complete the star. remember, PATIENCE IS KEY! / テープで固定したB星のサイズ(1〜3)に合うA星を探す。一つの頂点の両のり代に少量の糊をつける。丁寧にB星にのせ、30秒〜1分間手で押し付ける。このステップでは、一回に一つの頂点を終わらせてから次の頂点へ進めます。気長〜に丁寧に進めるのがキーポイントです!!

completed
FINISHED! / 出来上がり!
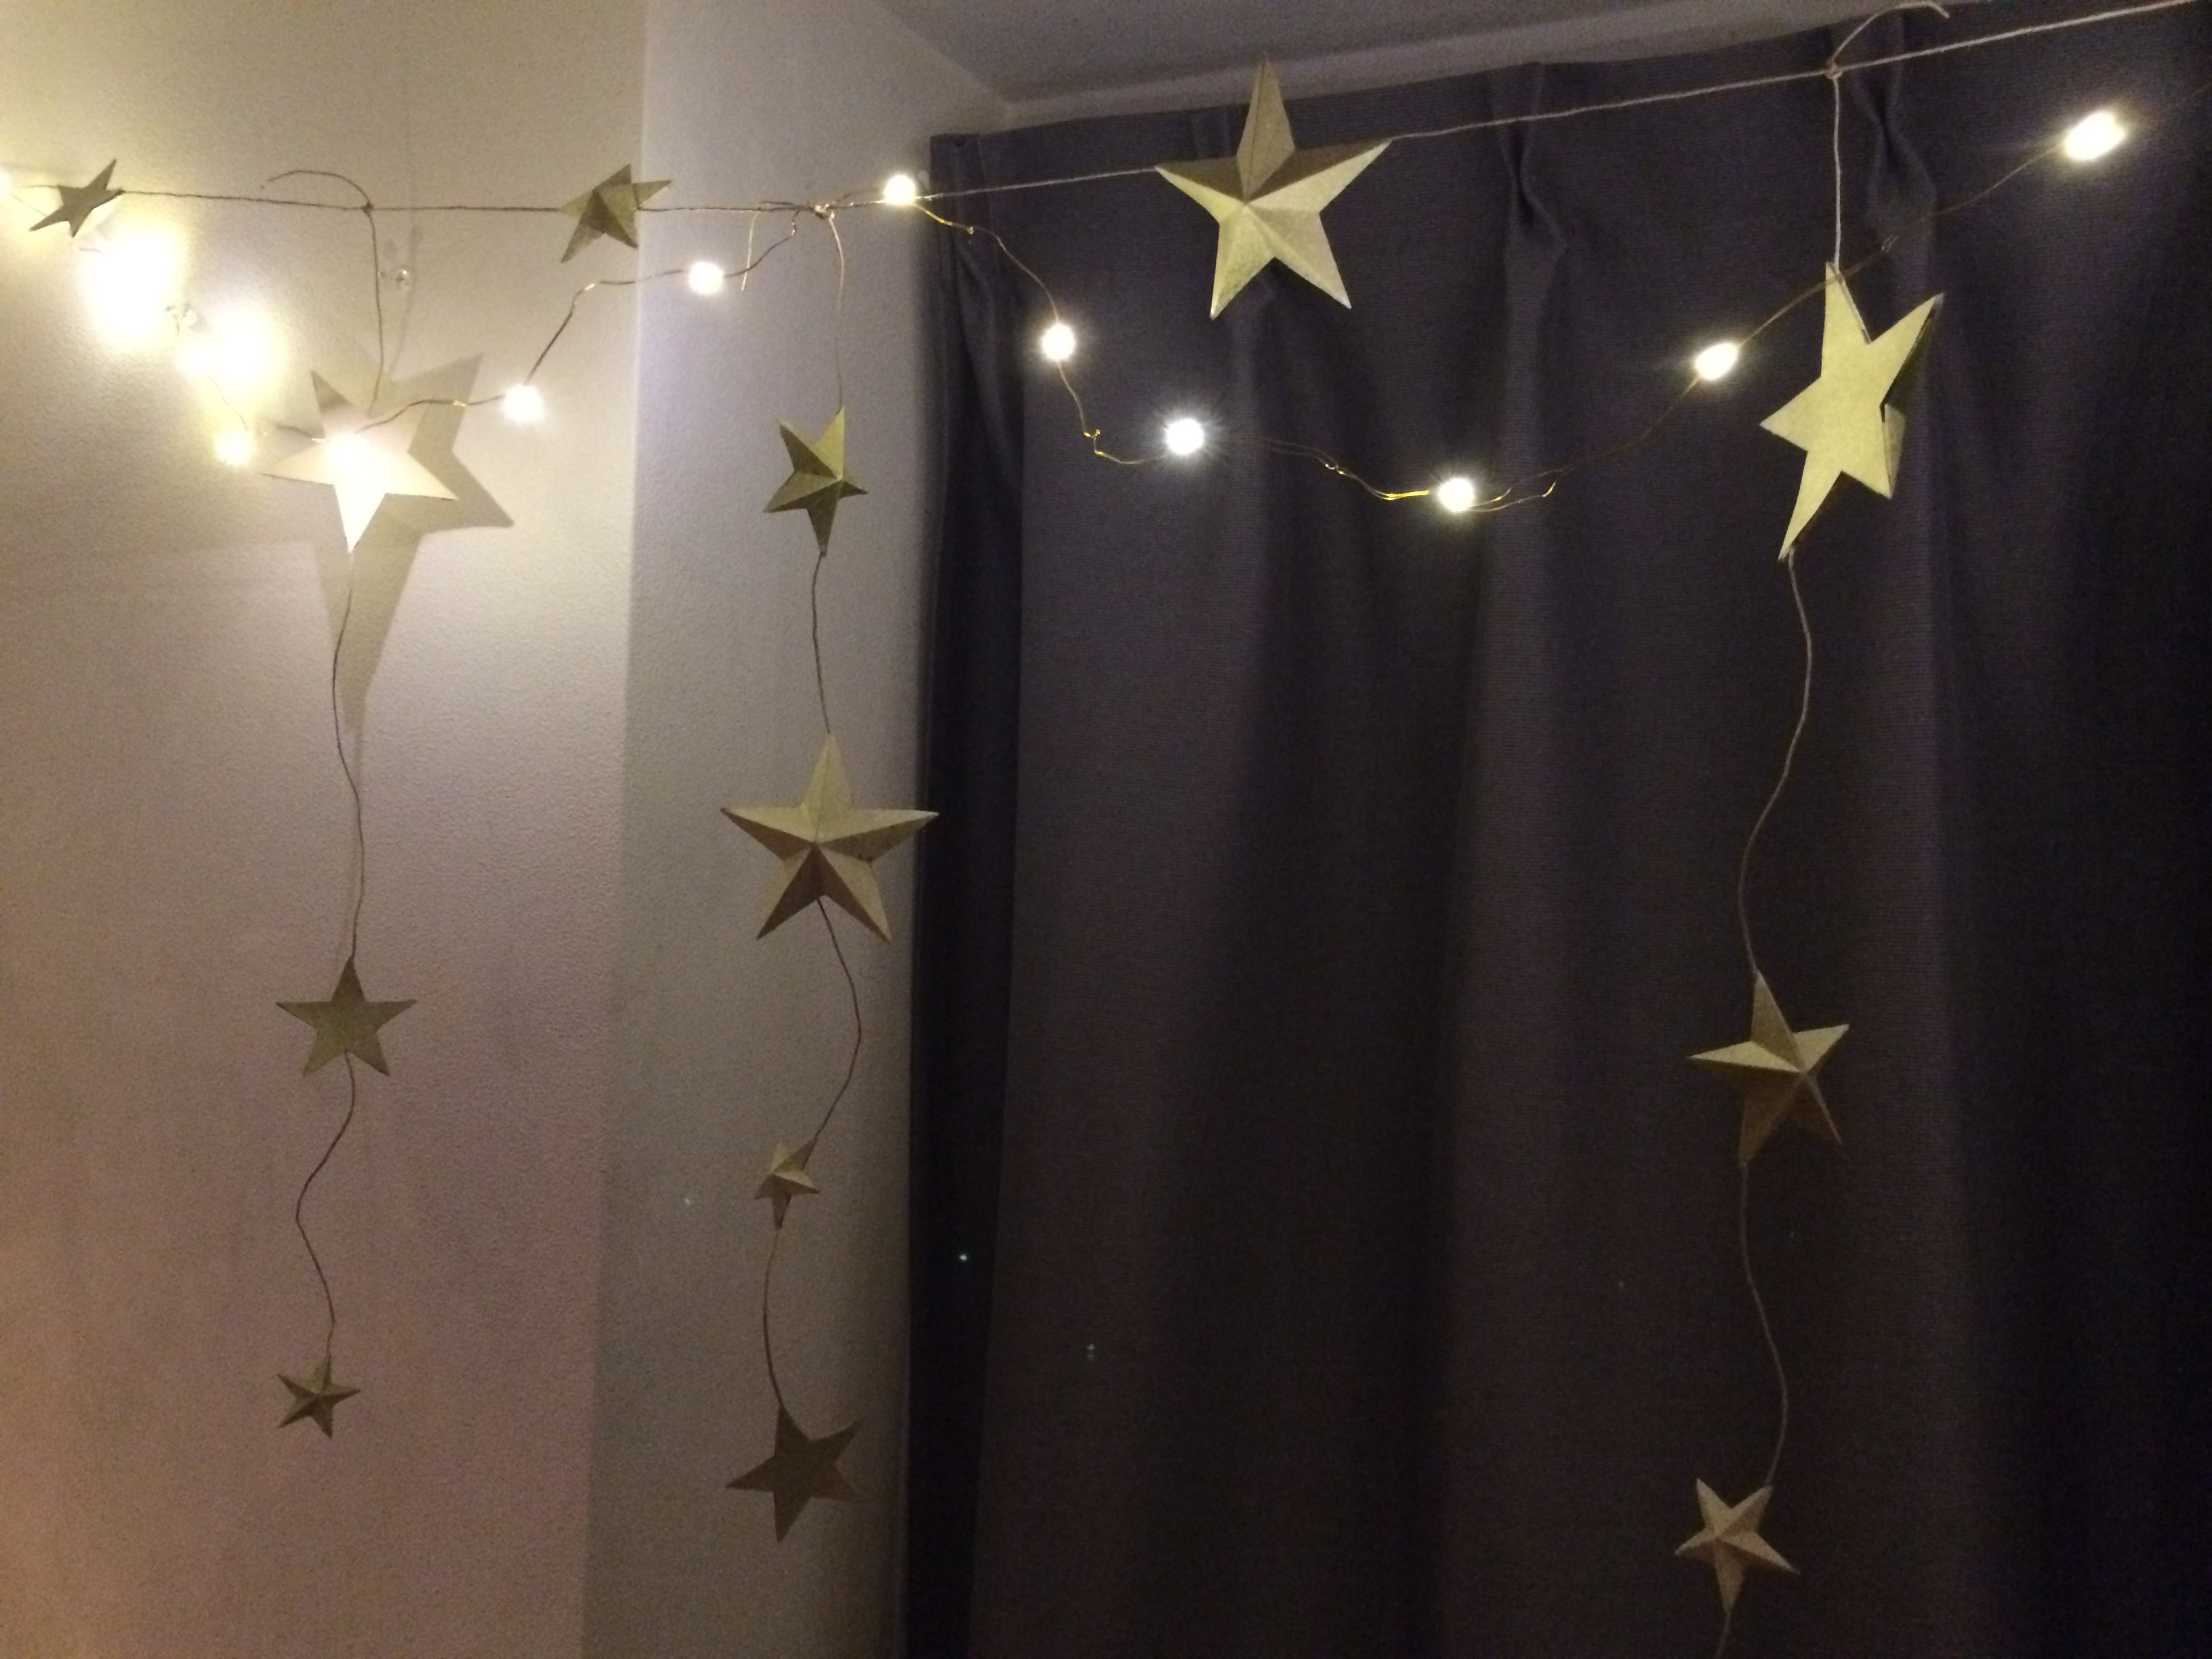
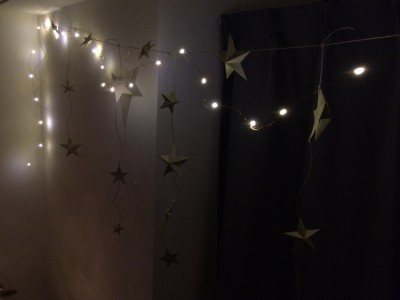
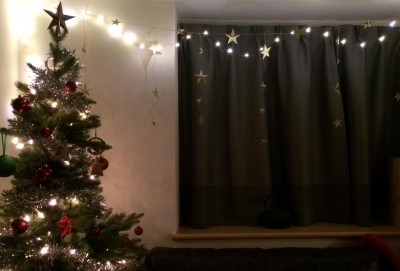
they really are dreamy when combined with these fairy lights! / フェアリーライトと組み合わせて暗い部屋でも暖かくて夢のような空間に仕上がりました。

completed with christmas tree
this is what it looks like with the christmas tree. i plan on keeping them up through the winter (or maybe through the year…) though. / クリスマスツリーと組み合わせています。クリスマスだけでなく、少なくても冬の間はずっと飾り続ける予定です!

h a p p y  h o l i d a y s ! !

[d.i.y.] super easy necklace and earring holder

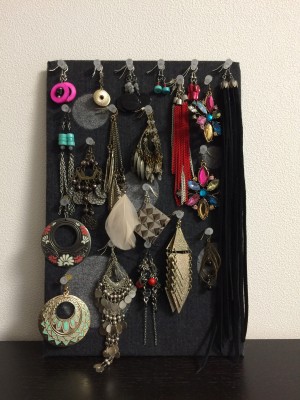
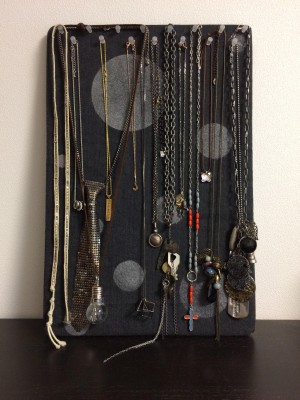
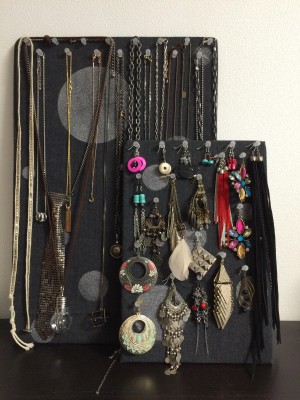
in addition to the ring & earring holder d.i.y. i posted earlier yesterday, i did this super easy three-step necklace & hook earring holder. this one is easily modifiable (i.e. adding a decorative frame, hanging on the wall or setting on the dresser) and worth every second to make it. check it out!

一つ前に載せたスタッズピアス+リングホルダーのd.i.y.と共に作ったもう一つのd.i.y.が『超簡単ネックレス+フックピアスホルダー』です!3ステップでできてしまう上に、フレームを加えたり、壁掛けにしたり、置き型にするなど使い方の自由がききます。どうぞご覧あれ〜

LET’S START! / 始めよう!

what you need / 材料:
cork board / コルクボード
fabric / 生地
ruler / 定規
scissors / ハサミ
glue gun / グルーガン
tacks / 画鋲

[optional / お好みで]
cardstock for stencil / ステンシル用の画用紙
compass / コンパス
fabric spray paint (i used Somay-Q in silver) / 生地用スプレーカラー染めQ エアゾール ギンギラ銀


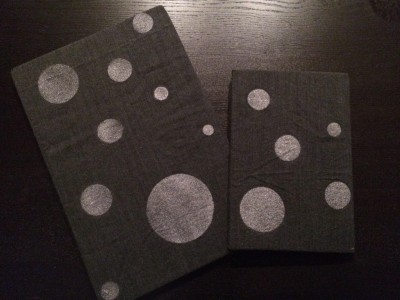
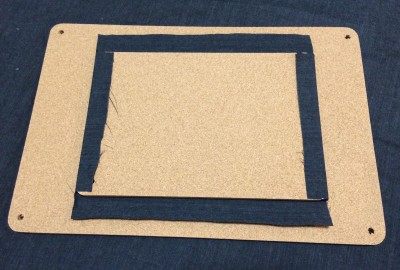
1. place cork board (the top one is MUJI’s M size for earrings and the bottom is the L size for necklaces) on fabric and cut about 1.5 inch/3~4cm around the board as seam allowance. fold and glue edges to the back side using a glue gun. (OPTIONAL: i cut/ripped a separate fabric slightly smaller than the cork board and glued it to cover the edges of the first fabric. i decided to leave them frayed since the glue would prevent further fraying.)
コルクボードを生地の中心に置く。(フック/フープピアス用には無印良品のMサイズ、ネックレスにはLサイズを使用しました。)コルクボードの厚みに合わせて縫い代を3~4cmで周囲をカット。縫い代を裏面に折り返してグルーガンで止める。(お好みで表地の縫い代を隠す為に裏にもお好きな生地を糊で止める。糊で生地が固まるので、私はあえて割いて裁断をし、端の始末をしていないです。)


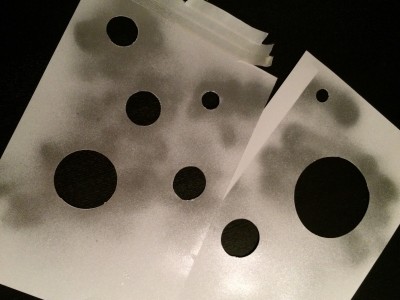
2. [this step is optional!] make stencil and spray. i cut out a random circle pattern. / [柄を加えるステップです。必要なければ次へ!] 染めQなどスプレーカラー用のステンシルを作り、スプレーする。こちらはサークル柄にしてみました。


3. after drying the spray for at least 24 hours, use tacks (i used MUJI’s) to hang hook/hoop earrings and necklaces. / 24時間ほど乾燥させてから画鋲(こちらも無印良品)を指し、ネックレスやピアスをかける。


FINISHED! / 出来上がり!

[d.i.y.] ring and stud earring holder

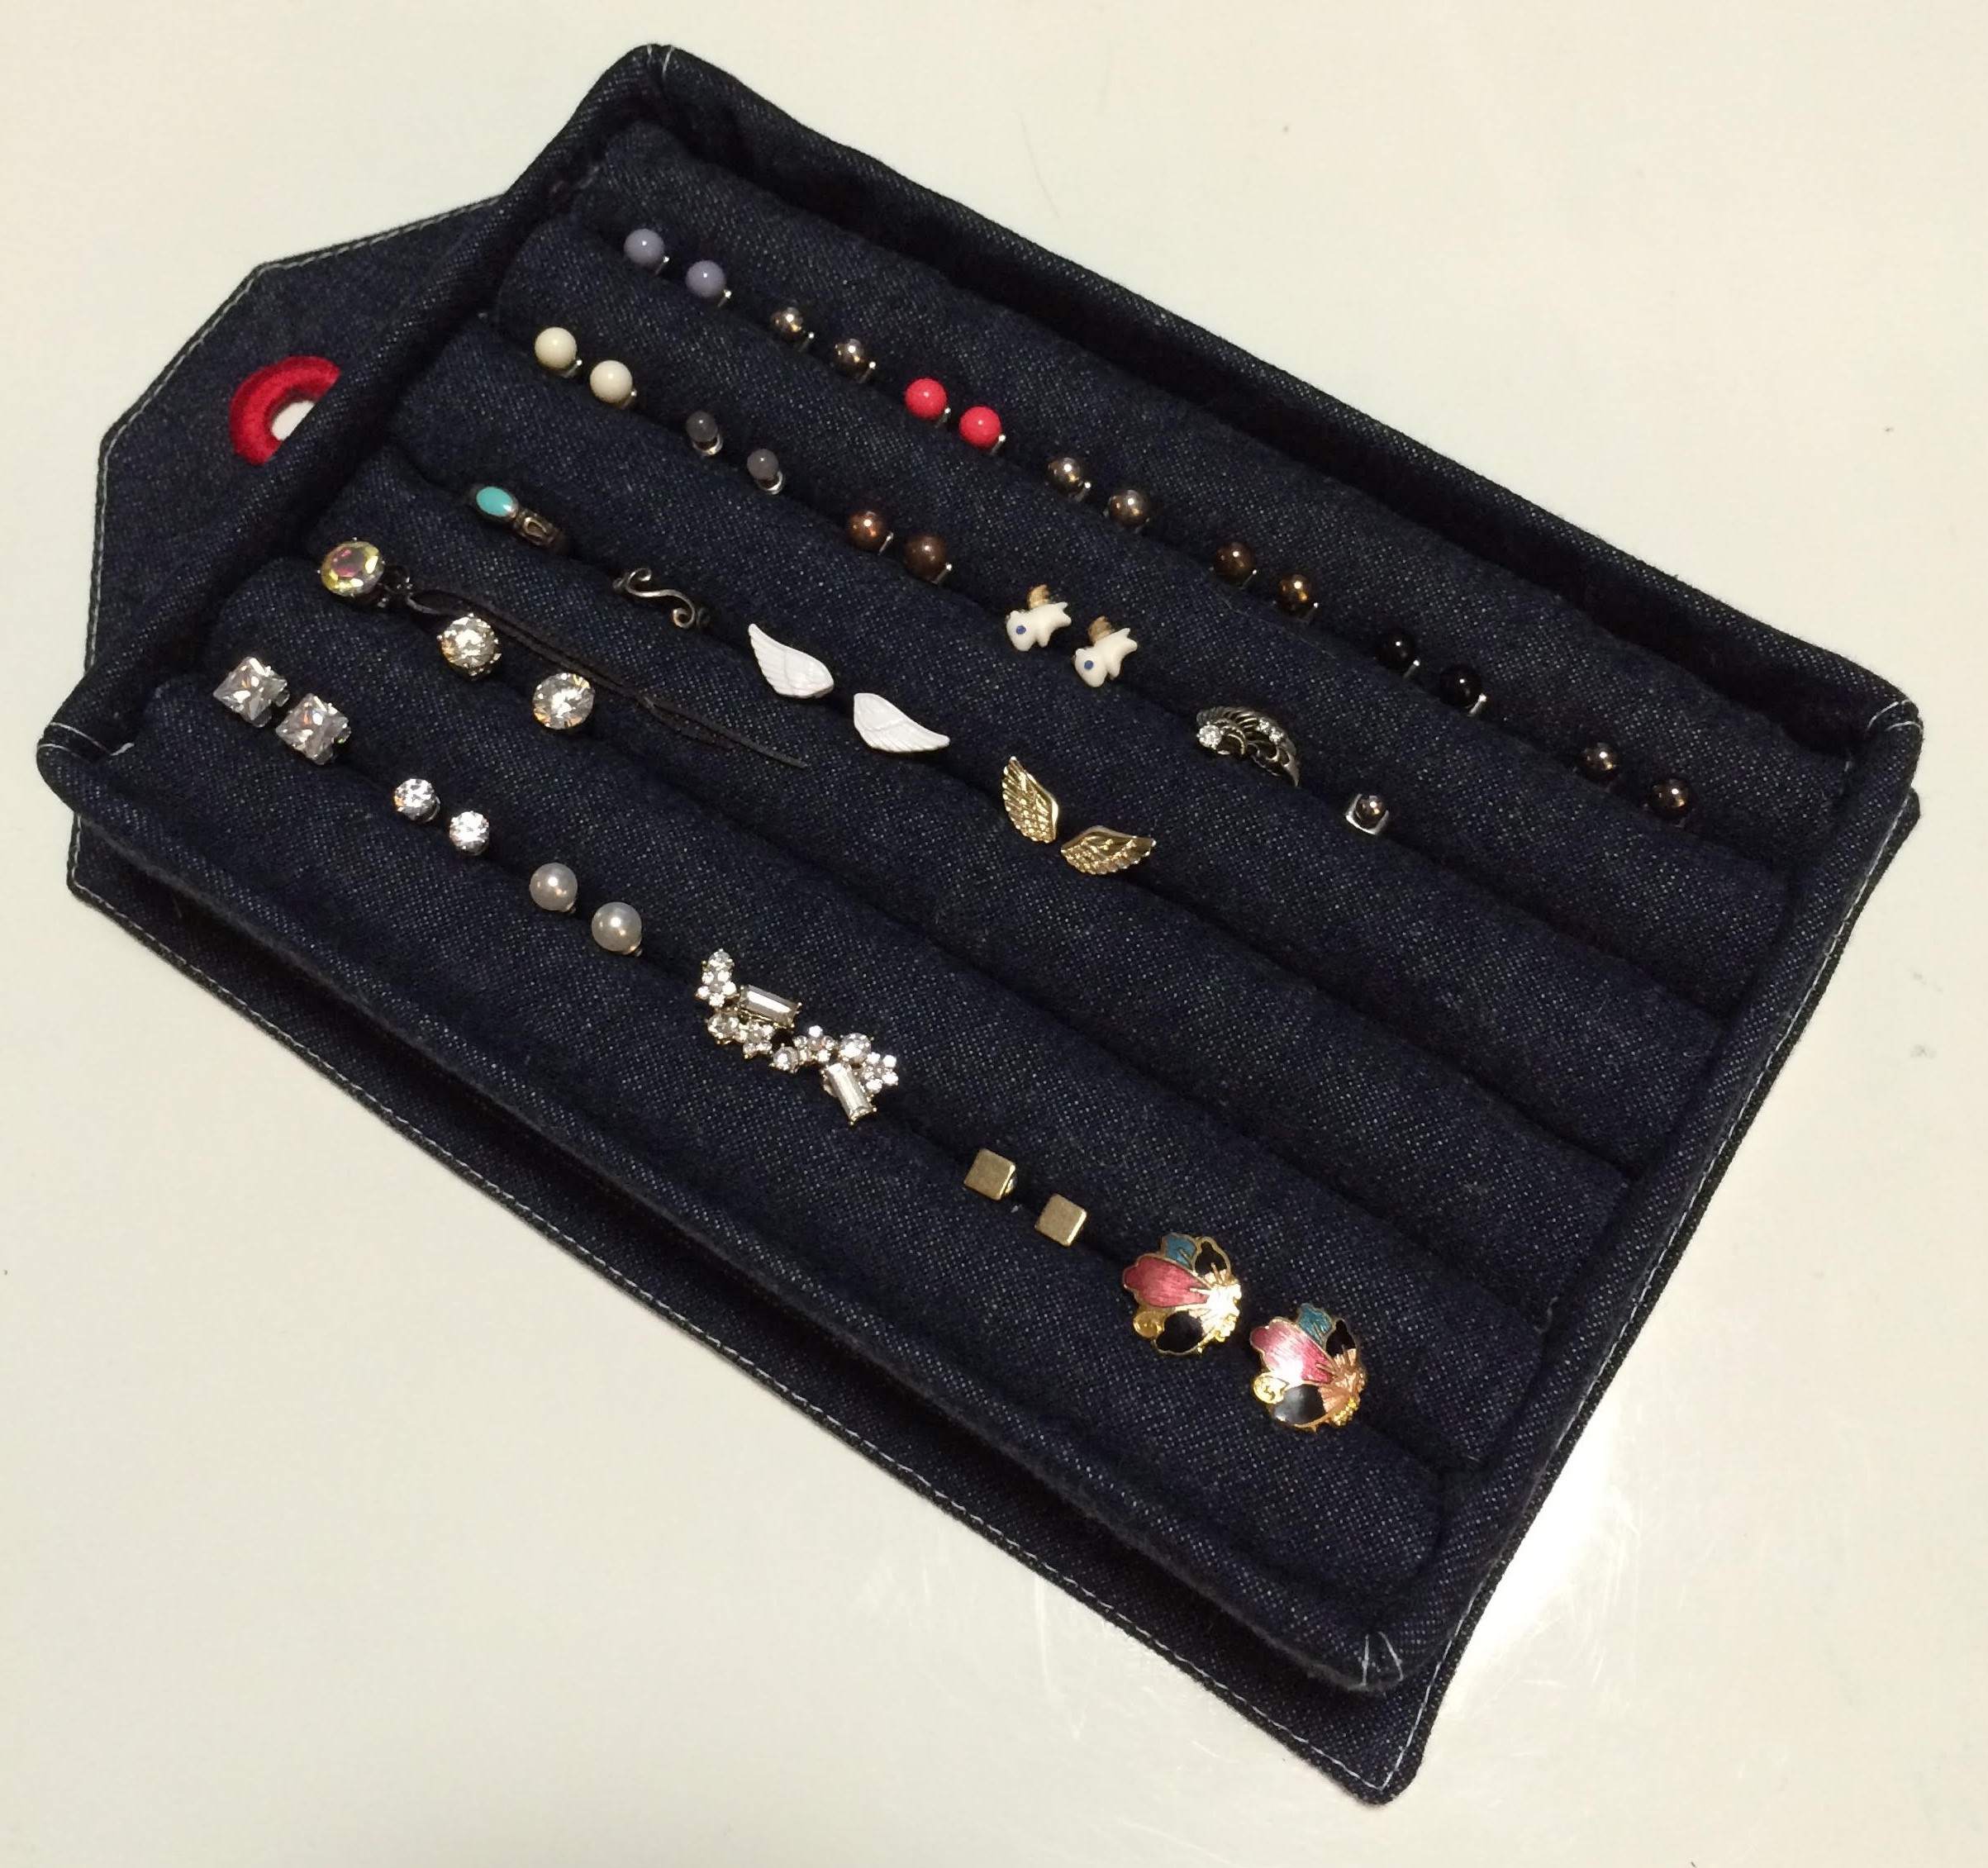
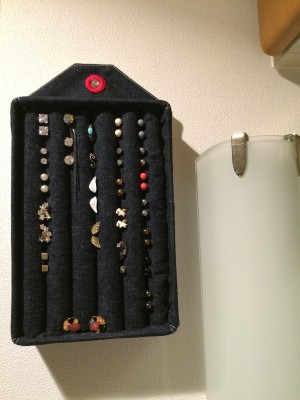
one day as i was rushing to get ready, i spilled a bunch of my post/stud earrings that didn’t have an organized place to rest but a scattered jewelry tray. i had spent quite a while looking for the perfect earring holder and one that i could hang on a wall to save counter space around my sink. finally, i came across delightfully diy‘s wonderful post on earring storage. based on that, i thought of attaching mine to a wall-hanging base. i apologize that this post isn’t as thorough and complete with measurements, but i hope this can at least help guide you through a d.i.y. project of your own!

ある日、出かける支度をしていたら、ごちゃごちゃのアクセサリートレイの中からスタッズピアスを探そうとして、バラバラに散らかしてしまいました。それからしばらくピアスの整理方法を色々探していました。特にポイントは洗面所のカウンターの場所をとらない壁掛けタイプの物でした。そこで見つけたのは、delightfully diyのd.i.y.ピアスホルダー。これを元に壁掛け土台つきの物を考えました。今回のd.i.y.は、寸法がないのですが、少しでも皆さまのオリジナルd.i.y.アイデアにつながれば嬉しいです。


LET’S START! / 始めよう!

what you need / 材料:
denim fabric (for base, tray covering, and “cushion” rows) / デニム生地 (土台用、トレーカバー、クッション用)
acrylic tray / アクリルトレイ
cardboard (adjust measurements according to tray) / ダンボール (寸法はトレイに合わせて)
pencils or wooden dowels (adjust number and measurements according to tray) / 鉛筆、細めの木の棒(数と長さはアクリルトレイに合わせて)
quilt batting / キルト用の綿(薄め)
ruler / 定規
scissors / ハサミ
sewing machine / ミシン
glue gun / グルーガン
grommet / ハトメ


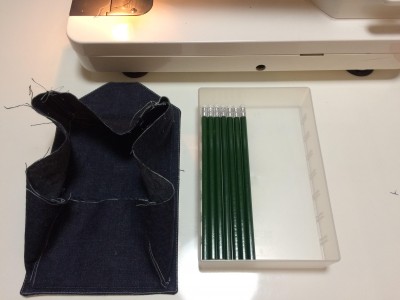
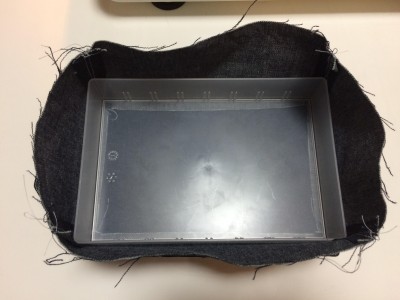
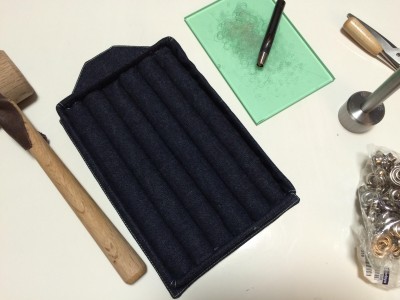
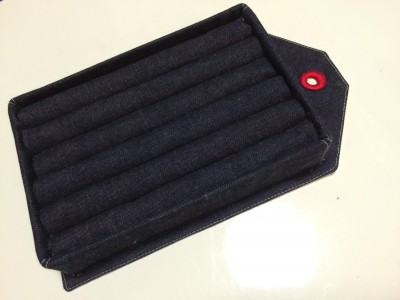
1. i started off by making a denim covering for the tray (this one from MUJI was the perfect size to fit the pencils i could find) and attached it to a denim backing that i could eventually punch a hole in. / 鉛筆の長さにちょうどあった無印良品のトレイを使っています。まずは、デニムの土台とトレイのカバーを作り、合体させました。土台は最後に壁掛け用の穴を開けられるようにトレイカバーを配置しました。


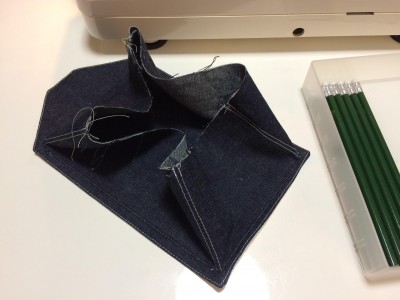
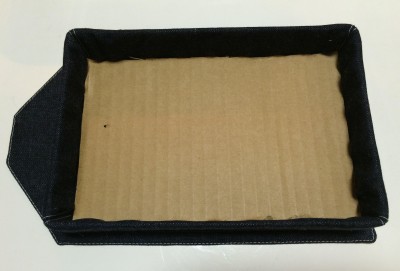
2. insert the tray into covering and fold sides in. / トレイを入れ、デニムのカバーを中に折り込む。


3. cut cardboard to fit snugly in the tray. i first put hot glue on the denim in the base before inserting the cardboard. without the cardboard, i was afraid the glue may not permanently attach to the acrylic tray and thus the “cushion” rows could possibly detach easily. / ダンボールをトレイの中にぴったり入るようにカットし、デニムにグルーガンで糊をつけてからはめ込む。ダンボールに糊がしっかりくっつく為、クッションも固定されます。


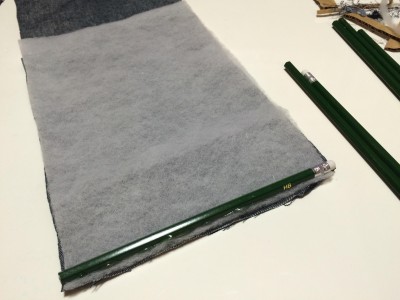
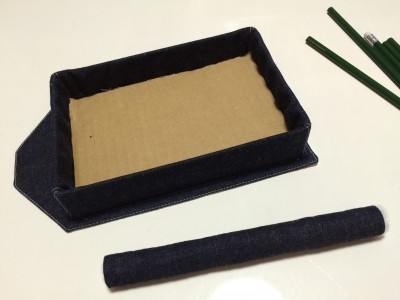
4. layer the batting on top of the denim (the batting is about 2/3 the length of the denim), place hot glue about a quarter inch/0.5 cm from the edge of the batting and denim. place the pencil on the glue and roll. finish the roll with another line of hot glue at the end edge of the denim. repeat to make 6 rows (or as many as needed to fill tray). / デニムの上にキルト綿を手前の端に合わせてのせる。(綿はデニムの2/3の長さです。)端から0.5cmの位置に平行してグルーガンで糊をのせる。糊の上に鉛筆をのせて、生地を巻く。糊で端を止める。他の6本(本数はトレイが隙間なく埋まるまで)も同じように作る。


5. use glue gun to attach the 6 rows onto the cardboard base. / グルーガンで6本のクッションをダンボールに止める。


6. open hole and finish! / 土台のデニムにハトメで穴を開けて完成!

FINISHED! / 出来上がり!

afternote / 注意点
※ when using denim, please beware that dark colored denim will most likely stain light colored walls. for this reason, i personally used a white-based fabric on the back. / 濃いめのデニムを使用する際は、壁に色移りする可能性が高いです。その為、私は、壁側にあたる裏面を白地の物にしました。

※※ ideally i would have liked horizontal rows on this holder, but i had a limited amount of space on the wall and didn’t have access to the right pencils/dowels. the best supplies i could find at the time were these pencils that fit this tray vertically. / 理想的には縦型のクッションではなく、横型の物が良かったです。が、ちょうど良いトレイ+ちょうど良い鉛筆の組み合わせはこちらしか見つからなかったので、今回は縦型にしました。

[d.i.y.] last minute halloween garland

so Halloween this year is on a weekend… meaning a bigger turn out for your Halloween daytime parties… meaning after a week of work… you have pretty much zero time to prepare original decorations….. today, i myself in the same dilemma came up with a easy DIY for a Halloween garland, to make your holiday home feel a little more festive with a little effort. (see parentheses for simpler options to make life a little easier for you!)

今年のハロウィンは、週末になりますね…. ハロウィンパーティーを企画している方は、たくさんの方が昼間からみえることでしょう。しかし、一週間のお仕事を終えた所で、明日の飾り付けとか考えるのもやっと… 私もそんなシチュエーションの真っ只中。なので、簡単、オリジナル、ハロウィンガーランドのDIYを考えました!(カッコ内は、シンプルな材料を書いております。)

[D.I.Y.] HALLOWEEN GARLAND
LET’S START! / 始めよう!

what you need / 材料:
orange patterned card stock (B4 size) x 5 / オレンジ色の柄の厚紙 (B4 size) x 5
(as long as it’s a rectangular shape, size is not essential. smaller paper will result in smaller flags. /
紙は、長方形であればいいです。サイズが小さければ、フラグが小さくなります。)

if you have extra time you can make your own patterned card stock:
時間があればオリジナルの柄をお作りください:
B4 size water color paper × 5 / B4 水彩画用紙 × 5
newspaper / 新聞紙
water colors (i used acrylic) / 水彩絵具(アクリル)

ruler / 定規
scissors / ハサミ
halloween colored washi tape (or black colored tape) / ハロウィン色和紙テープ適量 (もしくはシンプルに黒色テープ)
black card stock (or black marker) / 黒い厚紙 (もしくは、黒いマーカー)
glue / のりやボンド
twine / 麻紐

// makes 20 flags (14 for H A P P Y H A L L O W E E N + 1 between the two words + 2 for beginning + 2 for end = 19 plus 1 left over)
計 20 フラグ (H A P P Y H A L L O W E E N で 14枚 + 間に 1枚 + あたまの 2枚 + おわりの 2枚 = 19枚 と あまり1枚) //

[D.I.Y.] HALLOWEEN GARLAND
(SKIP THIS PROCESS IF YOU HAVE ORANGE PATTERNED PAPER / オレンジ色の柄の厚紙のご用意があれば、こちらを飛ばしてください)
1. if you decided to use water colors, dry the paint. / 水彩画で柄を作られた場合は、十分乾かしてください。
the first d.i.y flag garland i did also used water colors, for a softer feel. this time, i’m using water colors to play with the bold and soft contrasts. / 初めて作ったガーランドは、優しい印象のため水彩柄にしましたが、今回はカラーの強弱をつけるために水彩にしてみました。

[D.I.Y.] HALLOWEEN GARLAND
2. once your paper is dried and ready, fold them length-wise (hot dog style). / 紙が乾きましたら、長い辺に沿って半分に折る。

[D.I.Y.] HALLOWEEN GARLAND
3. measure and cut the folded paper into fourths. / 長い辺に沿って4当分に紙を切る。

[D.I.Y.] HALLOWEEN GARLAND
4. washi-tape (or black tape) the edges opposite of the folded side. / 短い辺同士を和紙テープ(もしくは、黒色テープ)で止める。

[D.I.Y.] HALLOWEEN GARLAND
(SKIP THIS PROCESS IF YOU HAVE A BLACK MARKER / 黒いマーカーのご用意がある場合はこちらを飛ばしてください)
5. sketch letters on black card stock. if using a pencil to sketch, i recommend drawing the letters (flip the letters horizontally for P, L, E, N) on the back so as not to leave pencil marks on the front side. / 黒い厚紙に文字を描く。できれば、裏面に描いた方が、仕上がり面に出ないのでよりきれいに仕上がります。(P、L、E、Nは、左右を逆に!)

[D.I.Y.] HALLOWEEN GARLAND
6. cut out and glue letters onto flags. if you have a black marker, draw your letters directly onto flags. / 文字を切り抜き、フラグにのりで貼る。マーカー使用の場合は、直接フラグに描く。

[D.I.Y.] HALLOWEEN GARLAND
7. thread the flags with twine. / 麻紐を通す。

[D.I.Y.] HALLOWEEN GARLAND
8. tape the twine to the inside of the flags on the folded side. / フラグの折れ目の内側に麻紐をテープで止める。

[D.I.Y.] HALLOWEEN GARLAND
(without the tape on the inside, the flags will go haywire… / テープで止めないと、フラグが重なって大変なことに…)

[d.i.y.] halloween flag garland // ハロウィンフラグガーランド
FINISHED! / 出来上がり!
fast, easy, simple! i hope this helps to make Halloween preparations slightly easier for you! / 簡単、早い、シンプル!これで、少しでもハロウィンの飾り付けの準備が楽になるといいです〜

[d.i.y.] flag garland

those cute little flag garlands have been around for a while, and have also been popular for quite a while. so why d.i.y. now? because i’m sure the world can use one more.

ガーランドはしばらく流行っていたりするけど、なんで今更 d.i.y. を??と聞かれても、、、あっても良いんじゃないかな??

LET’S START! / 始めよう!

what you need / 材料:
water color paper / 水彩画用紙
newspaper / 新聞紙
water colors (i used acrylic) / 水彩絵具(アクリル)
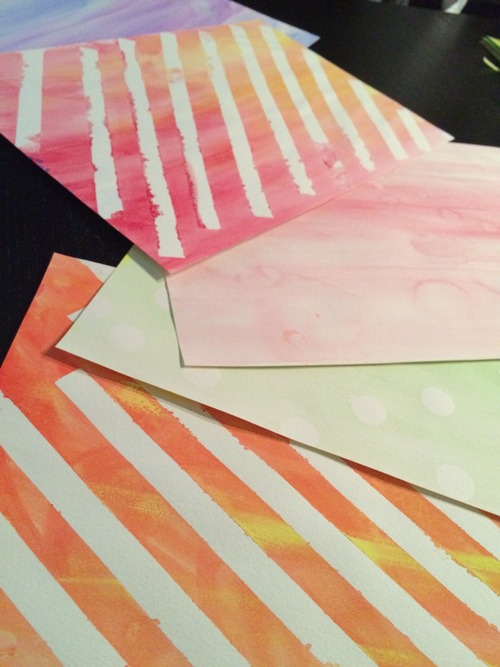
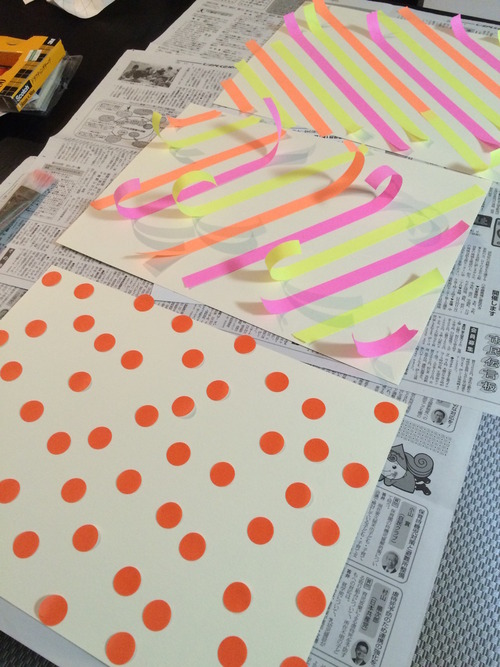
adhesive stickers to make patterns / 柄をつくるための貼ってはがせるシール
scissors / ハサミ
ruler / 定規
washi tape (the length of your garland) / 和紙テープ適量(ガーランドの長さ分)

garland process 1
1. i decided to make a watercolor garland for the colorful yet soft feel. / 水彩ガーランドをすることによって、優しくてカラフルな色合いに仕上げてみました。

garland process 1-2
to make fun patterns, i made good use of old old old post-it tape and circle labels that are barely adhesive anymore…. / しばらく使っていない付箋テープとサークルラベルを利用して面白い柄を作ってみました!

garland process 2
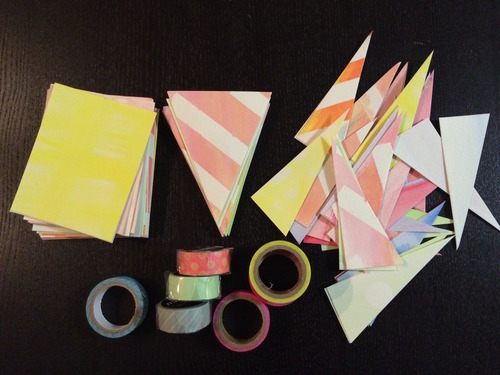
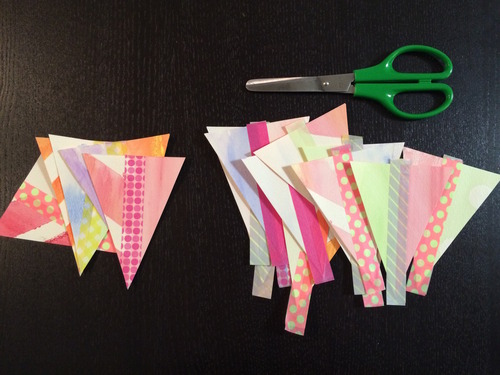
2. after painting both sides and letting it dry, cut 8cm × 10cm rectangles. a third of them i cut isosceles triangles out of, leaving me with a bunch of half triangles. / 両面とも塗ってから乾かし、8cm × 10cm の四角に切る。1/3は、二等辺三角形を切り出し、残った欠片をとっておく。

garland process 3
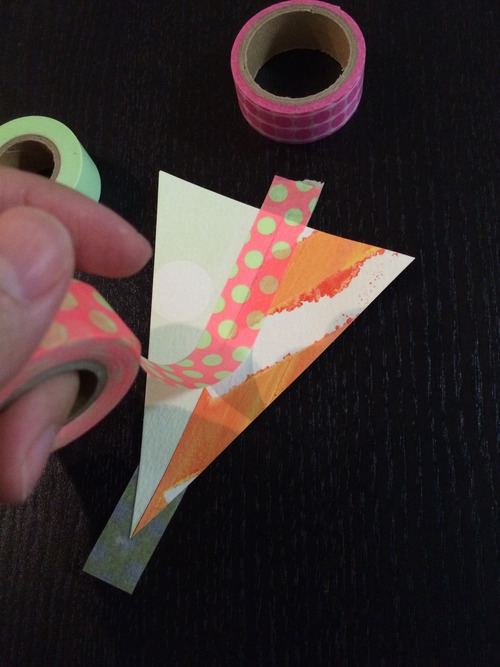
3. using the half triangles from the last step, tape two pieces together with washi tape to make more isosceles triangles. pairing different patterns and colored washi tape makes fun accents flags! / 和紙テープで余った欠片を2枚ずつ使って二等辺三角形を作る。違う柄と和紙テープを組み合わせることでアクセントフラグができます。

garland process 3-2
cut off the washi tape ends. / 最後に和紙テープの余った部分を切り取り、形を整える。

garland process 4
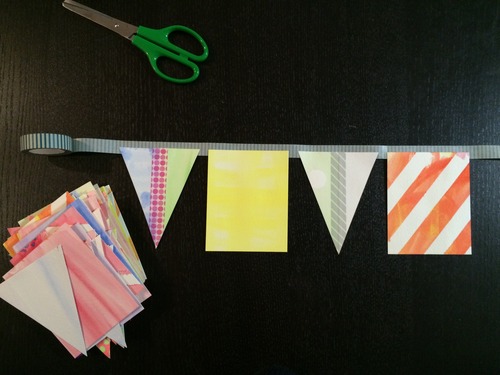
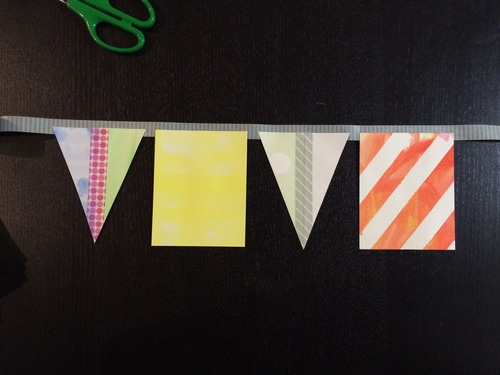
4. arrange flags so they are within the lower half of the washi tape. it’s better to have the flags within rather than on the halfway line for a clean finish later. there’s about 1~2 cm between the flags. / 1〜2cm間隔で和紙テープにフラグを置いていく。和紙テープの幅の半分以内に配置すると、和紙テープを折り返す時に綺麗に仕上がります。

garland process 5
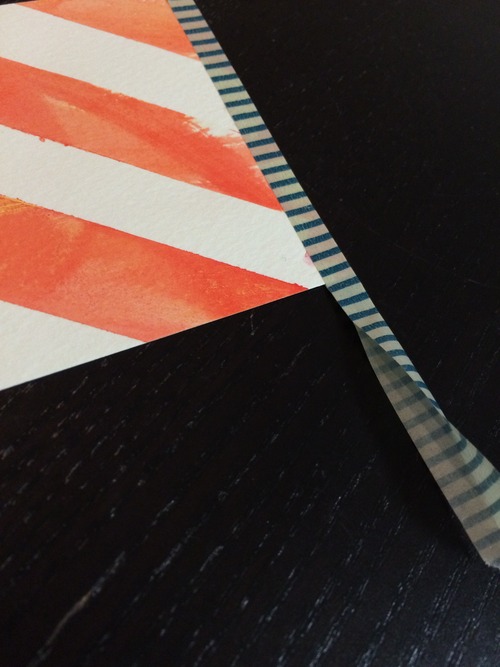
5. fold the washi tape over after laying about 4~5 flags at a time. / フラグを4〜5枚置いたら和紙テープを折り返す。

garland finished
FINISHED! / 出来上がり!
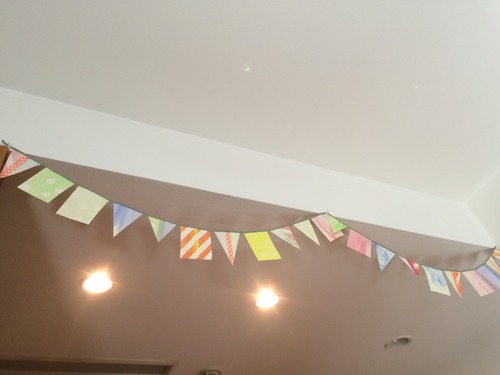
there you have it! a quick and easy project, great for birthday parties, weddings, baby / bridal showers, or just to make for fun. / 簡単ガーランドでした!お誕生日会、結婚式、ベビーやウェディング・シャワーにいかがでしょうか??

garland finished 2