

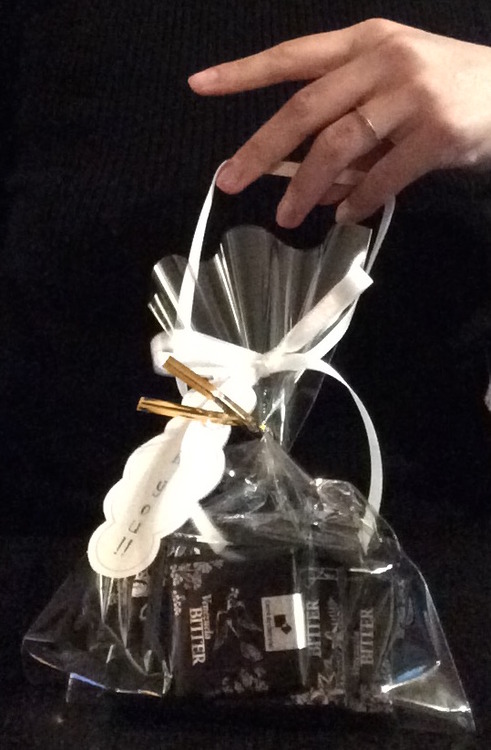
[d.i.y.] thank you favors
thank you favors are a must for weddings, bridal showers, and baby showers. a small but sweet appreciation gift for your guests who took their time to come out and celebrate with you. there are many ways to wrap your gifts. i would like to share a simple and slightly different way of tying that finishing touch!
日本の結婚式では引出物が基本ですが、アメリカではプチギフトが主流です。「ほんの気持ち」というもの。複雑ですが、文化の違いで日本人からしては引出物に比べてだいぶ大きな「気持ち」の違いかもしれないですが、差し上げる側からしては同じ想いなのです。日本では、プチギフトを差し上げる機会はお誕生日会やブライダル/ベビー・シャワーなどですかね。その他でも「ほんの気持ち」をお渡ししたい時のために普段とちょっと違うこちらの仕上げ方をご覧ください。
LET’S START! / 始めよう!
what you need / 材料:
gift bag(plastic or paper) / ギフトバッグ(プラスチック/紙どちらでも)
1 twist tie / ワイヤータイ
scissors / ハサミ
ribbon (7mm width / 76cm long) / リボン(7mm幅/長さ76cm)
gift tag (optional) / ギフトタグ(お好みで)
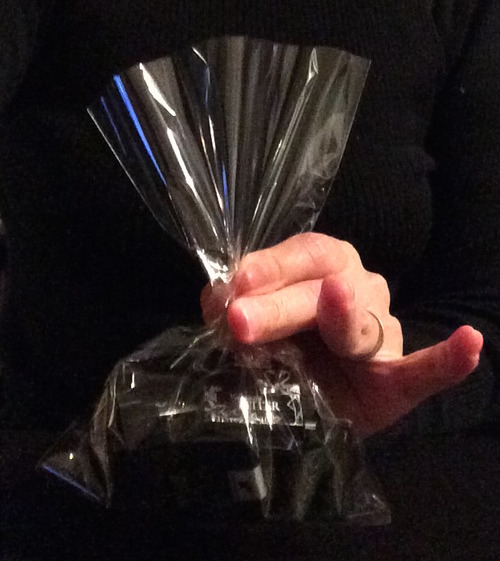
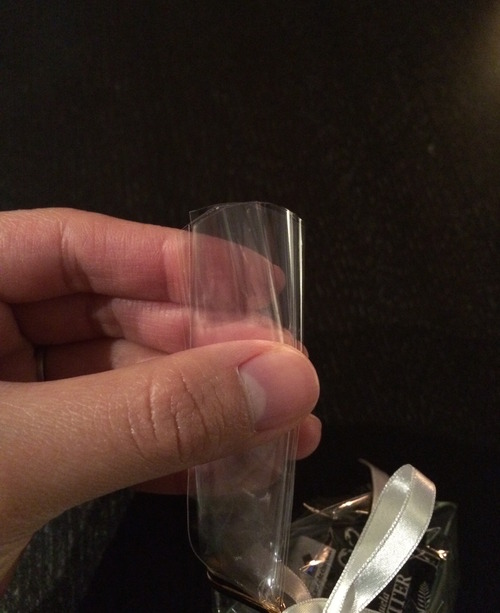
1. after filling the gift bag, fold bag vertically in an accordion fold. see next photo for folding details.
ギフトバッグを詰めたら、縦にアコーディオン型に折って閉じる。折り方は次の写真をご覧ください。
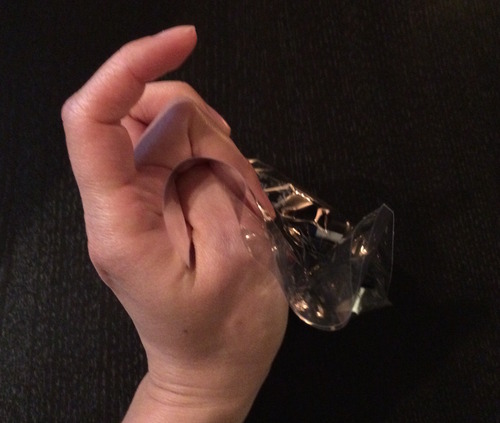
tuck the edge of the bag between the “v” of your thumb and pointer finger. use your folded thumb to create the first fold, and fold the bag over with your middle finger. release your thumb to join the first fold with the first edge. create the next fold.
親指と人指し指の間の「v」にバッグの端を挟む。親指を使って最初の折り山を作り、中指で押さえる。親指を離し、最初の端と合わせ、親指で次の折り山を作る。
2. use the twist tie to temporarily close the gift bag.
ワイヤータイで一度とめる。
3. using the ribbon, make a 39 cm band. if using a gift tag, string it through here.
リボンで39cmの輪っかを作る。ギフトタグを使用するようであれば、この時点で通す。
4. pull ribbon over gift bag. bring the bow and gift tag to the front.
リボンにギフトバッグを通す。結目とタグが正面になります。

twist the ribbon once to create a cross. this step keeps the ribbon from falling off.
後ろでリボンを交差させる。リボンが外れないよう、重要なポイントです!
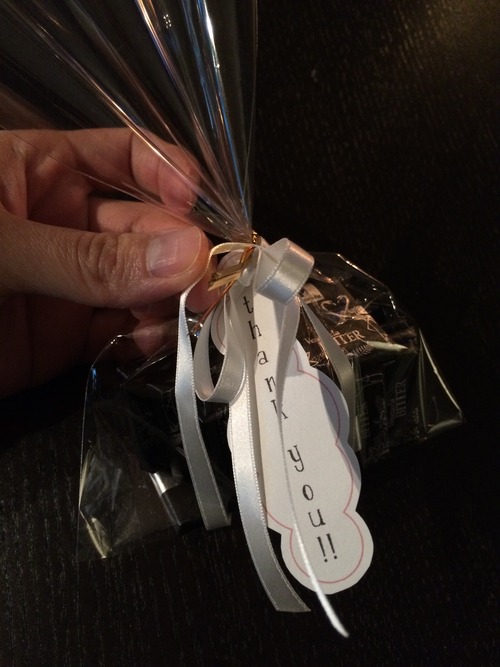
pull the ribbon over the front bow and/or tag.
リボンの輪を結目とタグの上にかぶせるように止めます。
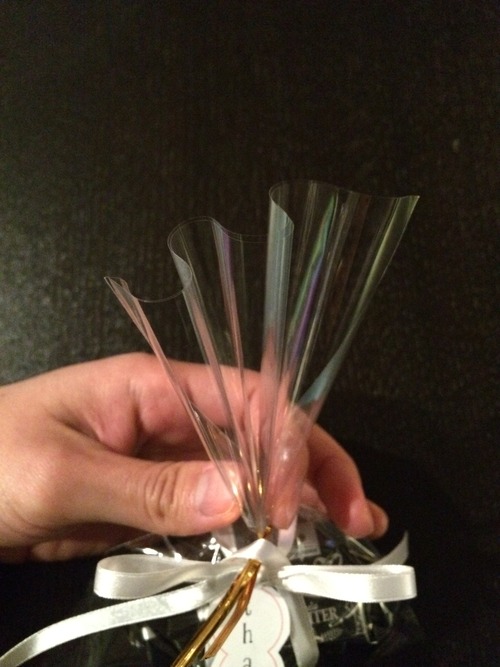
5. fold and hold the accordion folds once again. creasing isn’t necessary.
もう一度アコーディオン折り部分をまとめて折る。折り目をつける必要はありません。
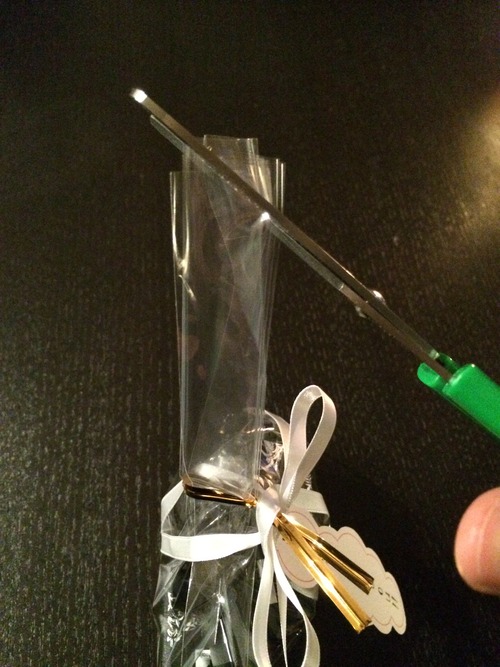
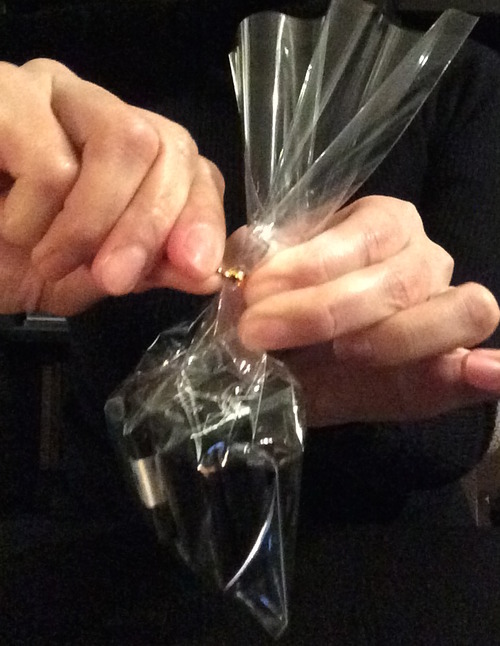
6. create a scalloped edge. side view: cut the folds altogether in a semi-circle. see next photo.
スカラップ端を作る。横から:まとめた折り目を半円を描くように切る。次の写真をご覧ください。
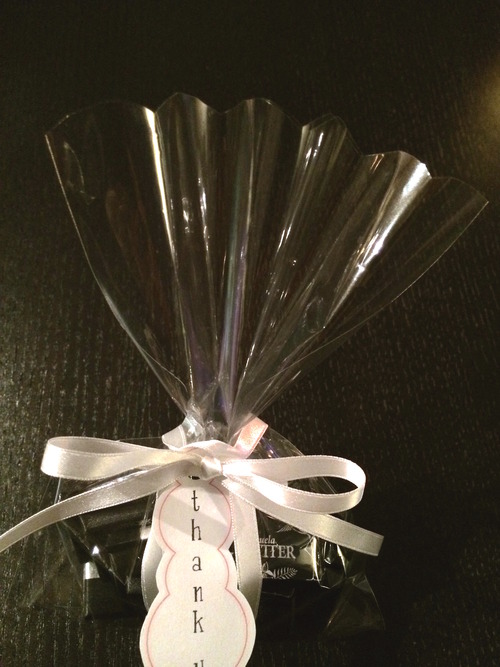
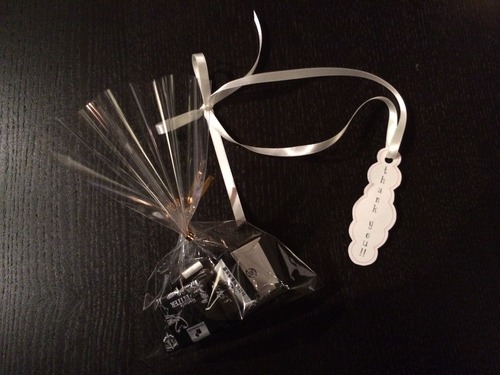
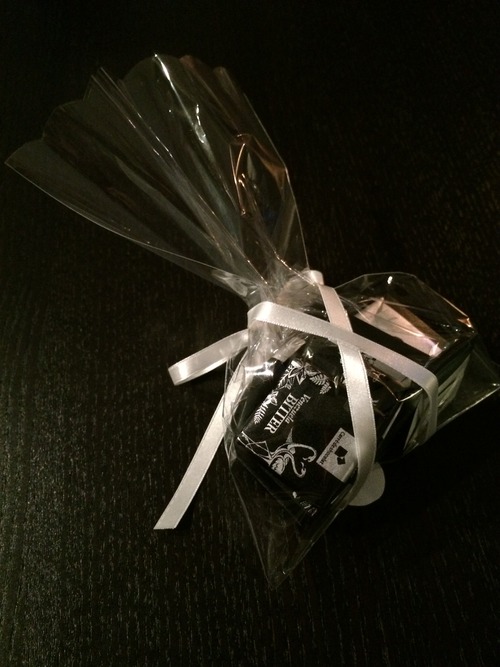
remove twist tie & FINISHED! / ワイヤータイを外して、出来上がり!
back view / 後ろ
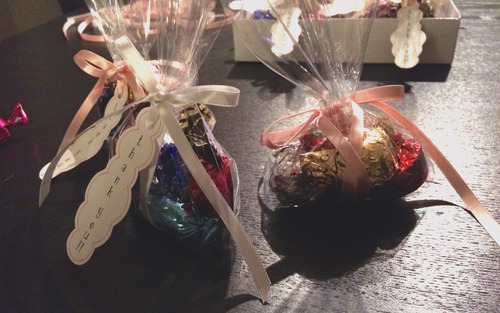
with this you have a handmade, heartfelt “thank you”.
これで手作りの「thank you」の気持ちをお贈りください。
*** other useful tips / その他の注意点
– the twist tie isn’t necessarily needed, but it helps to have in the process.
ワイヤータイなしでも作れますが、便利です。
– depending on the contents of the bag, the length needed of ribbon will vary. start with a longer length of ribbon and at the end of step 4, pull the bow forward and re-tie the bow.
中身によっては必要なリボンの長さが異なります。長めにリボンをカットし、ステップ4の最後に結目を手前にあまり分を引く。リボンを結び直す。
– after removing the twist tie, it will be a loose closure. this adds to the overall soft finish.
ワイヤータイを外したらギフトバッグの閉じ目は緩くなり、全体的にソフトな仕上がりになります。