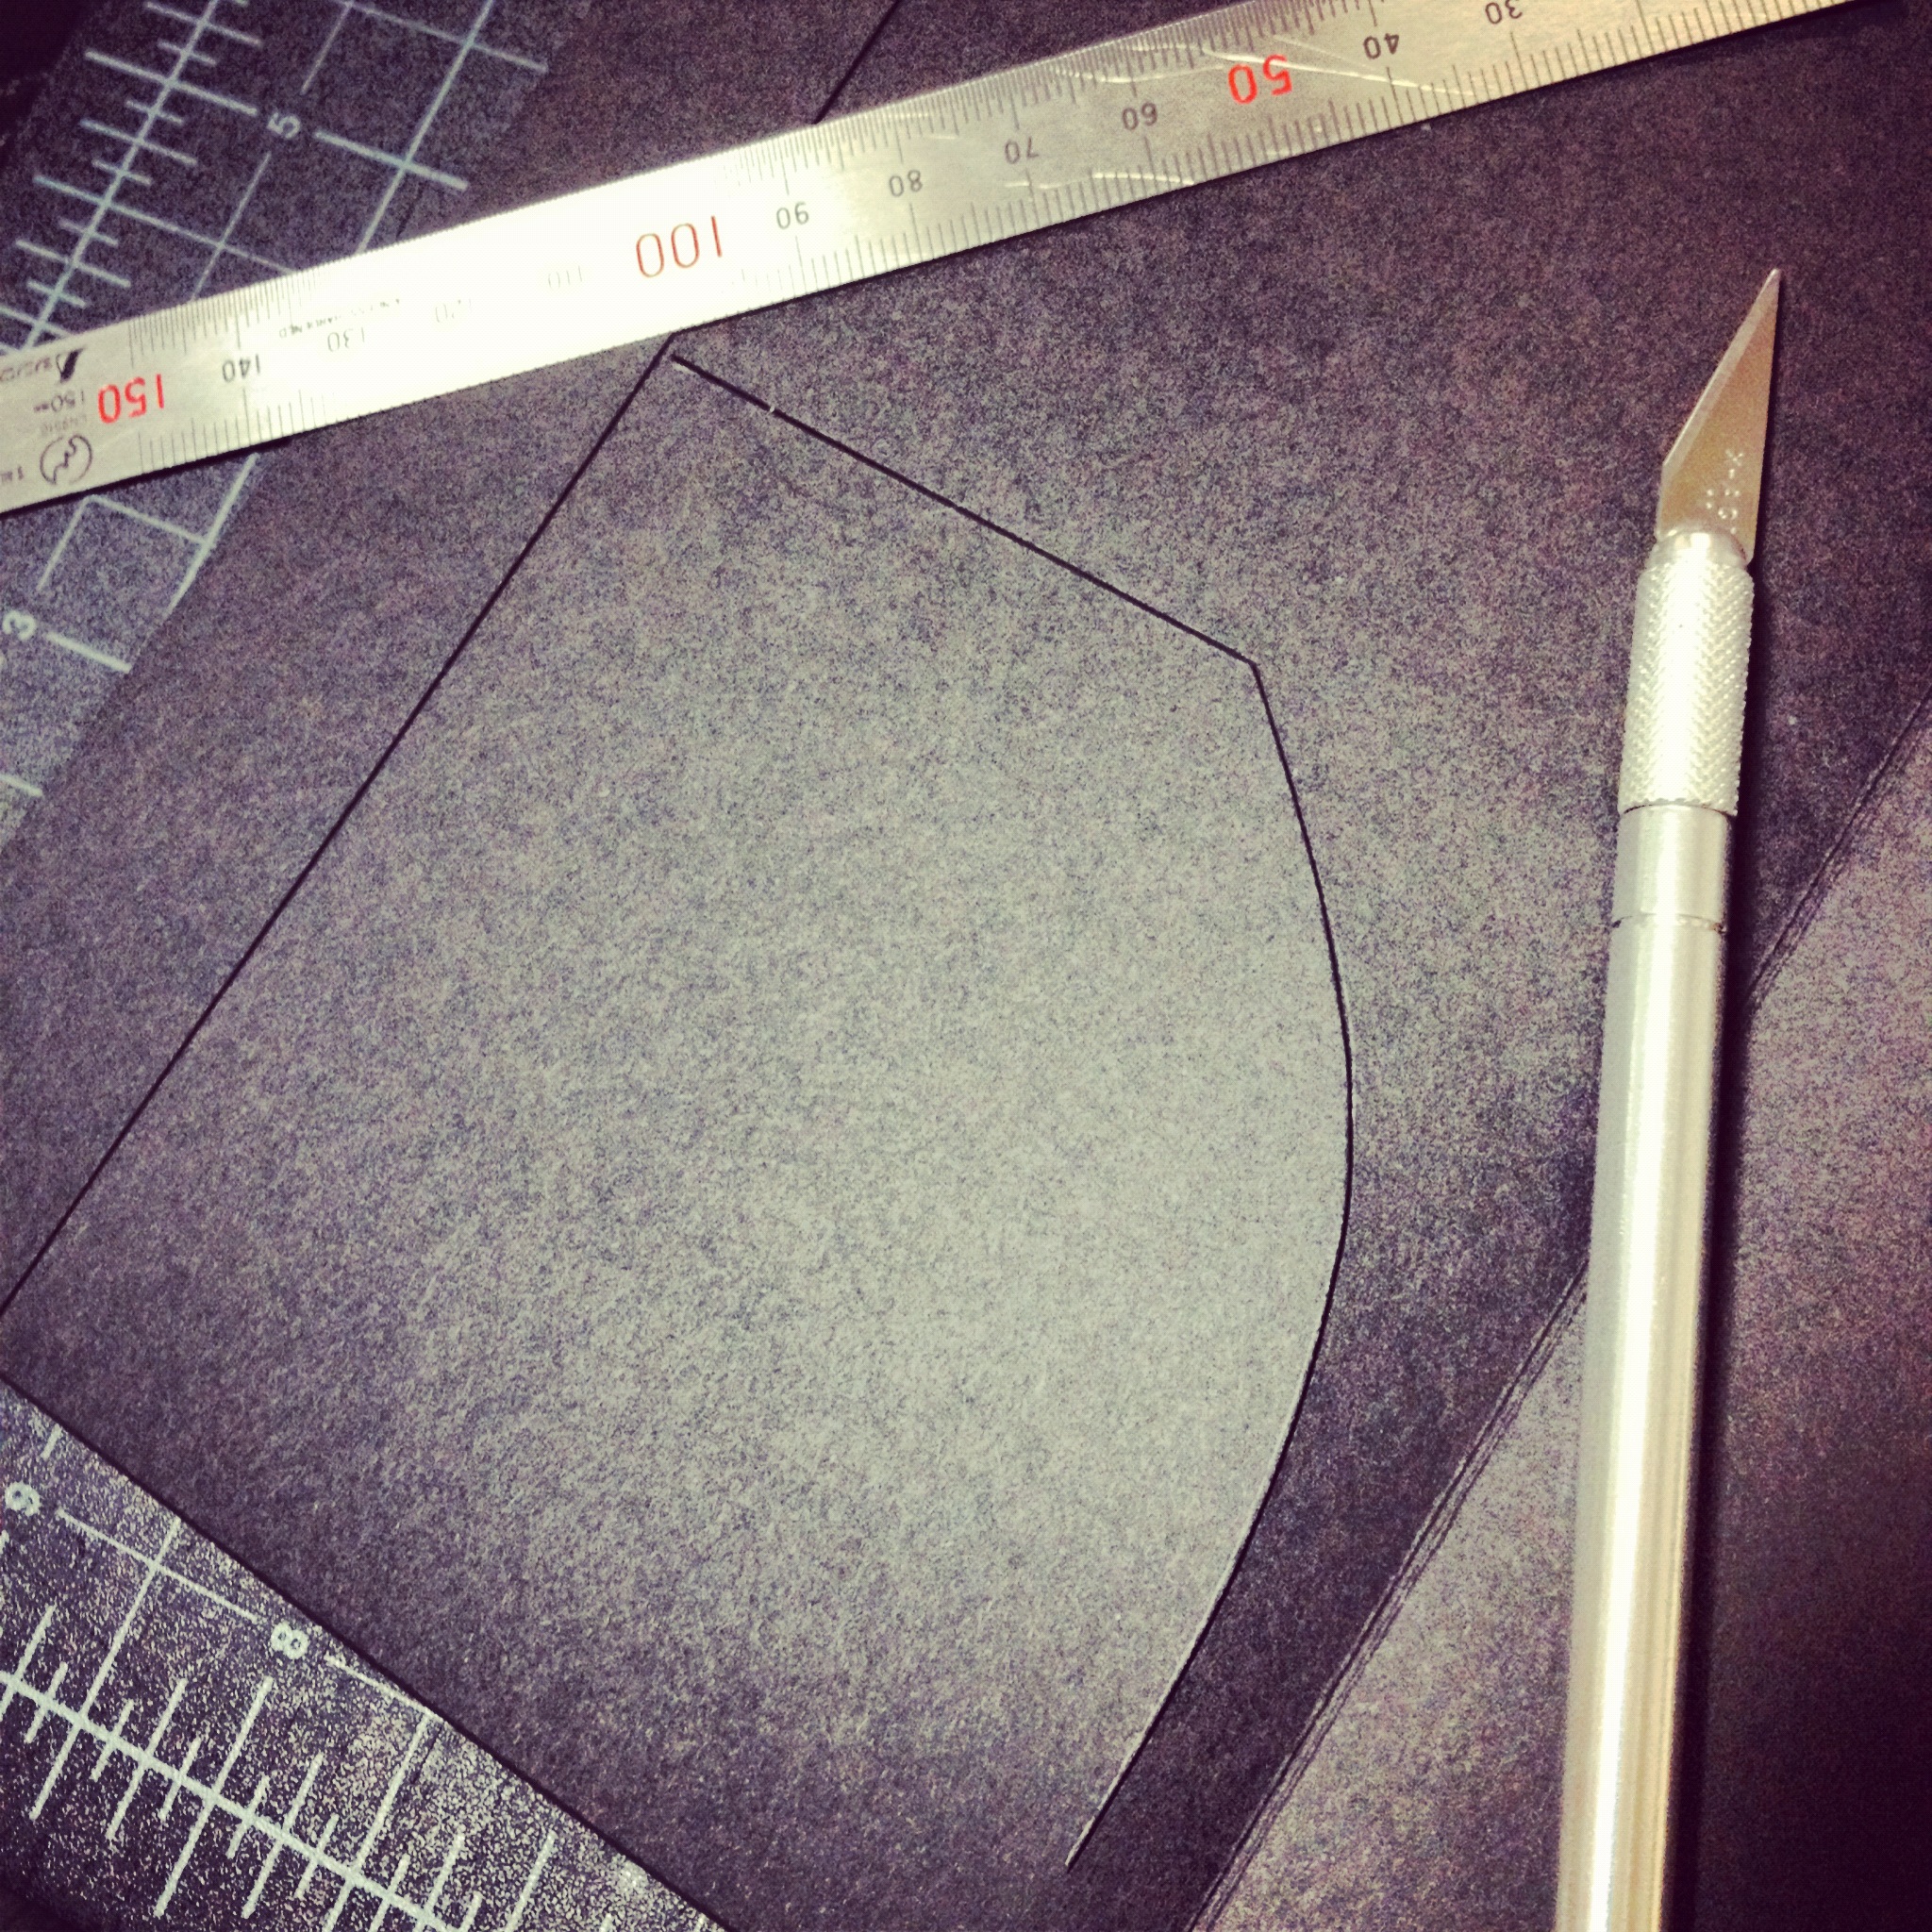
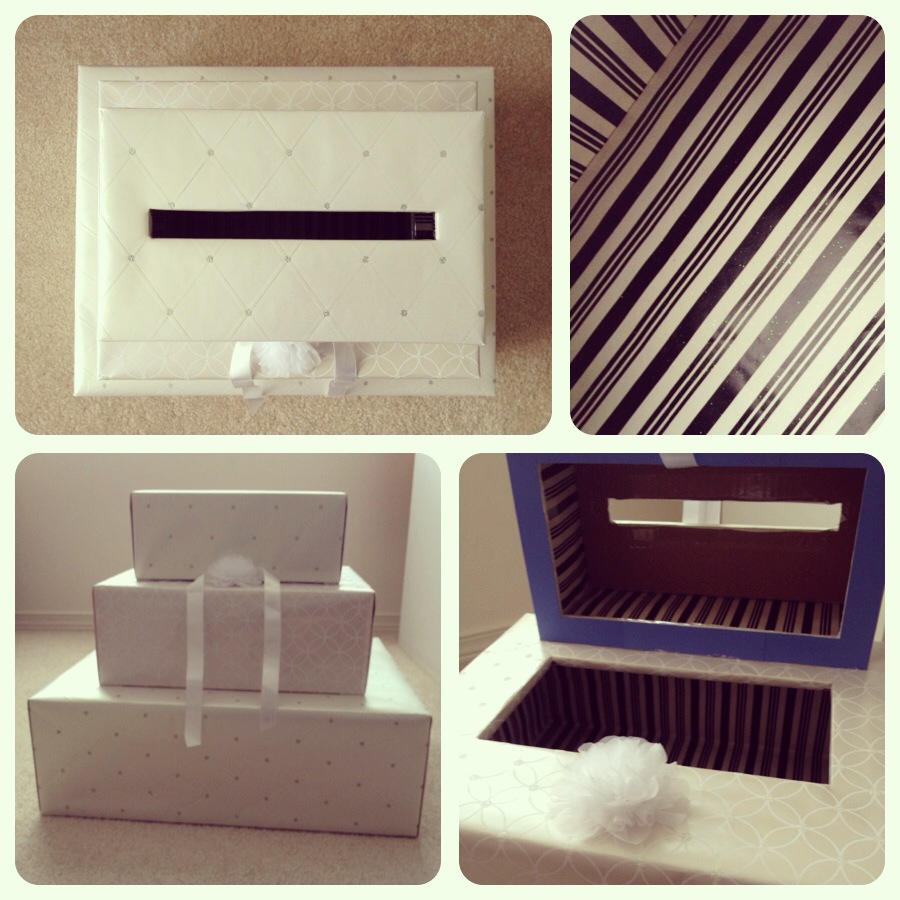
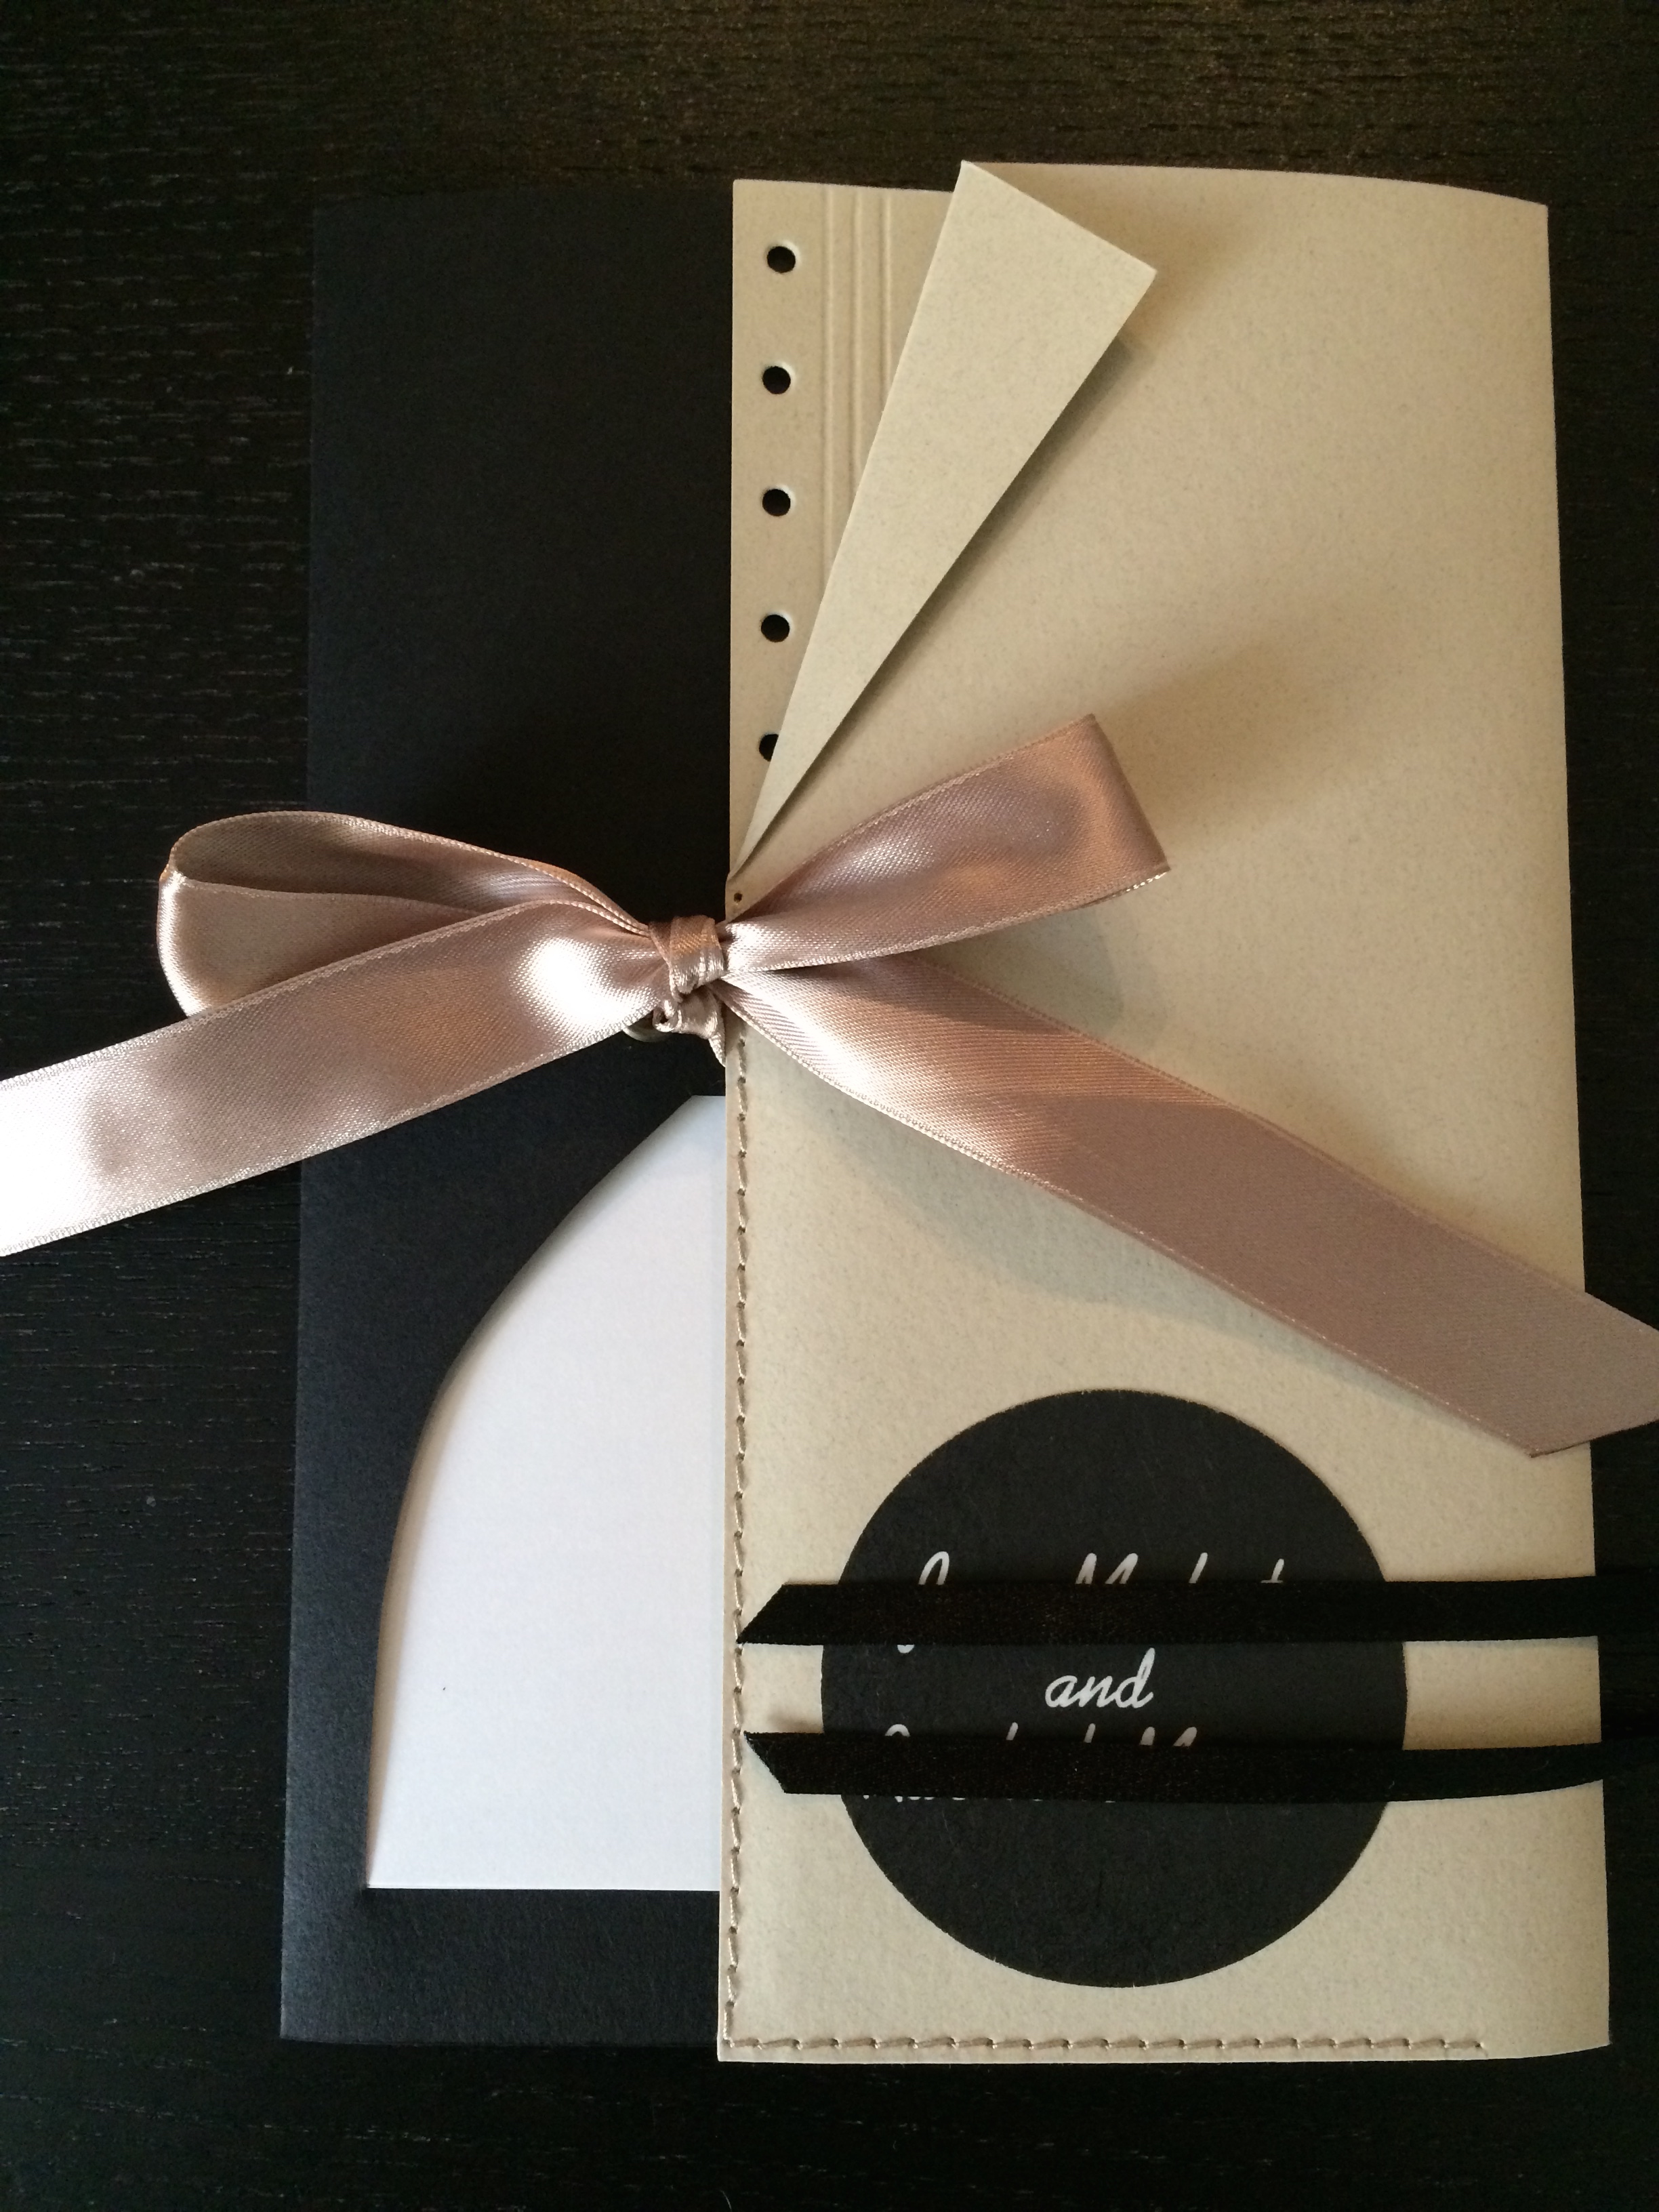
#tbt #fbf past wedding item post time! today i bring to you, a tri-fold wedding dress and tuxedo invitation. if you look closely, you’ll see a tuxedo detail on the right fold, a dress/skirt shaped pocket on the left fold. it’s actually the continuation to the polaroid save the date from last week, and the “polaroid” photos are incorporated into the contents.
#tbt #fbf の過去のウェディングアイテムをご紹介デーです!今日は、三つ折りウェディングドレス/タキシード風招待状です。よく見ると、ベージュの部分の端にタキシード、黒い部分にはスカートの形のポケット。この招待状は、先週のポラロイド風の save the date の続きになるので、引き続き写真がデザインポイントになっております。
i often like to sew my cards, sometimes by hand, sometimes with a sewing machine. each has it’s own distinct feeling to it.
カードを縫うことが好きで、時々手縫い、時々ミシン縫いを使用します。どちらも独特な雰囲気になります。
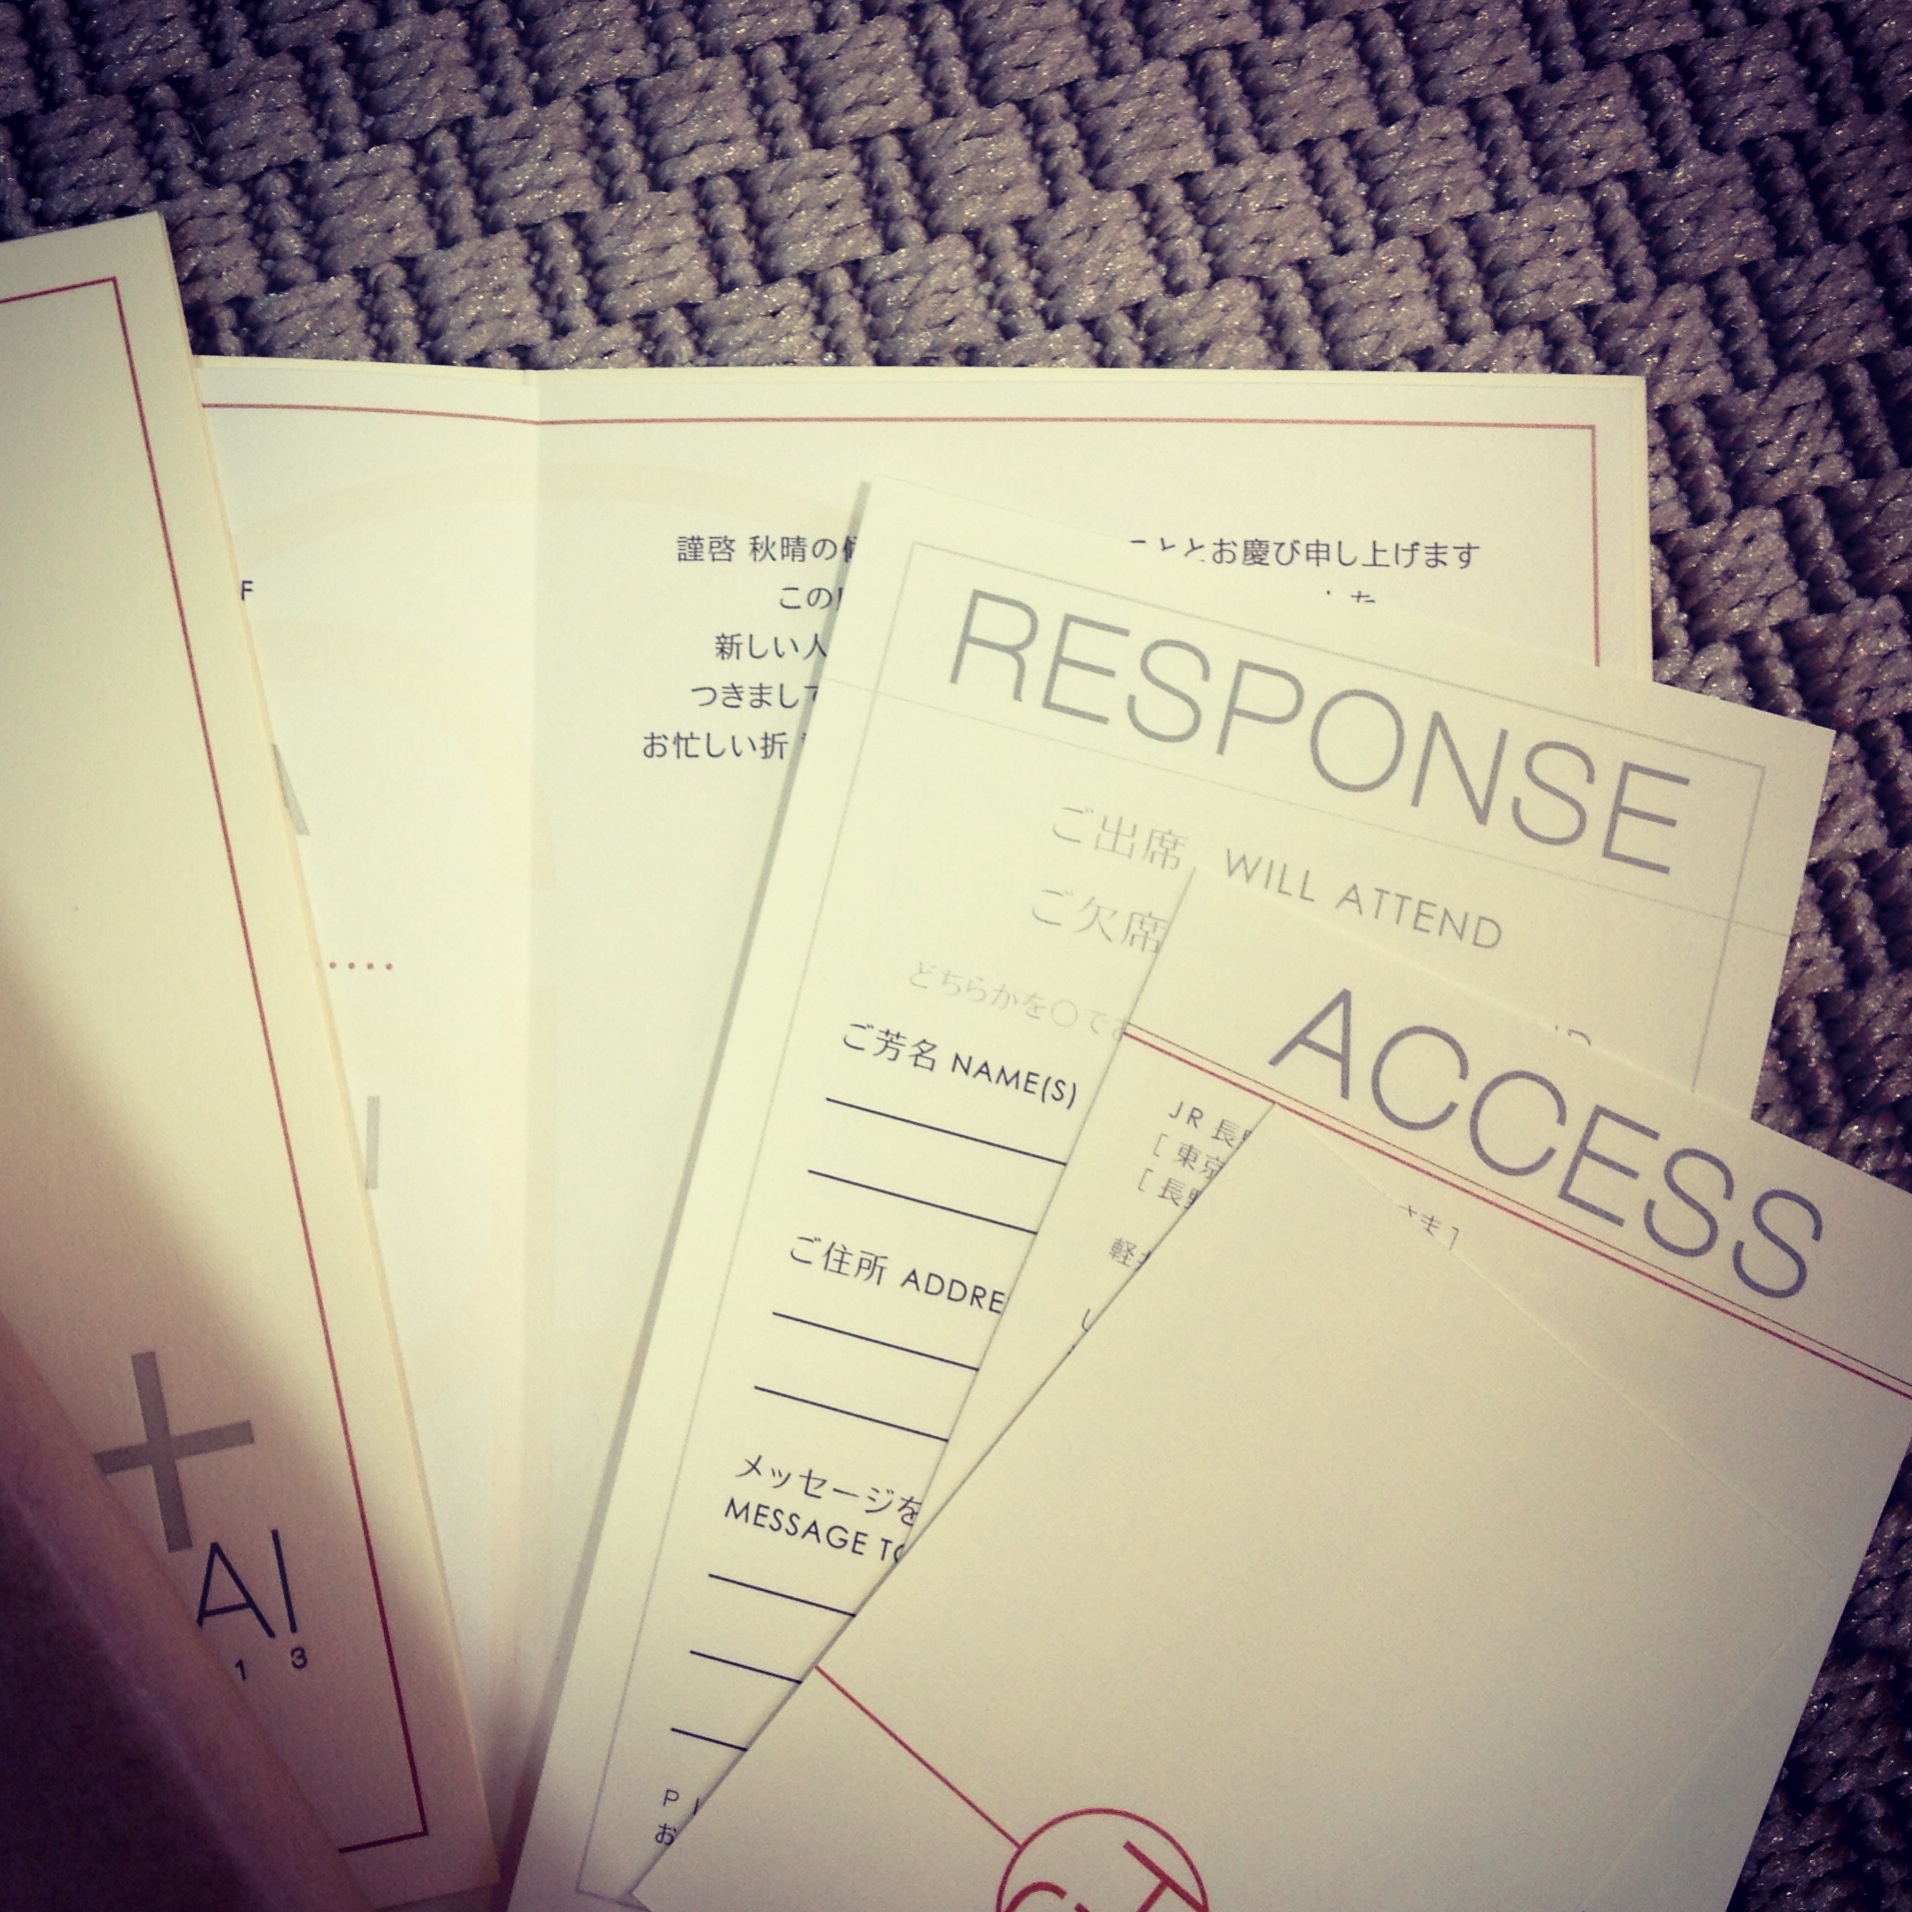
in the access card is a skyline which combines both seattle and yokohama, which are memorable locations for the wedding couple.
アクセスカードには街の輪郭(スカイライン)が見えます。これは新郎新婦の思い出の地、アメリカのシアトルと横浜をつなげたものになります。
this was the invitation that brought me into wedding item designs.
この招待状がきっかけにウェディングアイテムのデザイナーになりました。
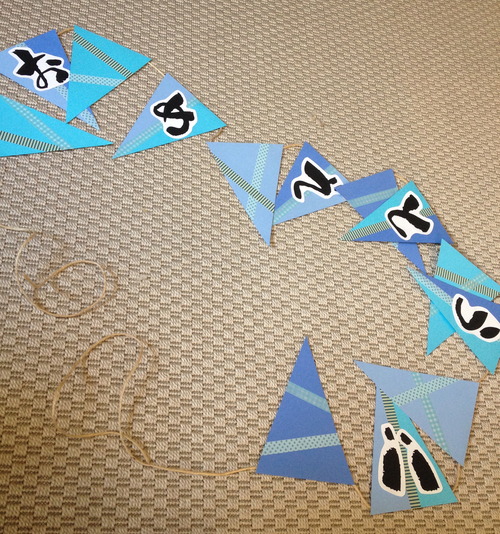
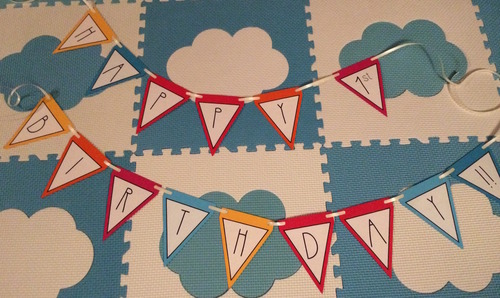
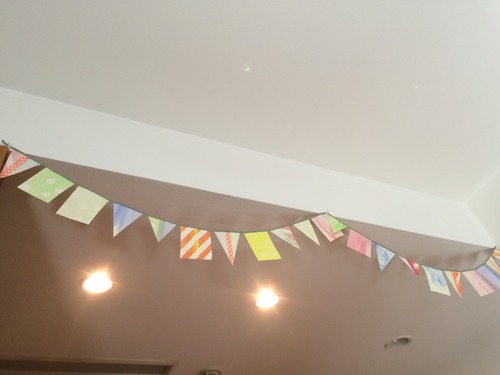
there are so many different styles of flag garlands. my last d.i.y. was about the type that the flags don’t move. for parties and garlands that have letters on them, i like flags that are moveable. it’s easier to adjust the space between the letters when decorating! here are two types that i’ve made before.
1. the easy peasy two hole punch type. / 超簡単穴あけパンチタイプ。
when making your garland, just make sure to leave space for the holes! you can punch the holes before cutting out the triangular shape (or just use rectangular flags).
フラグを切り出す際に、穴の分を計算して切り出すように!もしくは、先に穴を開けてから切り出す。(か、四角いままのフラグもかわいいですよ〜)
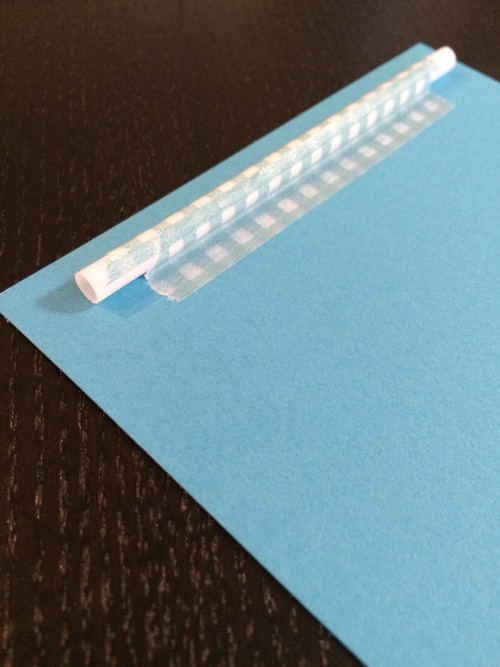
2. the hidden string type. / 紐隠しタイプ。
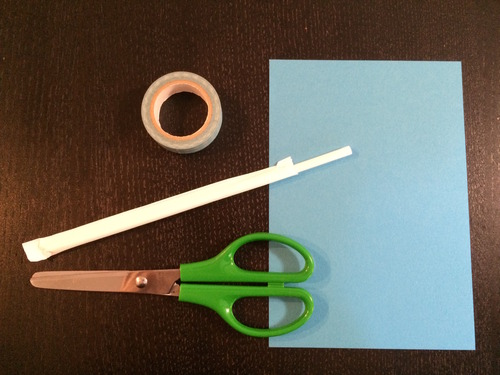
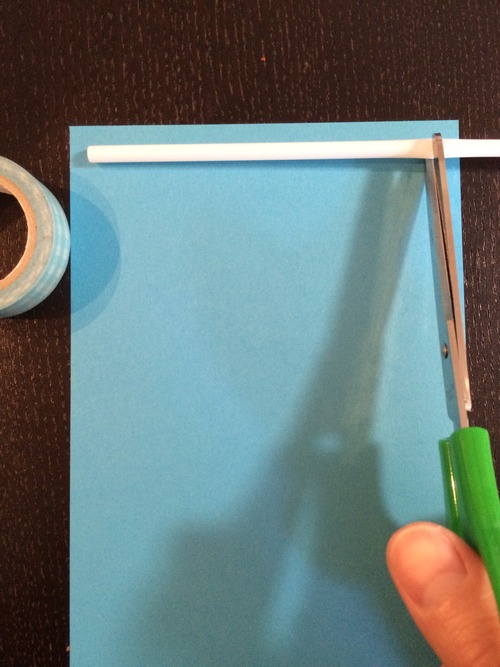
see below for photos. all you need are scissors, tape, and straws. cut the straw to the top width of the flag and tape! i don’t recommend glue as plastic straws can fall off easily. just string the flags and voila!
参考写真は下へおすすみください。必要なのは、ハサミ、テープ、ストロー。フラグの上端の幅にストローの長さを調節し、テープするだけ!のりだとプラスチックのストローがあまり固定されないので、あまりオススメできません。後は、紐を通すだけ!
those cute little flag garlands have been around for a while, and have also been popular for quite a while. so why d.i.y. now? because i’m sure the world can use one more.
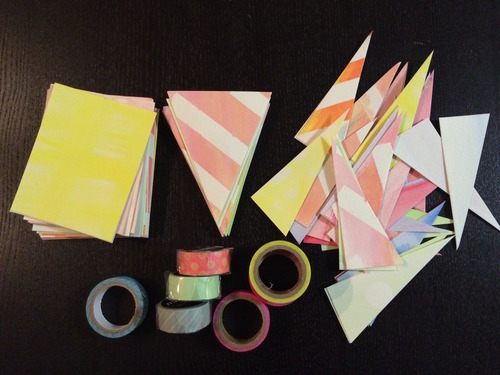
what you need / 材料:
water color paper / 水彩画用紙
newspaper / 新聞紙
water colors (i used acrylic) / 水彩絵具(アクリル)
adhesive stickers to make patterns / 柄をつくるための貼ってはがせるシール
scissors / ハサミ
ruler / 定規
washi tape (the length of your garland) / 和紙テープ適量(ガーランドの長さ分)
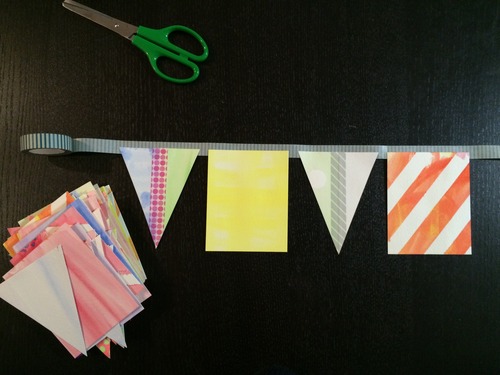
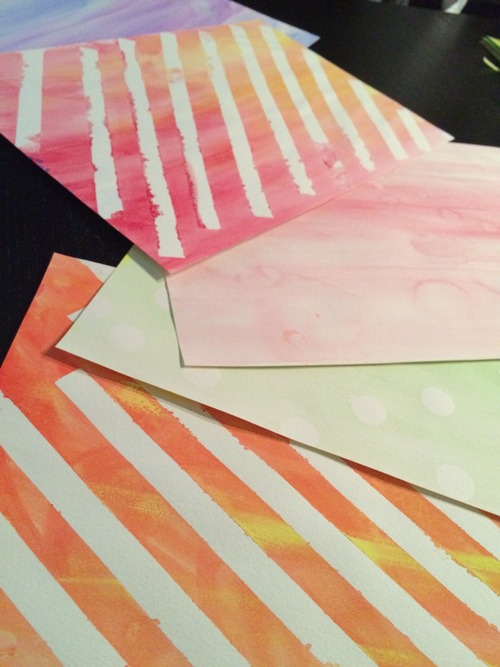
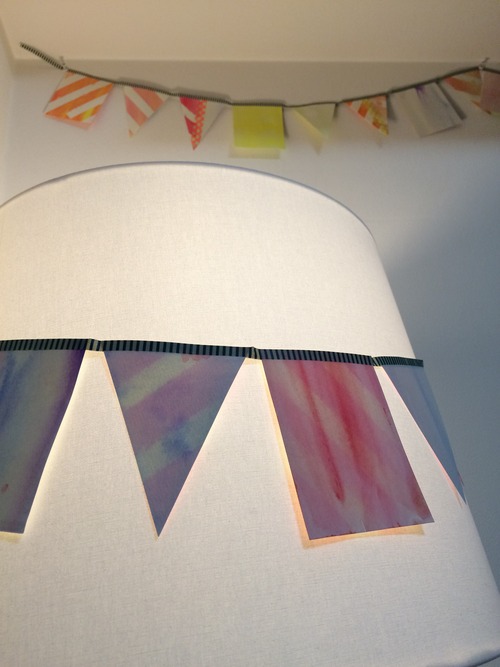
1. i decided to make a watercolor garland for the colorful yet soft feel. / 水彩ガーランドをすることによって、優しくてカラフルな色合いに仕上げてみました。
to make fun patterns, i made good use of old old old post-it tape and circle labels that are barely adhesive anymore…. / しばらく使っていない付箋テープとサークルラベルを利用して面白い柄を作ってみました!
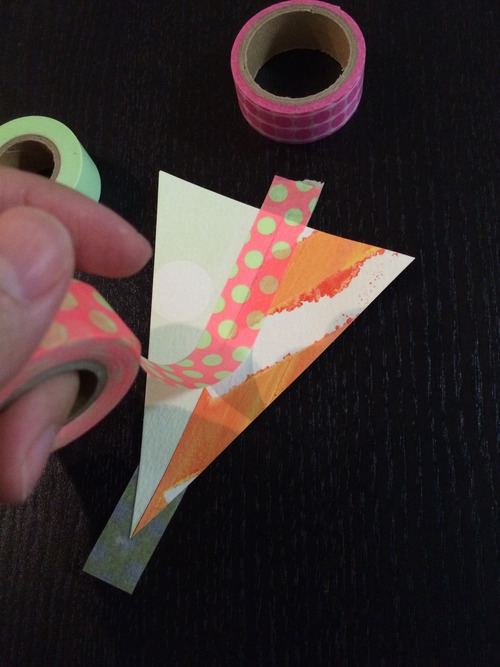
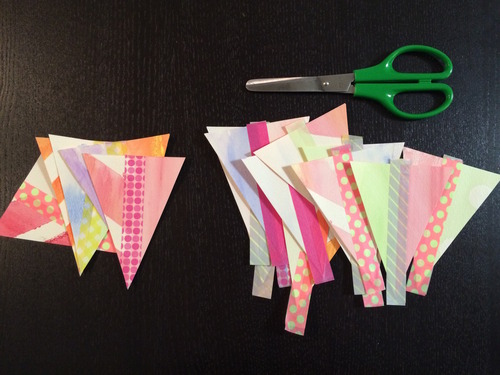
2. after painting both sides and letting it dry, cut 8cm × 10cm rectangles. a third of them i cut isosceles triangles out of, leaving me with a bunch of half triangles. / 両面とも塗ってから乾かし、8cm × 10cm の四角に切る。1/3は、二等辺三角形を切り出し、残った欠片をとっておく。
3. using the half triangles from the last step, tape two pieces together with washi tape to make more isosceles triangles. pairing different patterns and colored washi tape makes fun accents flags! / 和紙テープで余った欠片を2枚ずつ使って二等辺三角形を作る。違う柄と和紙テープを組み合わせることでアクセントフラグができます。
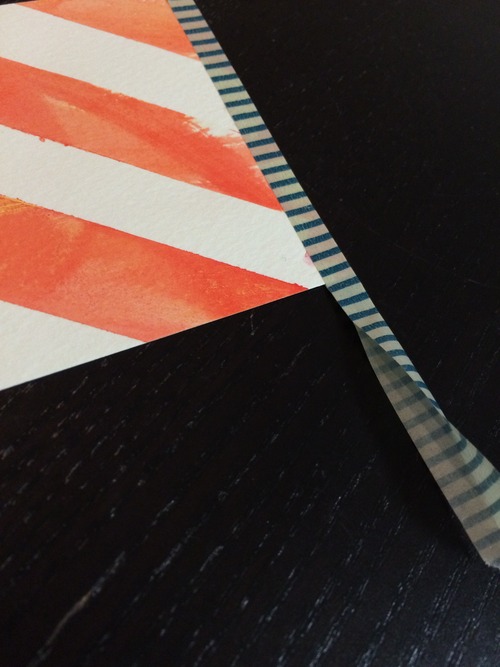
cut off the washi tape ends. / 最後に和紙テープの余った部分を切り取り、形を整える。
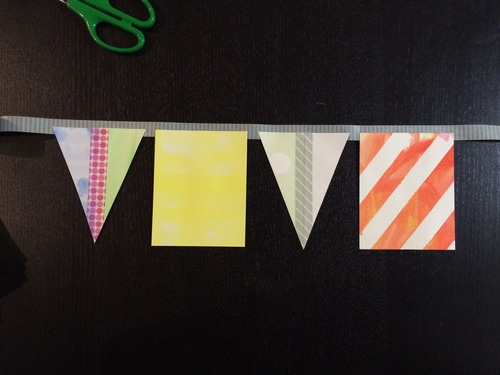
4. arrange flags so they are within the lower half of the washi tape. it’s better to have the flags within rather than on the halfway line for a clean finish later. there’s about 1~2 cm between the flags. / 1〜2cm間隔で和紙テープにフラグを置いていく。和紙テープの幅の半分以内に配置すると、和紙テープを折り返す時に綺麗に仕上がります。
5. fold the washi tape over after laying about 4~5 flags at a time. / フラグを4〜5枚置いたら和紙テープを折り返す。
FINISHED! / 出来上がり!
there you have it! a quick and easy project, great for birthday parties, weddings, baby / bridal showers, or just to make for fun. / 簡単ガーランドでした!お誕生日会、結婚式、ベビーやウェディング・シャワーにいかがでしょうか??
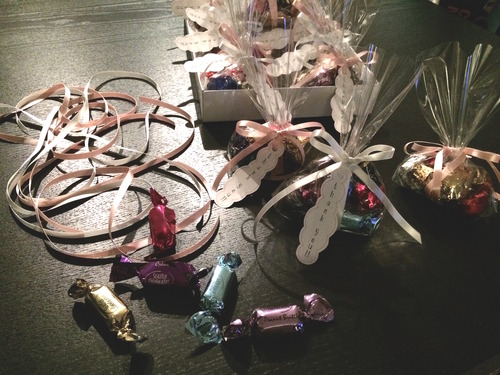
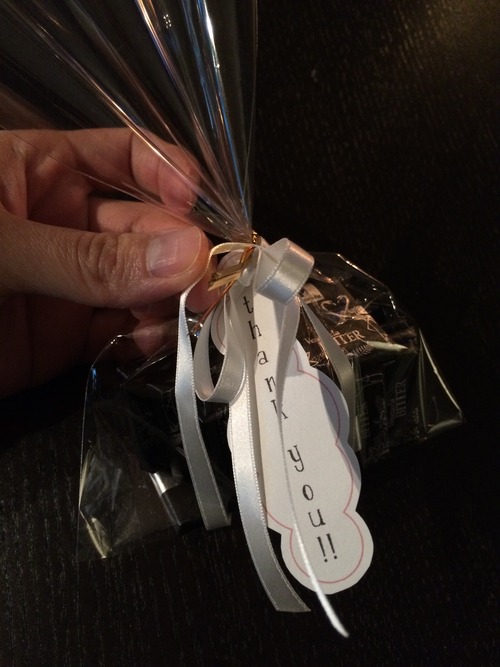
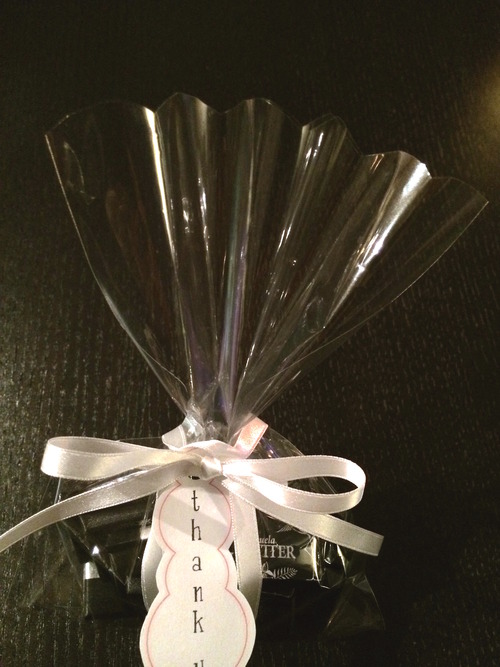
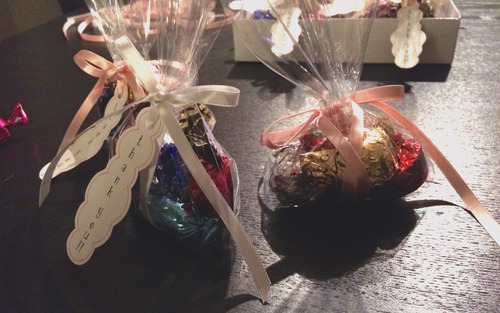
thank you favors are a must for weddings, bridal showers, and baby showers. a small but sweet appreciation gift for your guests who took their time to come out and celebrate with you. there are many ways to wrap your gifts. i would like to share a simple and slightly different way of tying that finishing touch!
what you need / 材料:
gift bag(plastic or paper) / ギフトバッグ(プラスチック/紙どちらでも)
1 twist tie / ワイヤータイ
scissors / ハサミ
ribbon (7mm width / 76cm long) / リボン(7mm幅/長さ76cm)
gift tag (optional) / ギフトタグ(お好みで)
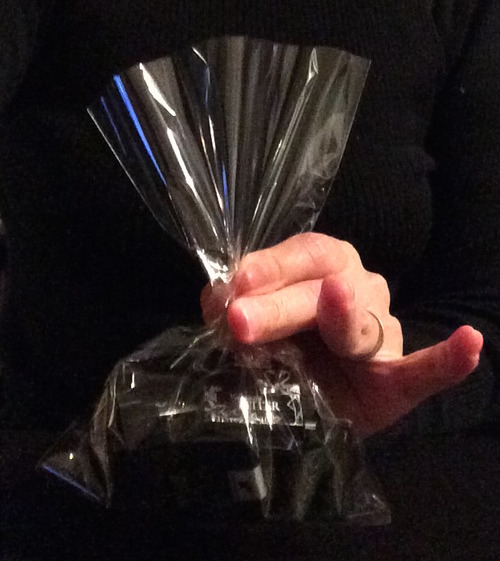
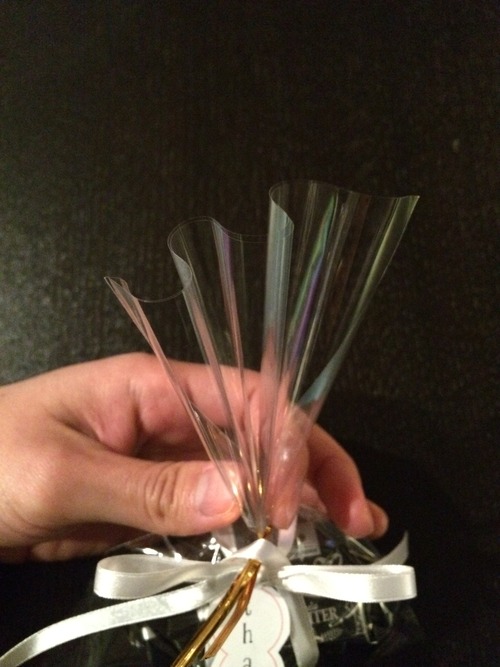
1. after filling the gift bag, fold bag vertically in an accordion fold. see next photo for folding details.
ギフトバッグを詰めたら、縦にアコーディオン型に折って閉じる。折り方は次の写真をご覧ください。
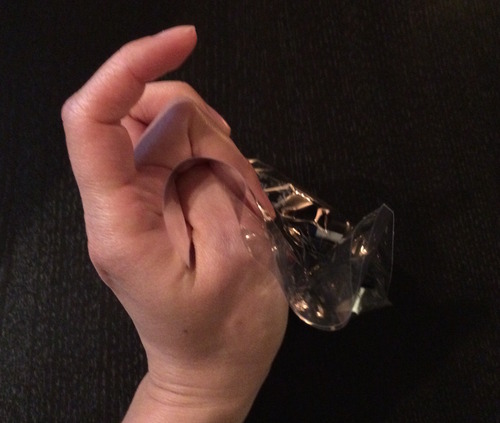
tuck the edge of the bag between the “v” of your thumb and pointer finger. use your folded thumb to create the first fold, and fold the bag over with your middle finger. release your thumb to join the first fold with the first edge. create the next fold.
親指と人指し指の間の「v」にバッグの端を挟む。親指を使って最初の折り山を作り、中指で押さえる。親指を離し、最初の端と合わせ、親指で次の折り山を作る。
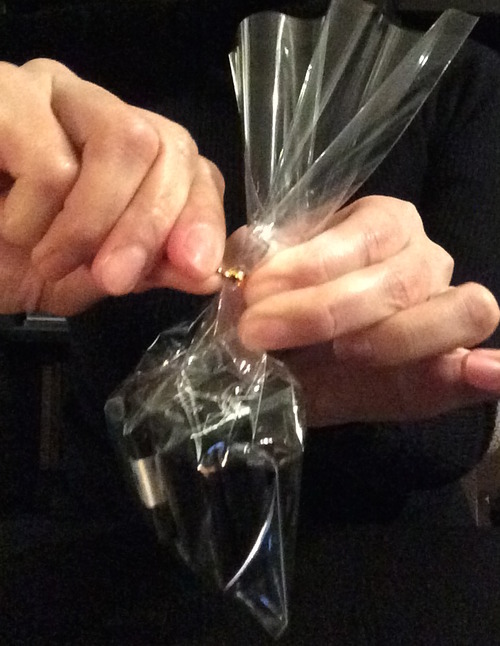
2. use the twist tie to temporarily close the gift bag.
ワイヤータイで一度とめる。
3. using the ribbon, make a 39 cm band. if using a gift tag, string it through here.
リボンで39cmの輪っかを作る。ギフトタグを使用するようであれば、この時点で通す。
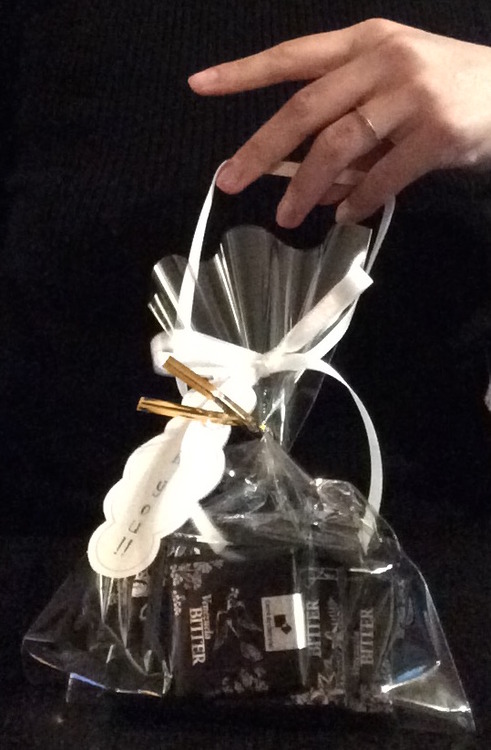
4. pull ribbon over gift bag. bring the bow and gift tag to the front.
リボンにギフトバッグを通す。結目とタグが正面になります。
twist the ribbon once to create a cross. this step keeps the ribbon from falling off.
後ろでリボンを交差させる。リボンが外れないよう、重要なポイントです!
pull the ribbon over the front bow and/or tag.
リボンの輪を結目とタグの上にかぶせるように止めます。
5. fold and hold the accordion folds once again. creasing isn’t necessary.
もう一度アコーディオン折り部分をまとめて折る。折り目をつける必要はありません。
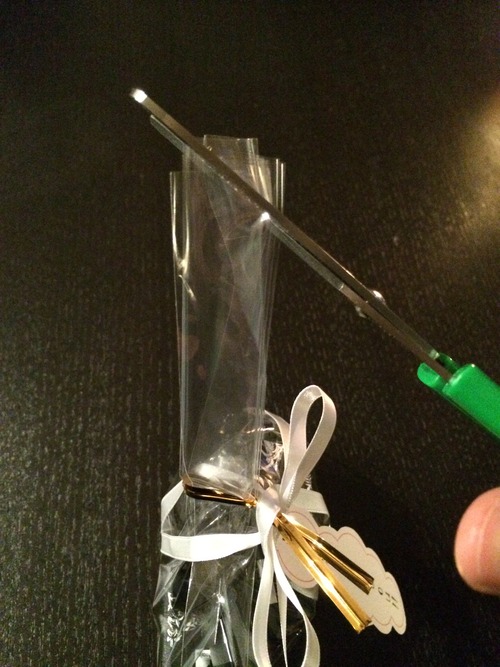
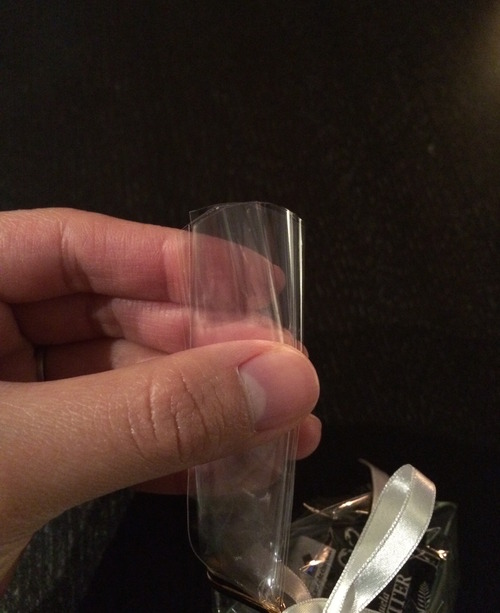
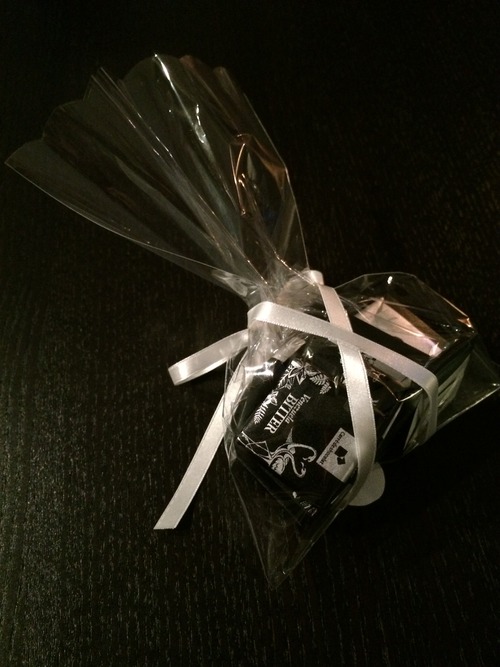
6. create a scalloped edge. side view: cut the folds altogether in a semi-circle. see next photo.
スカラップ端を作る。横から:まとめた折り目を半円を描くように切る。次の写真をご覧ください。
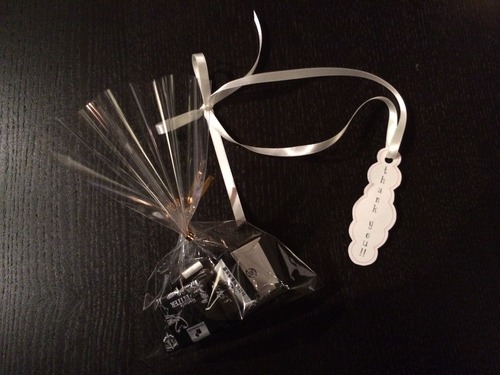
remove twist tie & FINISHED! / ワイヤータイを外して、出来上がり!
back view / 後ろ
with this you have a handmade, heartfelt “thank you”.
これで手作りの「thank you」の気持ちをお贈りください。
*** other useful tips / その他の注意点
– the twist tie isn’t necessarily needed, but it helps to have in the process.
ワイヤータイなしでも作れますが、便利です。
– depending on the contents of the bag, the length needed of ribbon will vary. start with a longer length of ribbon and at the end of step 4, pull the bow forward and re-tie the bow.
中身によっては必要なリボンの長さが異なります。長めにリボンをカットし、ステップ4の最後に結目を手前にあまり分を引く。リボンを結び直す。
– after removing the twist tie, it will be a loose closure. this adds to the overall soft finish.
ワイヤータイを外したらギフトバッグの閉じ目は緩くなり、全体的にソフトな仕上がりになります。
m i n o r i : graphic design / handmade cards / fashion design / japanese -> english translation
recently, a lot of my work are wedding related. i design and handcraft wedding items. anything from paper items to doggie collars and linen gift bags. for my own wedding i designed and sewed my wedding dress and 6 bridesmaids dresses (yes i deserve to be called “crazy”).
aside from wedding jobs, i do logos, business cards, t-shirts, and other paper crafts.

![[WEDDING] BLACK AND WHITE INVITATIONS CONTENTS](http://www.peacelovetokyo.com/home/wp-content/uploads/2015/03/IMG_4182-400x300.jpg)
![[WEDDING] BLACK AND WHITE INVITATIONS](http://www.peacelovetokyo.com/home/wp-content/uploads/2015/03/IMG_4184-400x300.jpg)
![[WEDDING] BLACK AND WHITE INVITATIONS](http://www.peacelovetokyo.com/home/wp-content/uploads/2015/03/IMG_4186-400x300.jpg)
![[WEDDING] BLACK AND WHITE INVITATIONS CONTENTS](http://www.peacelovetokyo.com/home/wp-content/uploads/2015/03/IMG_4183-400x300.jpg)
![[WEDDING] BLACK AND WHITE INVITATIONS](http://www.peacelovetokyo.com/home/wp-content/uploads/2015/03/IMG_4181-300x400.jpg)