why hello! it’s that time of the week again! this week on the #tbt #fbf post, i’m going to talk about PRE mr. banana leaf. as in, the wedding invitations for the mr. banana leaf wedding.
ハロー!早速、今週の #tbt #fbf は、バナナリーフくんウェディングの招待状のお話し。
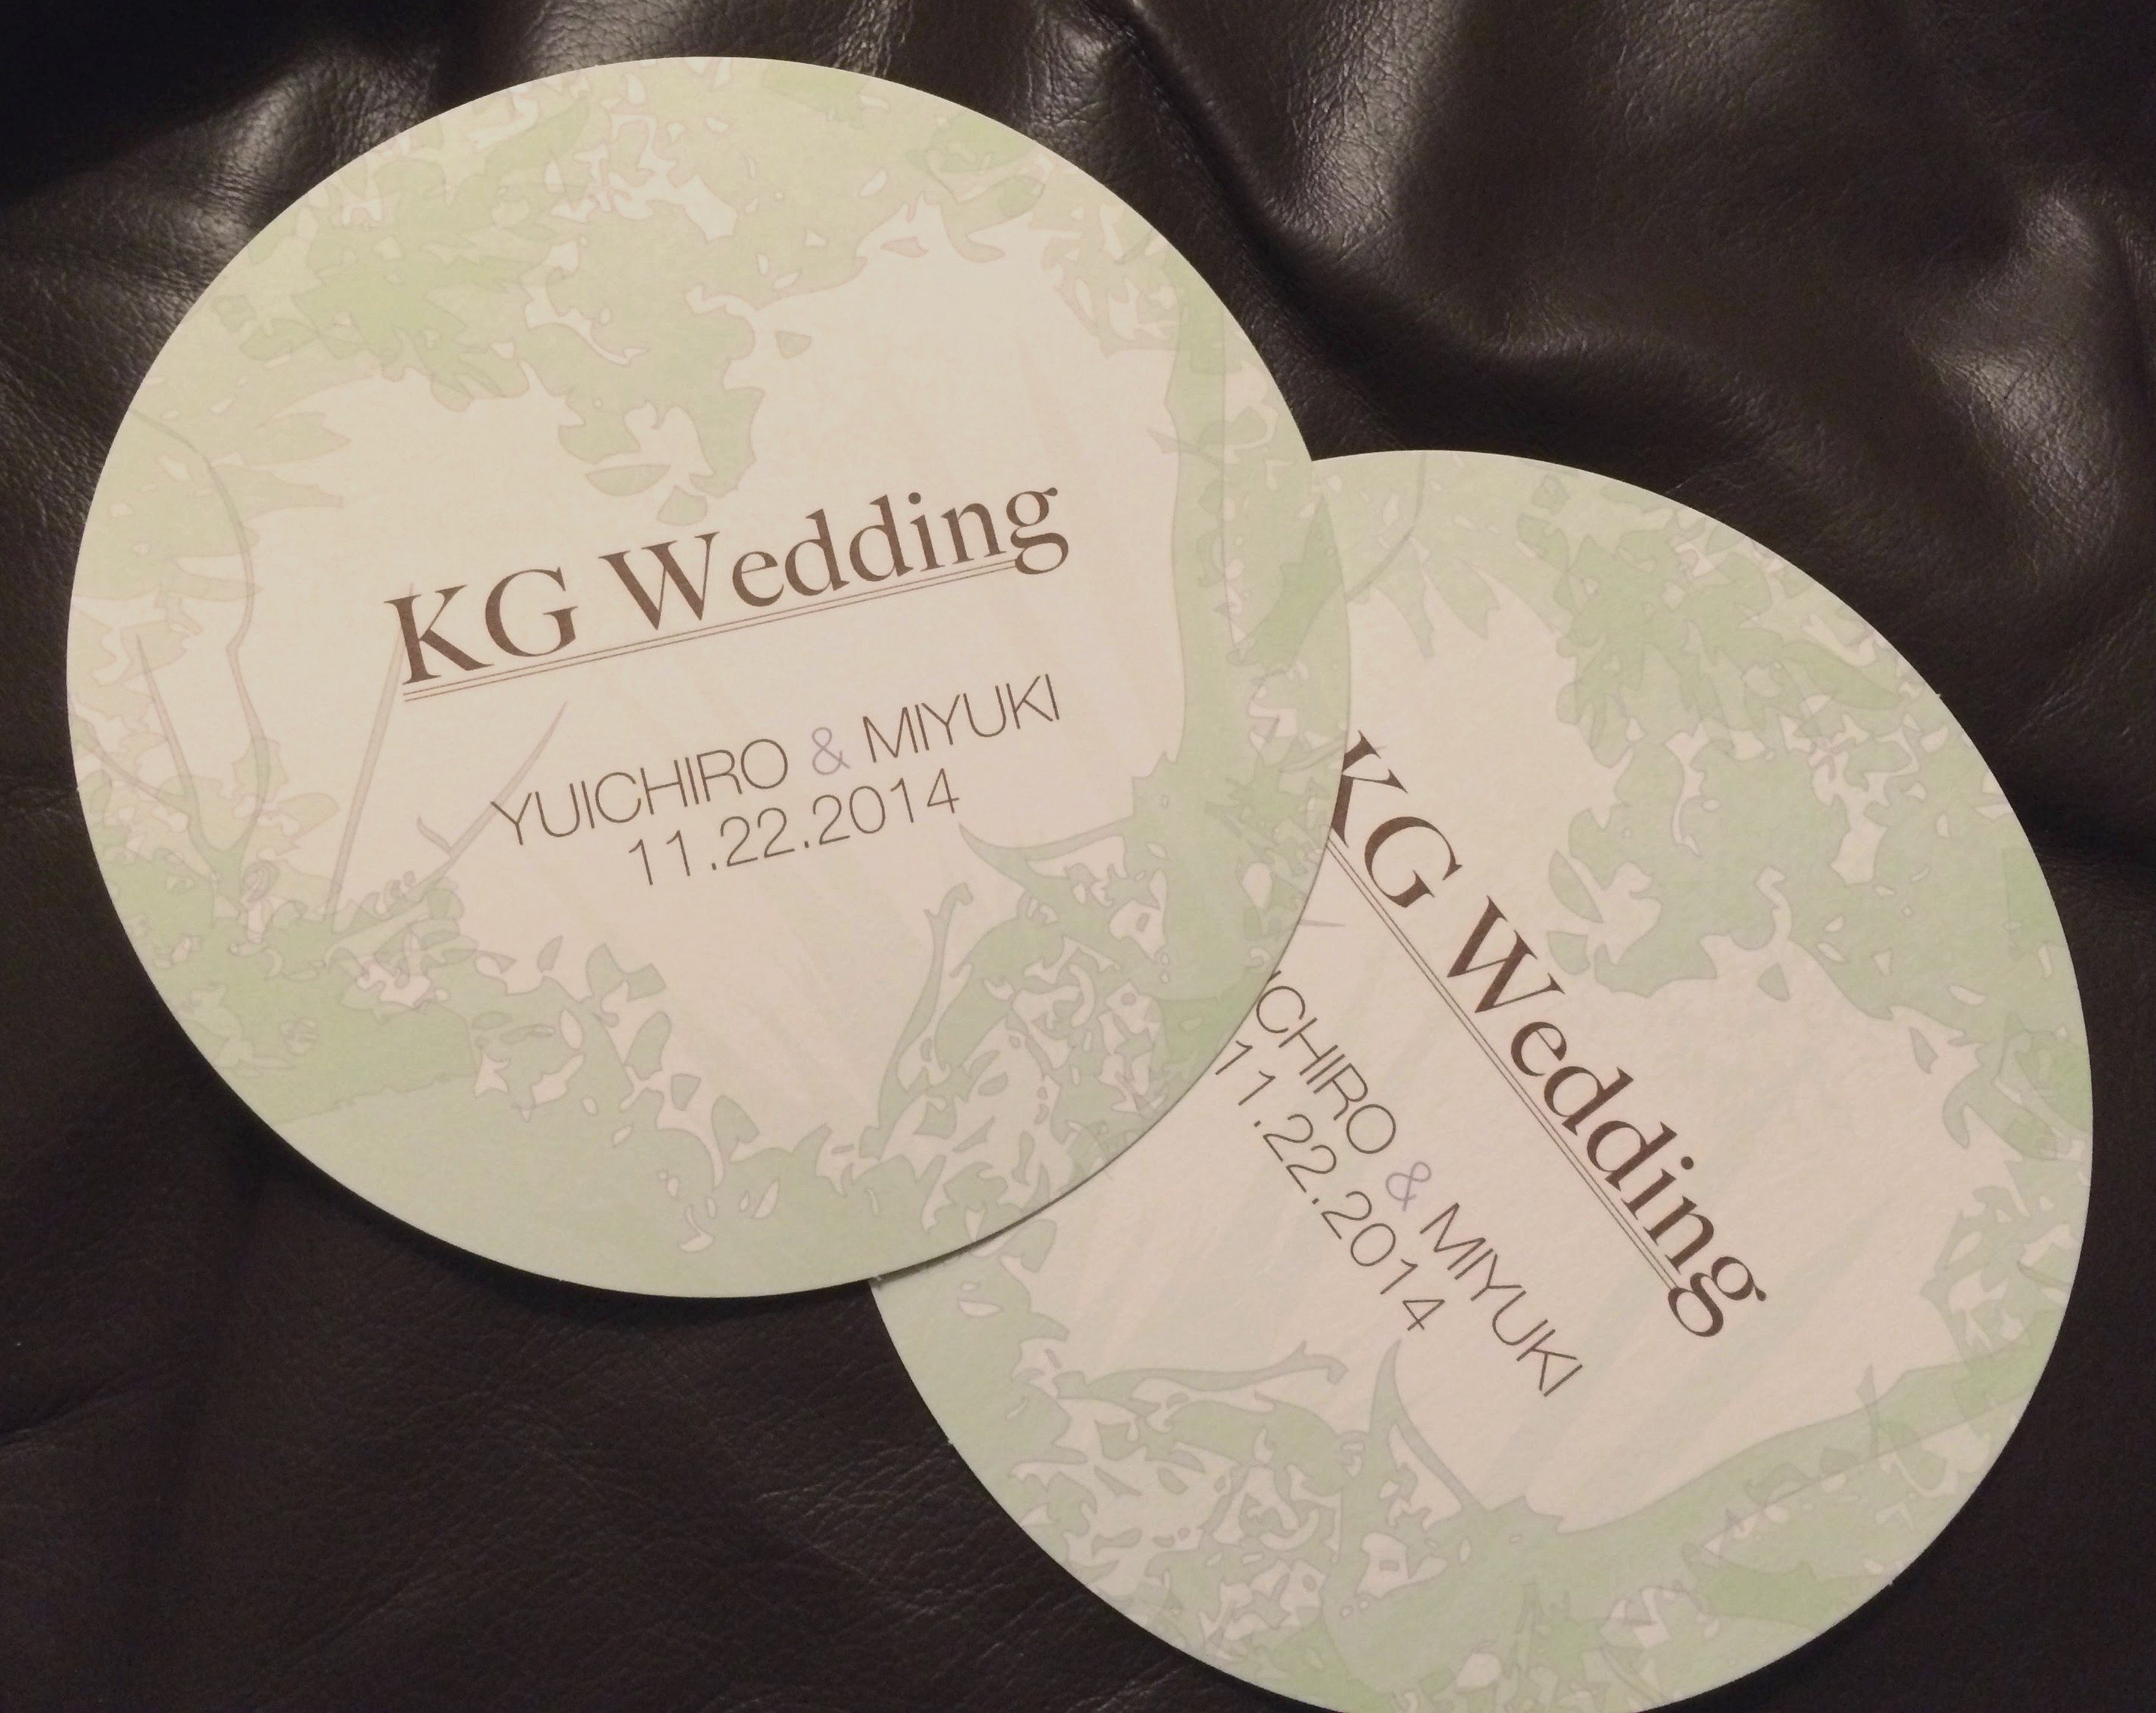
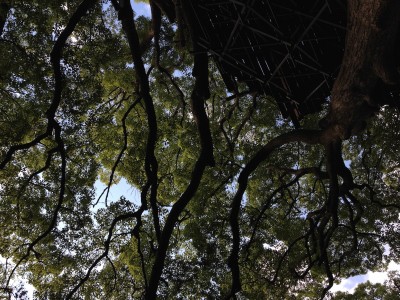
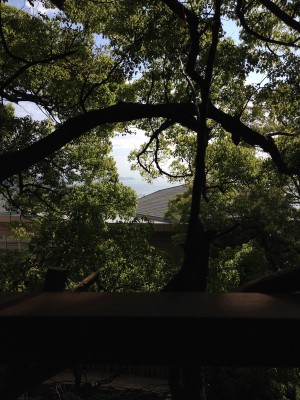
as i mentioned before, the couple lived in singapore. they fell in love with the green tropical foliage there and wanted to put that into their wedding invitation. especially the feel when you gaze up at the greenery and see rays of sunlight shining through.
from time to time, i like to use my photography in my art work. sometimes collaging with the photo itself, and often times a trace work of something i’ve taken. this time, it was a combination of both, collaging the tracings. i used a couple of photos of greenery that i had taken on vacation just before this invitation.
on the front, i layered the leaves to create a heart shape in the center. on the back where all the details go, i left the center clear.
表はさりげなくハートが見えてくるように配置し、裏の詳細面は、中心部分が見やすいように端に寄せました。
my goodness, every week the days go by so fast! for this week’s #tbt #fbf, i want to take a little break and talk about my favorite work tools for handmade weddings.
a lot of the weddings i have been to have been overseas (in the states). and many times i am there to be the crafty one, so i have a small box of my favorite tools that i bring with me. others i improvise with what i can get locally or have at hand. here i show you the favorites and the ones that you wouldn’t think would be useful!
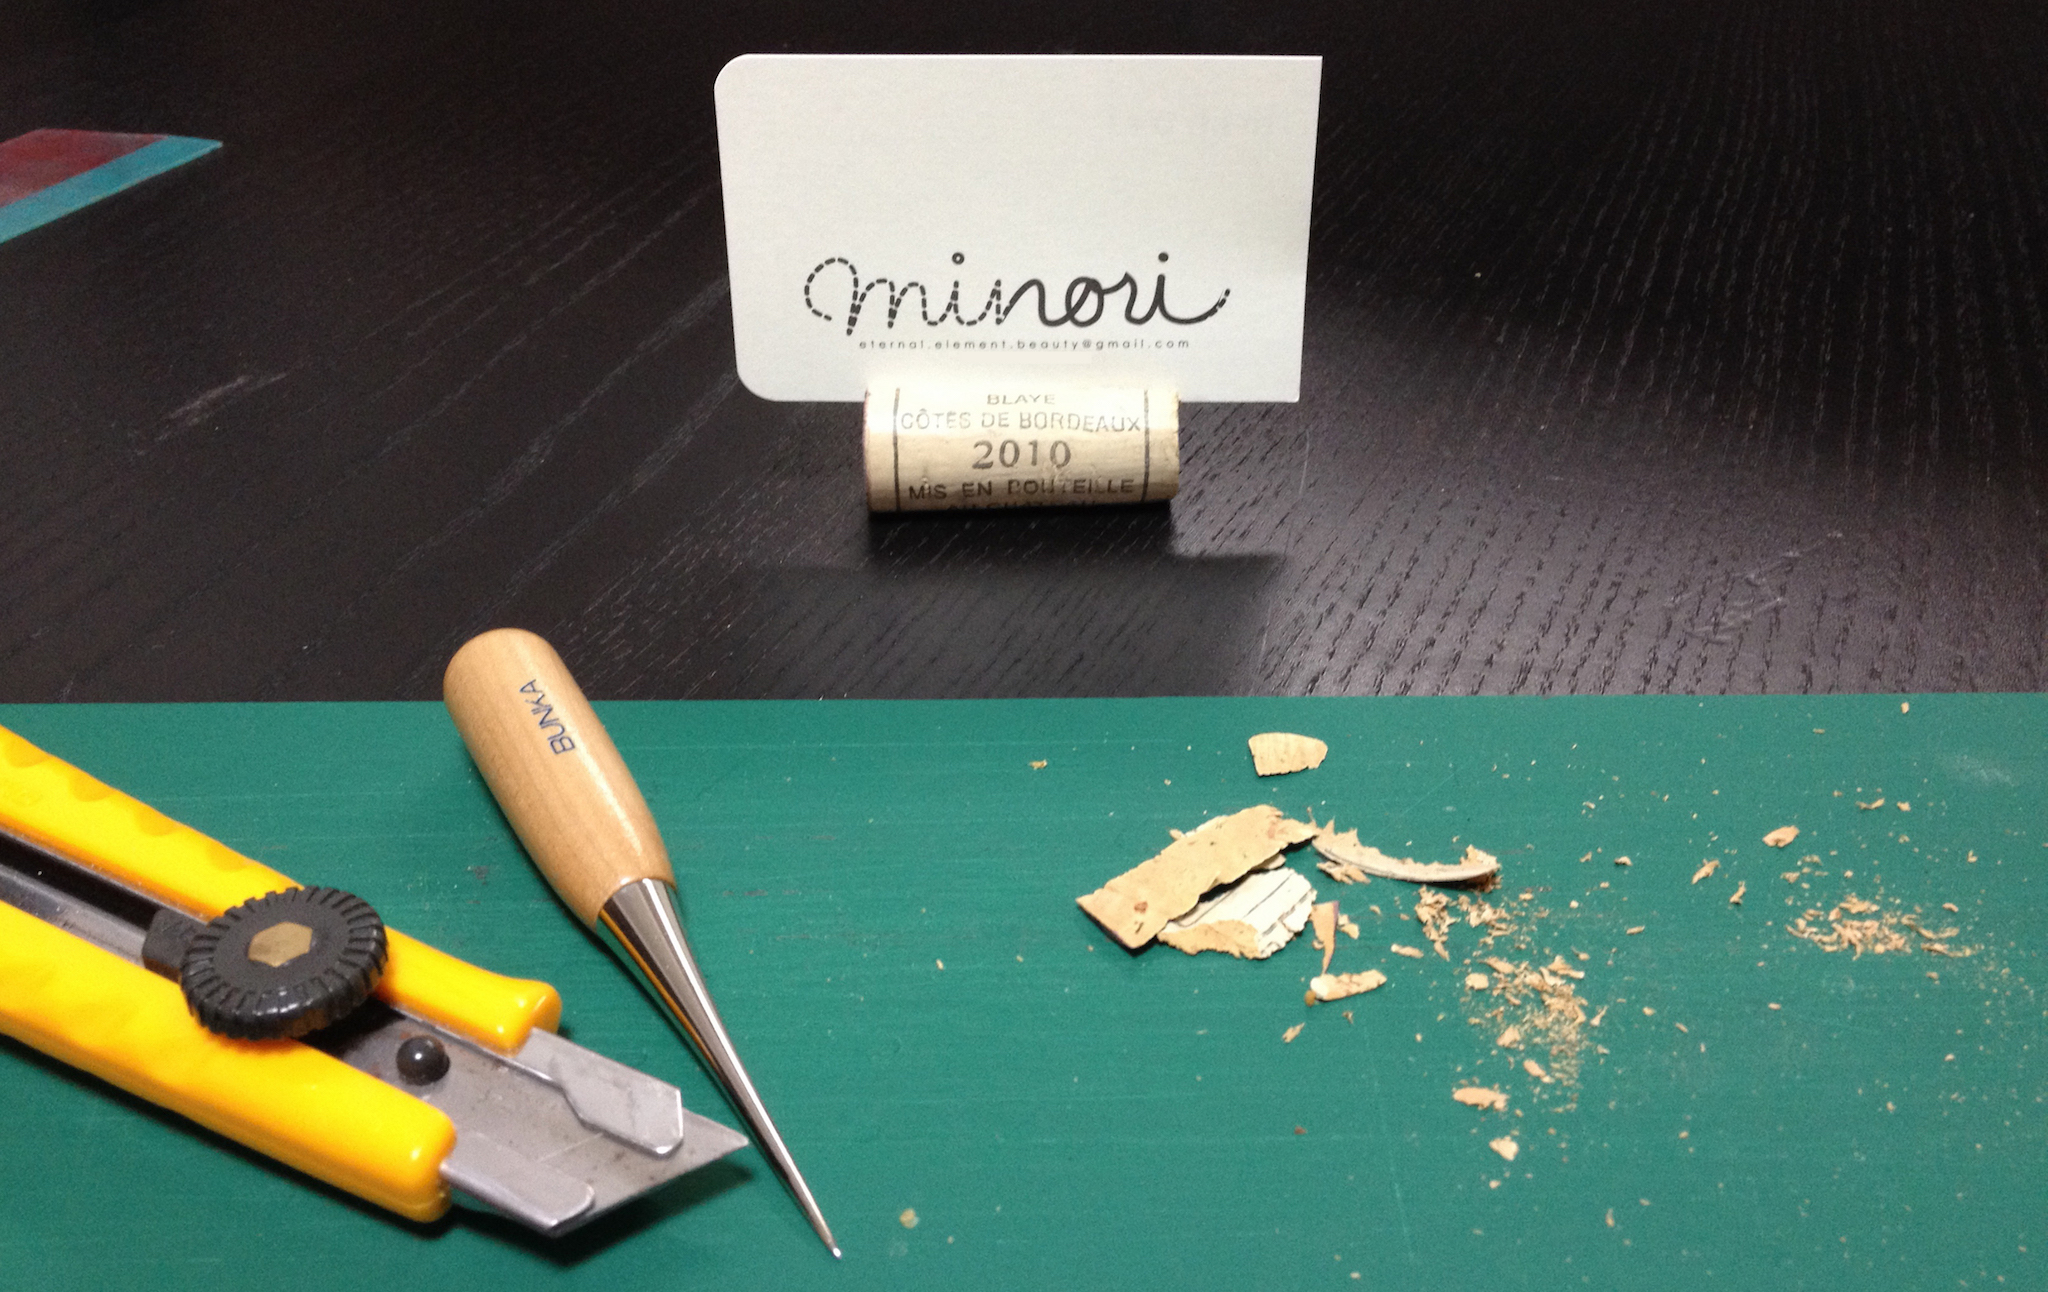
all-purpose cutter: which i use for more heavier duty materials like styrofoam boards or card stock and in this case to cut into a wine cork to make name placement stands. なんでもカッター: 厚みのある材料に使用するカッターは、フォームボードやカード紙に最適。この場合は席札立てとなるワインコルクに使用しました。
the awl: i can’t even begin to explain how often i use my awl. although this one is for sewing, i also use it when perforating hand crafted cards and paper items. in this situation, it helped to widen the score in the name placement stands. 目打ち: 大好きな目打ち!元は裁縫用ですが、ハンドメイドカードやペーパーアイテムの穴あけなどによく使用しています。この場合はコルクの切り目を広げるために便利でした。
metal ruler | cutter
直尺 | カッター
metal ruler: this is such a great ruler! it’s a shorter ruler which is great for measuring out smaller cards, such as name placements, or for designs on paper items. also they are great to use as a guide for cutting paper since they can’t get sliced like plastic rulers. 直尺: 短めな直尺は、特に小さめなカード(席札など)やペーパーアイテム上のデザイン寸法を計算するのにもかなり良いです。また、プラスチックと違って金属製のものは紙や布のカッティングガイドとして便利です。
cutter: this cutter i use for paper. it’s great because along with the metal ruler above, it’s a compact size that fits in my pencil case. カッター: こちらは、紙用に使用しているカッター。こちらは直尺と一緒に筆箱にフィットするコンパクトサイズ。
sewing tools: aside from using them for crafts, sewing tools are great for wedding emergencies. if you can sew, bring your sewing tools to a wedding! i have needed sewing tools at two friends’ weddings. you never know what can go wrong, but the bride will always appreciate an extra needle and thread! and you don’t have to bring the entire pin cushion. just wrap a needle or two in some tissue along with a bobbin of white thread. 裁縫道具: ウェディングアイテム以外に結婚式の緊急事態ように裁縫道具は必需品!裁縫ができる方は、簡単な裁縫道具を結婚式に持っていくべき!これまで2人の友人の結婚式で必要になったことがありました。何が起きるか分からないのが結婚式(笑)、ご新婦様がきっと感謝してくれます。針山ごと持っていく必要はないので、針を1〜2本ティッシュに包んで白い糸をボビンに巻くなどでコンパクトに持ち歩けます。
glue: rubber cement may be great for gluing two pieces of thin paper or card stock together…. but from personal experience i feel that it’s not the most permanent of solutions. i’ve had many a time where the papers separated easily after a short period of time. for paper+paper, i prefer double stick tape which is much cleaner and less smellier.
although it can get messy, i love using elmer’s glue for many many items. the following are some examples. 糊: アメリカでは紙と紙の接着にゴム糊(ラバーシメント)が使用されることが多いように感じます。個人的にはオススメしません。結局、ゴムの接着力が弱まり、紙が剥がれるケースをよく見ます。紙と紙でしたら、私は両面テープを使うのが好きです。綺麗に仕上がり、使いやすく、臭わないのが利点です!
糊のお気に入りはアメリカで小学校などで使われるエルマーズグルー。日本ではクラフトボンドに近いと思いますが、水溶性で小さい子供が使えるほどかなり使いやすいものです。次のようなもので使用しました。
i used loads of elmer’s glue to make this popsicle stick boat/base for this cake topper. (how cute are the octopi??? the bride ordered them on etsy!) the foundation of this boat is a styrofoam block (not sure what it’s really for, but i found it in the artificial flower section at the local craft store), which i covered with kraft paper (to cover the spaces between the sticks).
here i used elmer’s glue to attach fabric to card stock and made this tuxedo hat. elmer’s glue or craft glue is great for porous materials like fabric or styrofoam, even wood, because the liquid can soak into the material and stick very well.
エルマーズグルーを使って、生地をカード紙に貼りました。それでタキシードハットを作成。クラフトボンド同様、ドロっとしたエルマーズは、木材、生地、発泡スチロールのような穴や隙間のある材料に液体が染み込んでいき、乾いたらなかなか外れない強度で仕上がります。
nail polish cap: i made this tiara out of wire (that i had just happened to be carrying in my toolbox) and this nail polish cap was the perfect size to mold it to!! who would’ve known! マニキュアの蓋: ティアラをマニキュアの蓋に合わせてワイヤー(たまたまツール箱に入っていたのです・・)で作りました。まさかマニキュアがこういうところで使えると思いもしませんでした!
this week on the #tbt #fbf blog, i bring to you a custom logo wedding invitation. it was an absolute pleasure to work with this couple, as they share the same taste as myself when it comes to colors, fonts, and simplicity.
the key points of this invitation’s design / デザインのキーポイントは:
1. wedding colors: olive, orange, and natural colored paper
ウェディングカラー:うぐいす、橙色、ナチュラルな紙色
2. a letterpress friendly design (the main invitation is printed with letterpress)
活版印刷(招待状本状が活版印刷)
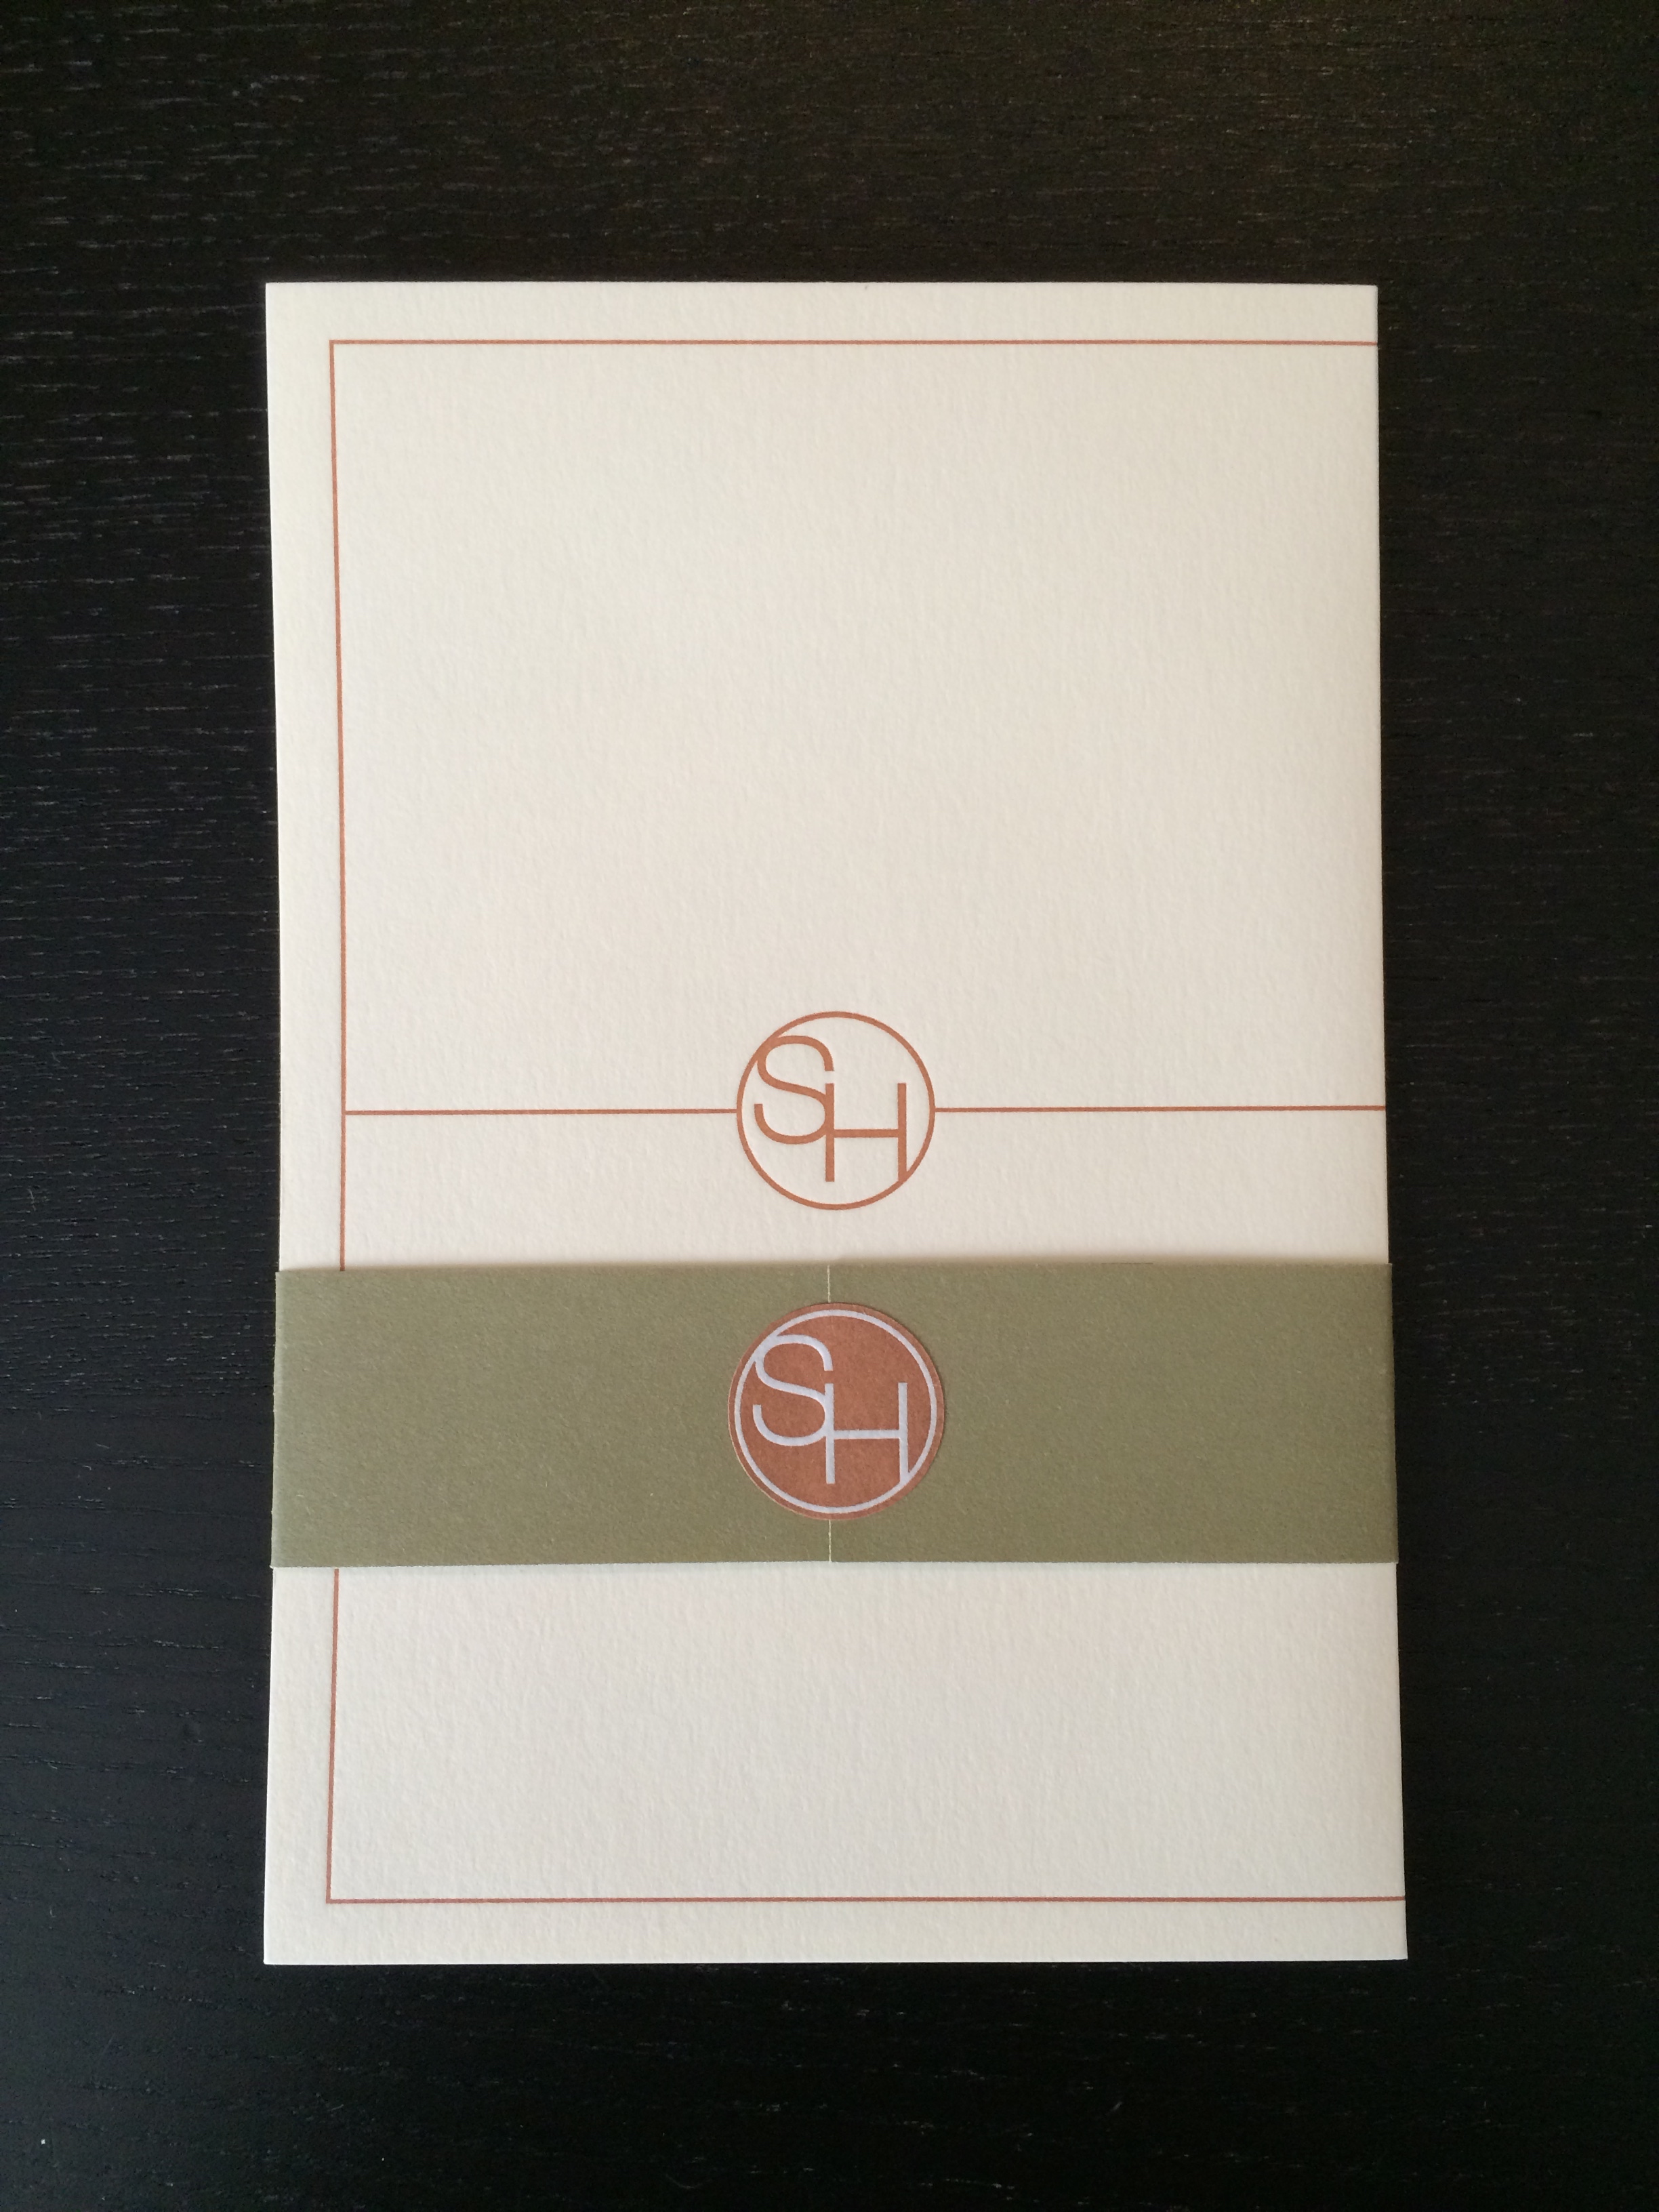
3. a simple logo for the “title” of their wedding “S+H”
“S+H” ウェディングのシンプルなロゴ
the couple loved the logo!! so they used it every chance they could throughout their wedding, which i will introduce in the coming weeks. since the actual invitation was printed in letterpress, i decided to take advantage of the depth and expanded the logo to cover the whole background of the inside. by using a lighter color, bolder line, and bigger size it allows the eye to focus on the front dimension (the invitation details).
when i work with invitation sets, i like to think of how the entire set looks put together. each individual card is important on it’s own (and can have varying design elements), but it’s like an equation that needs to add up to 100 in terms of color, layout, and especially in this case, geometric elements.
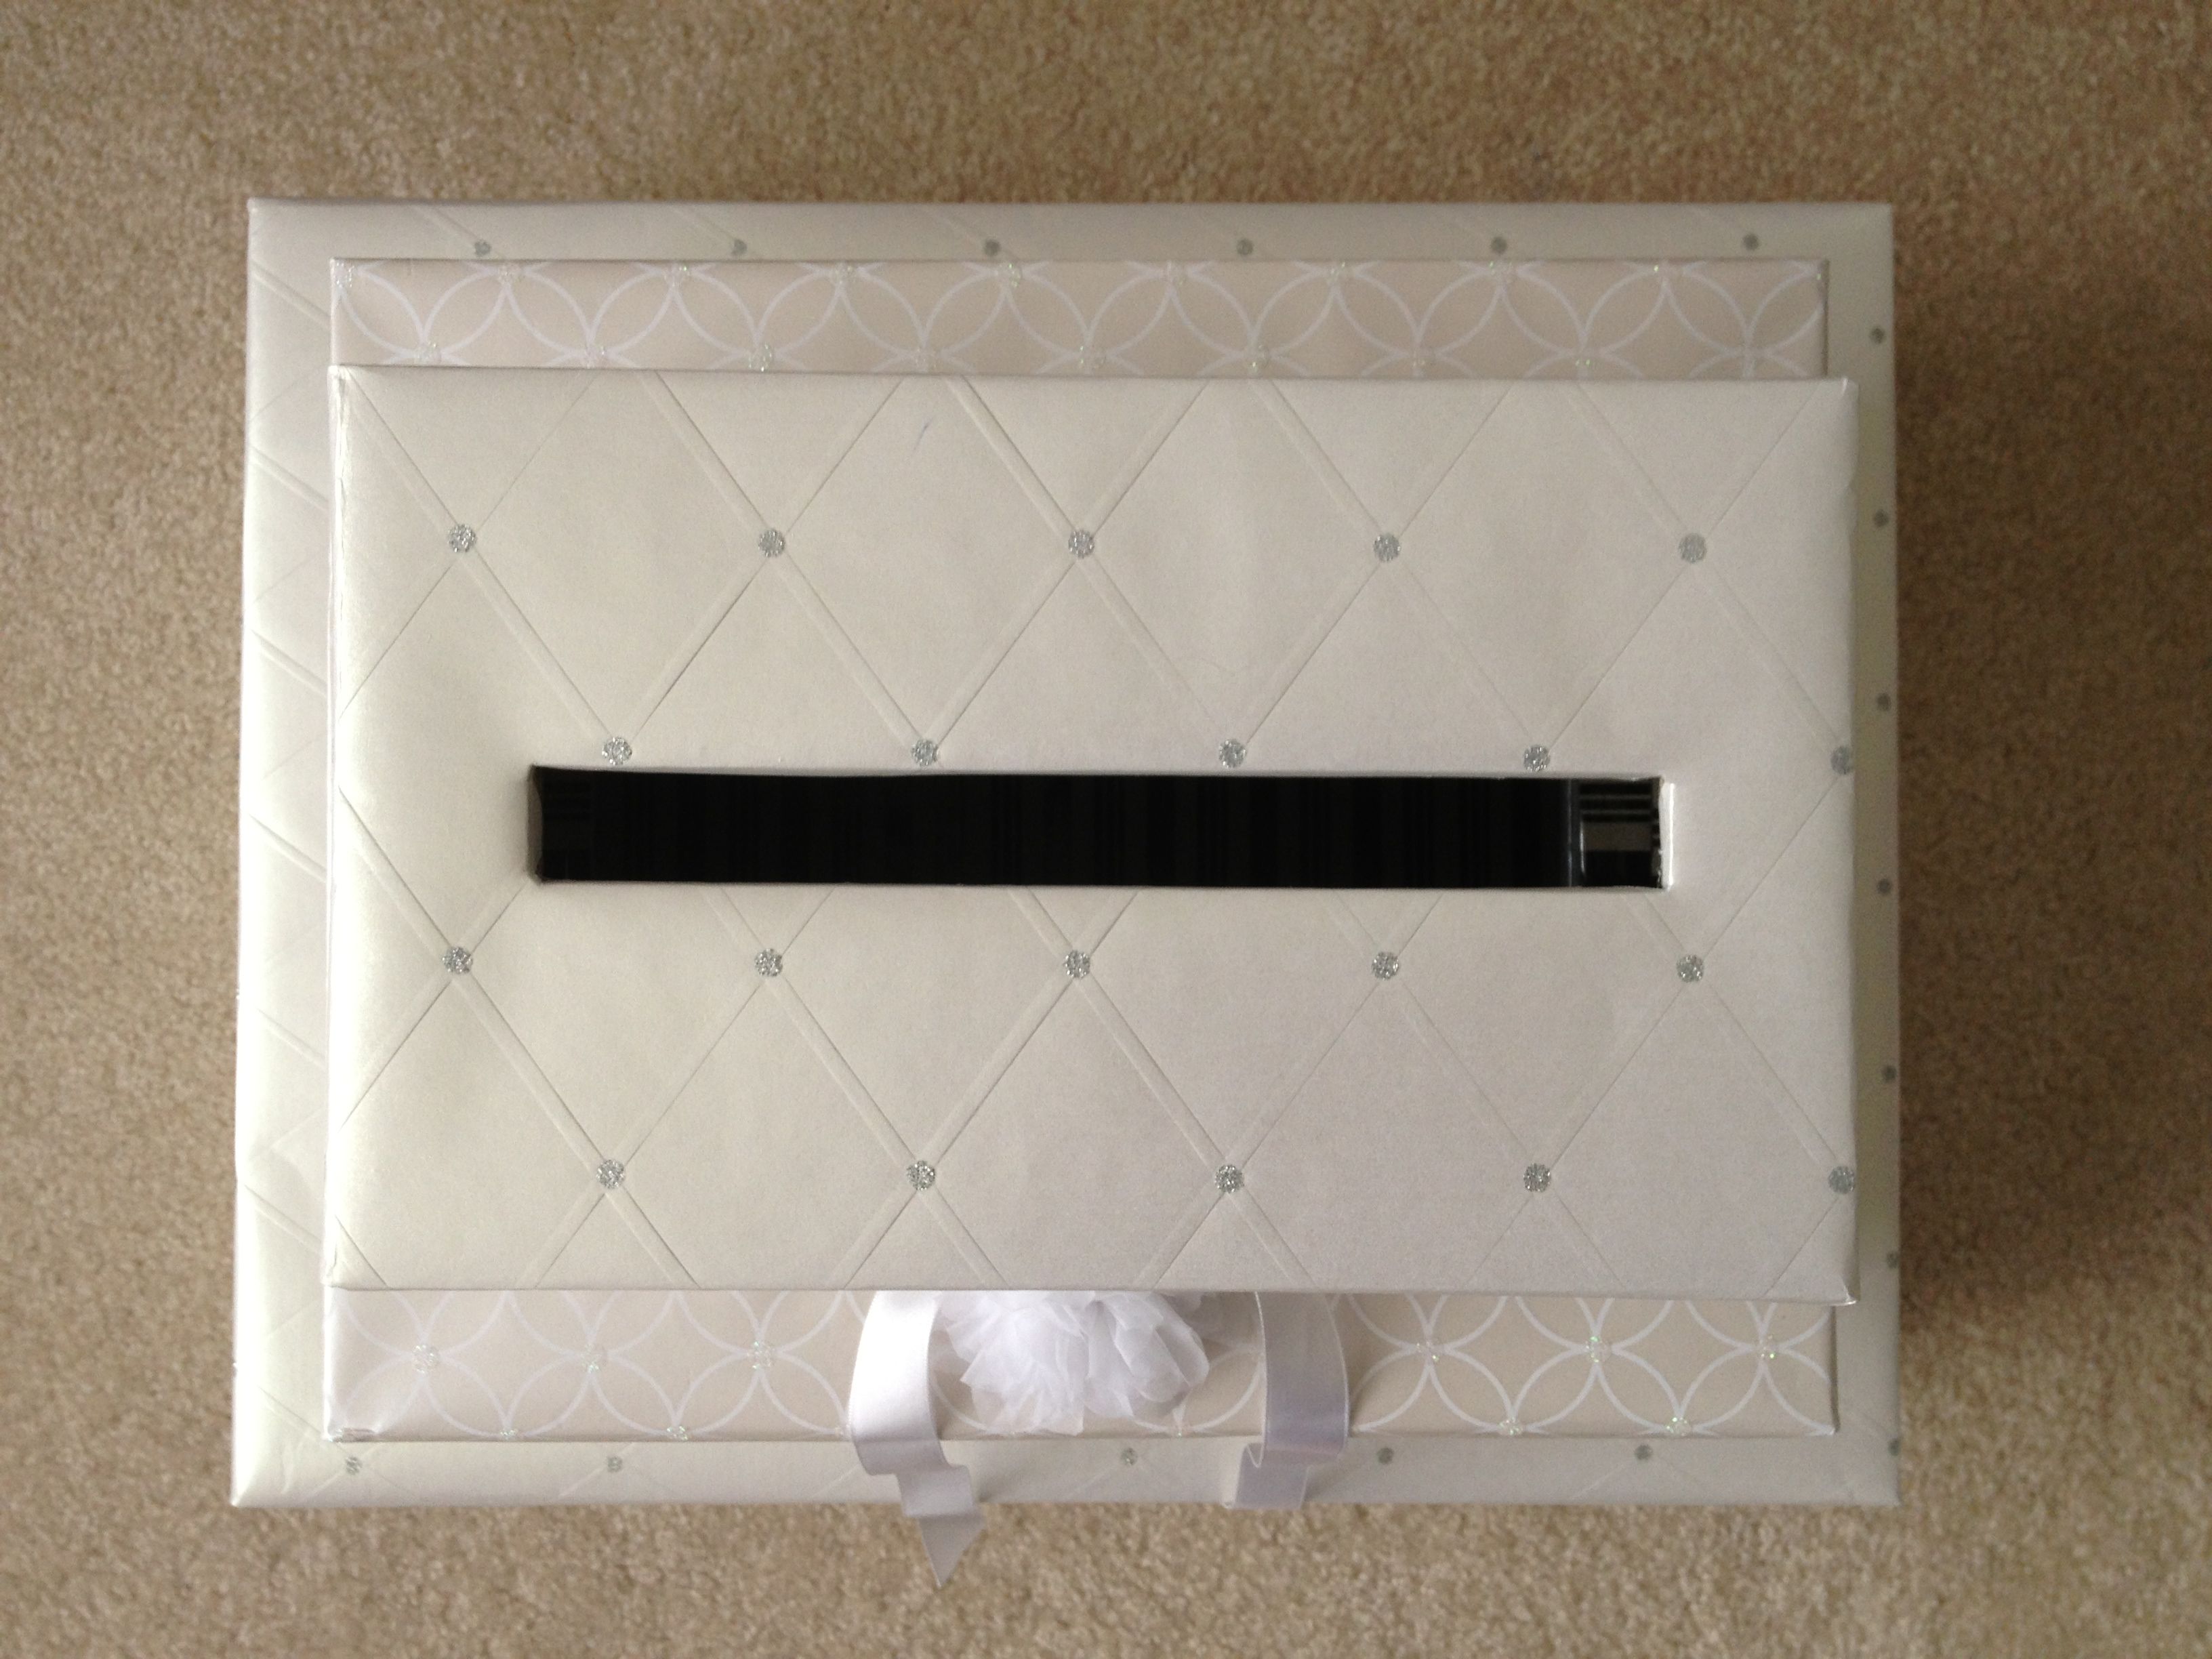
#tbt #fbf past wedding item post time! one last post about my friend’s blue & yellow wedding. here is the gift card box i made. she wanted something that represented a three-tier cake.
under all the beautiful wrapping paper (the bride and i fell in love with this wrapping paper to use for a previous friend’s wedding) is actually styrofoam board. wedding’s often bring mishaps and accidents, so to avoid any breakage, i chose styrofoam.
実は、ラッピングペーパーの下はフォームボードを使用しているのです。ウェディングには、アクシデントが付き物だったりします。ので、なるべく頑丈に仕上げるのにはフォームボードが良いのです。
of course there is a slot to insert cards, but the box also needs to be able to open. with a card stock hinge, i attached the top two tiers. the bottom base tier is for decoration.
グリーティングカードボックスは、カードの入れ口はもちろん必要ですが、取り出し口も必要です。カード紙のちょうつがいで1段目と2段目をつなげました(ベースとなる第3段は飾りです)。
this tulle flower acts as a “button” to tie the ribbon closure to.
チュールのお花を「ボタン」風に利用し、リボンで結びつけられる仕組みになっています。
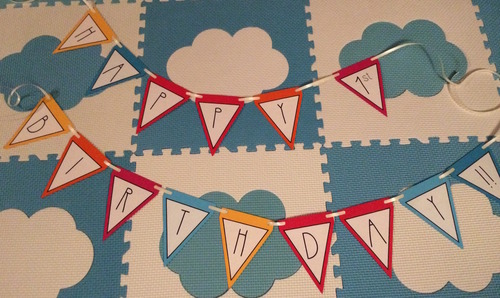
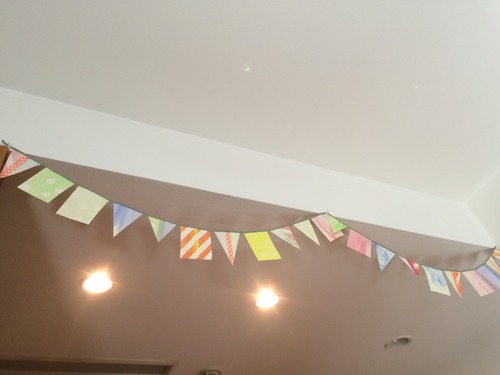
there are so many different styles of flag garlands. my last d.i.y. was about the type that the flags don’t move. for parties and garlands that have letters on them, i like flags that are moveable. it’s easier to adjust the space between the letters when decorating! here are two types that i’ve made before.
1. the easy peasy two hole punch type. / 超簡単穴あけパンチタイプ。
when making your garland, just make sure to leave space for the holes! you can punch the holes before cutting out the triangular shape (or just use rectangular flags).
フラグを切り出す際に、穴の分を計算して切り出すように!もしくは、先に穴を開けてから切り出す。(か、四角いままのフラグもかわいいですよ〜)
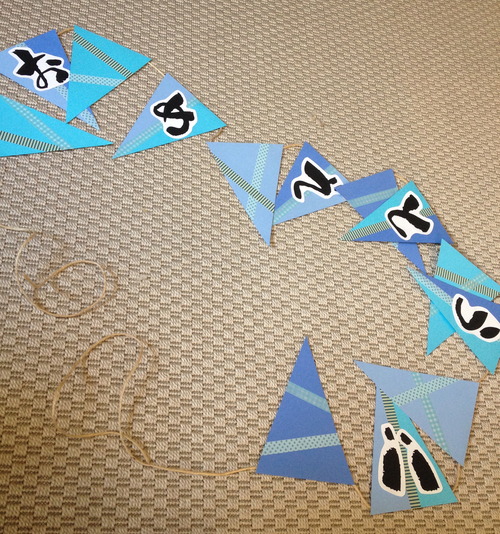
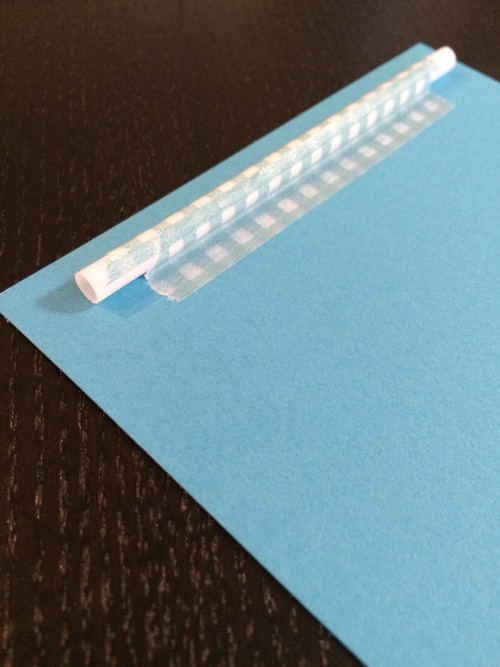
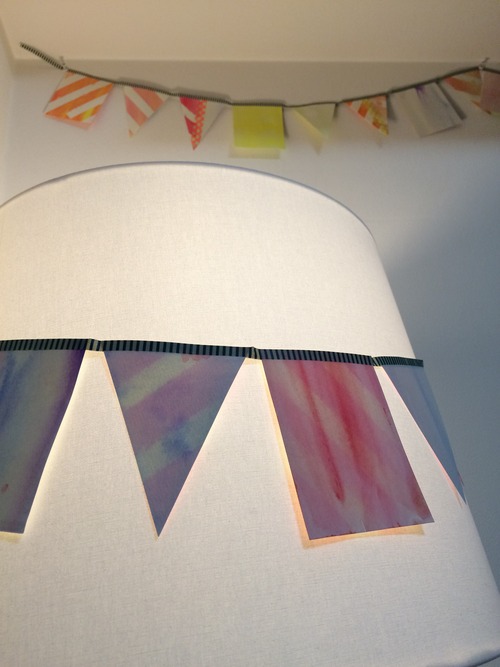
2. the hidden string type. / 紐隠しタイプ。
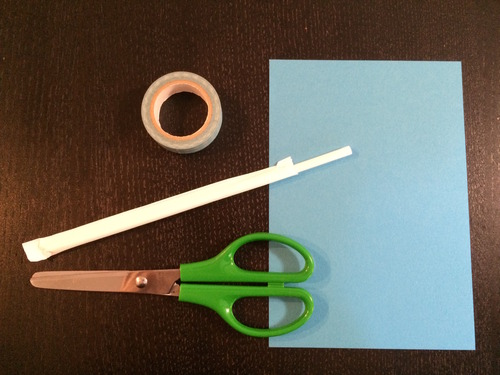
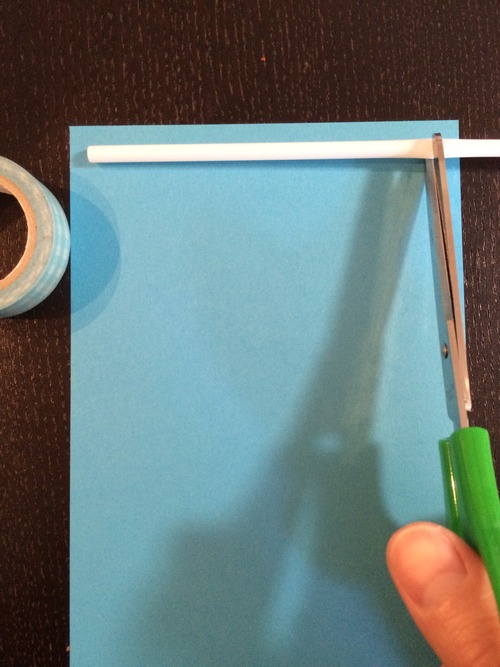
see below for photos. all you need are scissors, tape, and straws. cut the straw to the top width of the flag and tape! i don’t recommend glue as plastic straws can fall off easily. just string the flags and voila!
参考写真は下へおすすみください。必要なのは、ハサミ、テープ、ストロー。フラグの上端の幅にストローの長さを調節し、テープするだけ!のりだとプラスチックのストローがあまり固定されないので、あまりオススメできません。後は、紐を通すだけ!
those cute little flag garlands have been around for a while, and have also been popular for quite a while. so why d.i.y. now? because i’m sure the world can use one more.
what you need / 材料:
water color paper / 水彩画用紙
newspaper / 新聞紙
water colors (i used acrylic) / 水彩絵具(アクリル)
adhesive stickers to make patterns / 柄をつくるための貼ってはがせるシール
scissors / ハサミ
ruler / 定規
washi tape (the length of your garland) / 和紙テープ適量(ガーランドの長さ分)
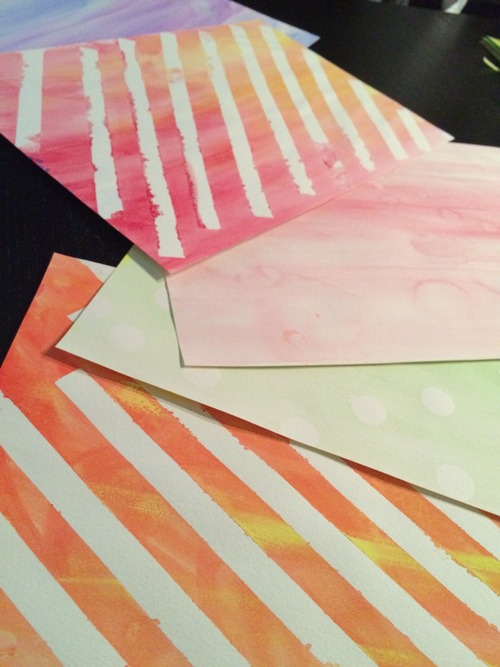
1. i decided to make a watercolor garland for the colorful yet soft feel. / 水彩ガーランドをすることによって、優しくてカラフルな色合いに仕上げてみました。
to make fun patterns, i made good use of old old old post-it tape and circle labels that are barely adhesive anymore…. / しばらく使っていない付箋テープとサークルラベルを利用して面白い柄を作ってみました!
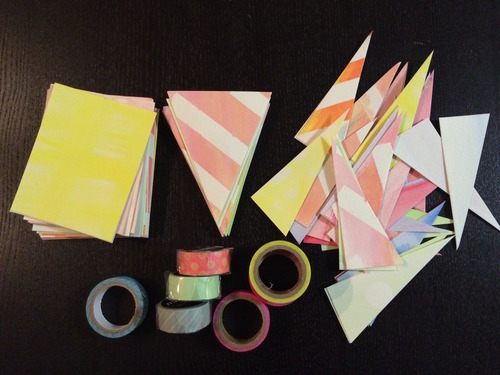
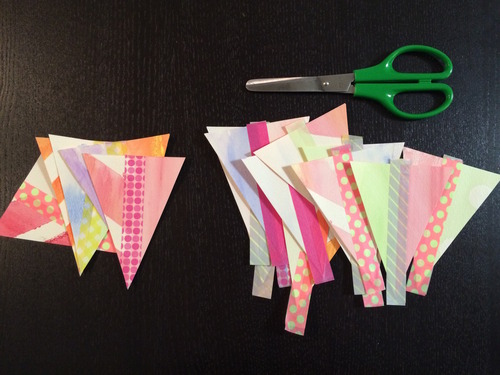
2. after painting both sides and letting it dry, cut 8cm × 10cm rectangles. a third of them i cut isosceles triangles out of, leaving me with a bunch of half triangles. / 両面とも塗ってから乾かし、8cm × 10cm の四角に切る。1/3は、二等辺三角形を切り出し、残った欠片をとっておく。
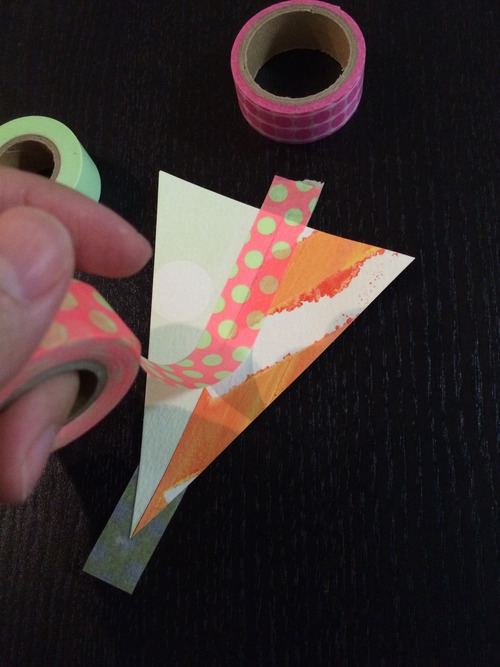
3. using the half triangles from the last step, tape two pieces together with washi tape to make more isosceles triangles. pairing different patterns and colored washi tape makes fun accents flags! / 和紙テープで余った欠片を2枚ずつ使って二等辺三角形を作る。違う柄と和紙テープを組み合わせることでアクセントフラグができます。
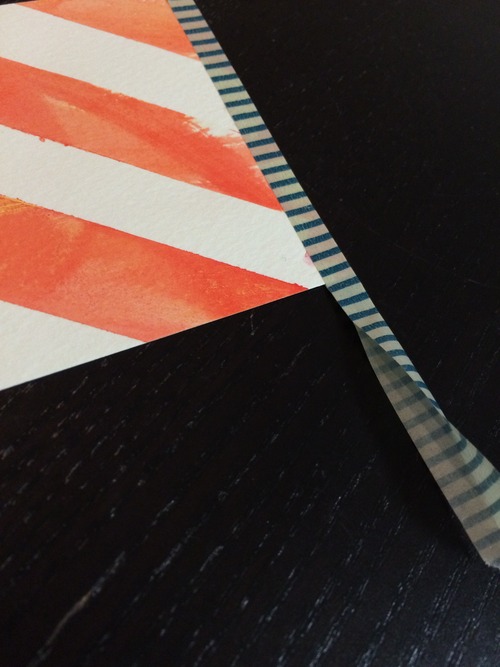
cut off the washi tape ends. / 最後に和紙テープの余った部分を切り取り、形を整える。
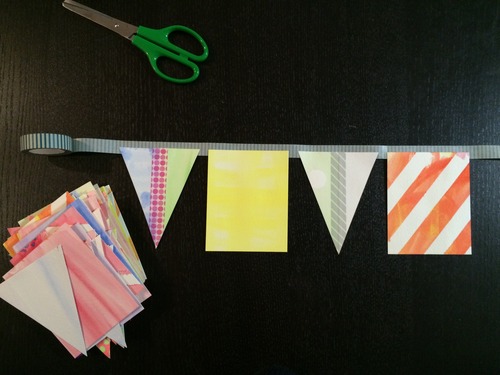
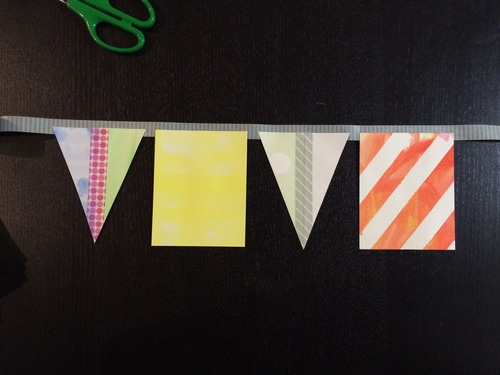
4. arrange flags so they are within the lower half of the washi tape. it’s better to have the flags within rather than on the halfway line for a clean finish later. there’s about 1~2 cm between the flags. / 1〜2cm間隔で和紙テープにフラグを置いていく。和紙テープの幅の半分以内に配置すると、和紙テープを折り返す時に綺麗に仕上がります。
5. fold the washi tape over after laying about 4~5 flags at a time. / フラグを4〜5枚置いたら和紙テープを折り返す。
FINISHED! / 出来上がり!
there you have it! a quick and easy project, great for birthday parties, weddings, baby / bridal showers, or just to make for fun. / 簡単ガーランドでした!お誕生日会、結婚式、ベビーやウェディング・シャワーにいかがでしょうか??

![[WEDDINGS] FOLIAGE INVITATION](http://www.peacelovetokyo.com/home/wp-content/uploads/2015/06/YKMM_circle_front_FINAL-400x400.jpg)
![[WEDDINGS] FOLIAGE INVITATION](http://www.peacelovetokyo.com/home/wp-content/uploads/2015/06/YKMM_circle_back_FINAL-400x400.jpg)
![[WEDDINGS] TOOLS OF THE CRAFT (CUTTER CUTTING BOARD AWL](http://www.peacelovetokyo.com/home/wp-content/uploads/2015/06/IMG_7524のコピー-400x252.jpg)
![[WEDDINGS] TOOLS OF THE CRAFT (RULER & CUTTER)](http://www.peacelovetokyo.com/home/wp-content/uploads/2015/06/IMG_4834-300x400.jpg)
![[WEDDINGS] TOOLS OF THE CRAFT (SEWING)](http://www.peacelovetokyo.com/home/wp-content/uploads/2015/06/IMG_4476-300x400.jpg)
![[WEDDINGS] TOOLS OF THE CRAFT (GLUE)](http://www.peacelovetokyo.com/home/wp-content/uploads/2015/06/IMG_4380-279x400.jpg)
![[WEDDINGS] CAKE TOPPER BOAT](http://www.peacelovetokyo.com/home/wp-content/uploads/2015/06/IMG_4999-322x400.jpg)
![[WEDDINGS] CAKE TOPPER BOAT](http://www.peacelovetokyo.com/home/wp-content/uploads/2015/06/IMG_3889-400x247.jpg)
![[WEDDINGS] TOOLS OF THE CRAFT (GLUE)](http://www.peacelovetokyo.com/home/wp-content/uploads/2015/05/225679_202715119763614_7635963_n-e1432877311554-400x290.jpg)
![[WEDDINGS] TOOLS OF THE CRAFT (NAIL POLISH)](http://www.peacelovetokyo.com/home/wp-content/uploads/2015/05/227923_202715079763618_320469_n-e1432877376432-400x303.jpg)
![[WEDDINGS] GIFT DECORATION](http://www.peacelovetokyo.com/home/wp-content/uploads/2015/05/namilyfrogs2-293x400.jpg)
![[WEDDINGS] GIFT DECORATION](http://www.peacelovetokyo.com/home/wp-content/uploads/2015/05/CIMG2441-のコピー-e1432877234230-299x400.jpg)
![[WEDDING] S+H LOGO WEDDING INVITATIONS](http://www.peacelovetokyo.com/home/wp-content/uploads/2015/04/FullSizeRender-2-400x300.jpg)
![[WEDDING] S+H LOGO WEDDING INVITATIONS](http://www.peacelovetokyo.com/home/wp-content/uploads/2015/04/IMG_41981-400x300.jpg)
![[WEDDING] S+H LOGO WEDDING INVITATIONS](http://www.peacelovetokyo.com/home/wp-content/uploads/2015/04/IMG_41971-300x400.jpg)
![[WEDDING] S+H LOGO WEDDING INVITATIONS](http://www.peacelovetokyo.com/home/wp-content/uploads/2015/04/FullSizeRender-400x290.jpg)
![[WEDDING] TIERED GIFT CARD BOX](http://www.peacelovetokyo.com/home/wp-content/uploads/2015/04/IMG_41922-400x368.jpg)
![[WEDDING] TIERED GIFT CARD BOX](http://www.peacelovetokyo.com/home/wp-content/uploads/2015/04/IMG_41912-400x357.jpg)
![[WEDDING] TIERED GIFT CARD BOX](http://www.peacelovetokyo.com/home/wp-content/uploads/2015/04/IMG_3876-のコピー-382x400.jpg)
![[WEDDING] TIERED GIFT CARD BOX](http://www.peacelovetokyo.com/home/wp-content/uploads/2015/04/IMG_4197-300x400.jpg)
![[WEDDING] TIERED GIFT CARD BOX](http://www.peacelovetokyo.com/home/wp-content/uploads/2015/04/IMG_4198-300x400.jpg)
![[WEDDING] TIERED GIFT CARD BOX](http://www.peacelovetokyo.com/home/wp-content/uploads/2015/04/IMG_41931-300x400.jpg)
![[WEDDING] TIERED GIFT CARD BOX](http://www.peacelovetokyo.com/home/wp-content/uploads/2015/04/IMG_4195-300x400.jpg)
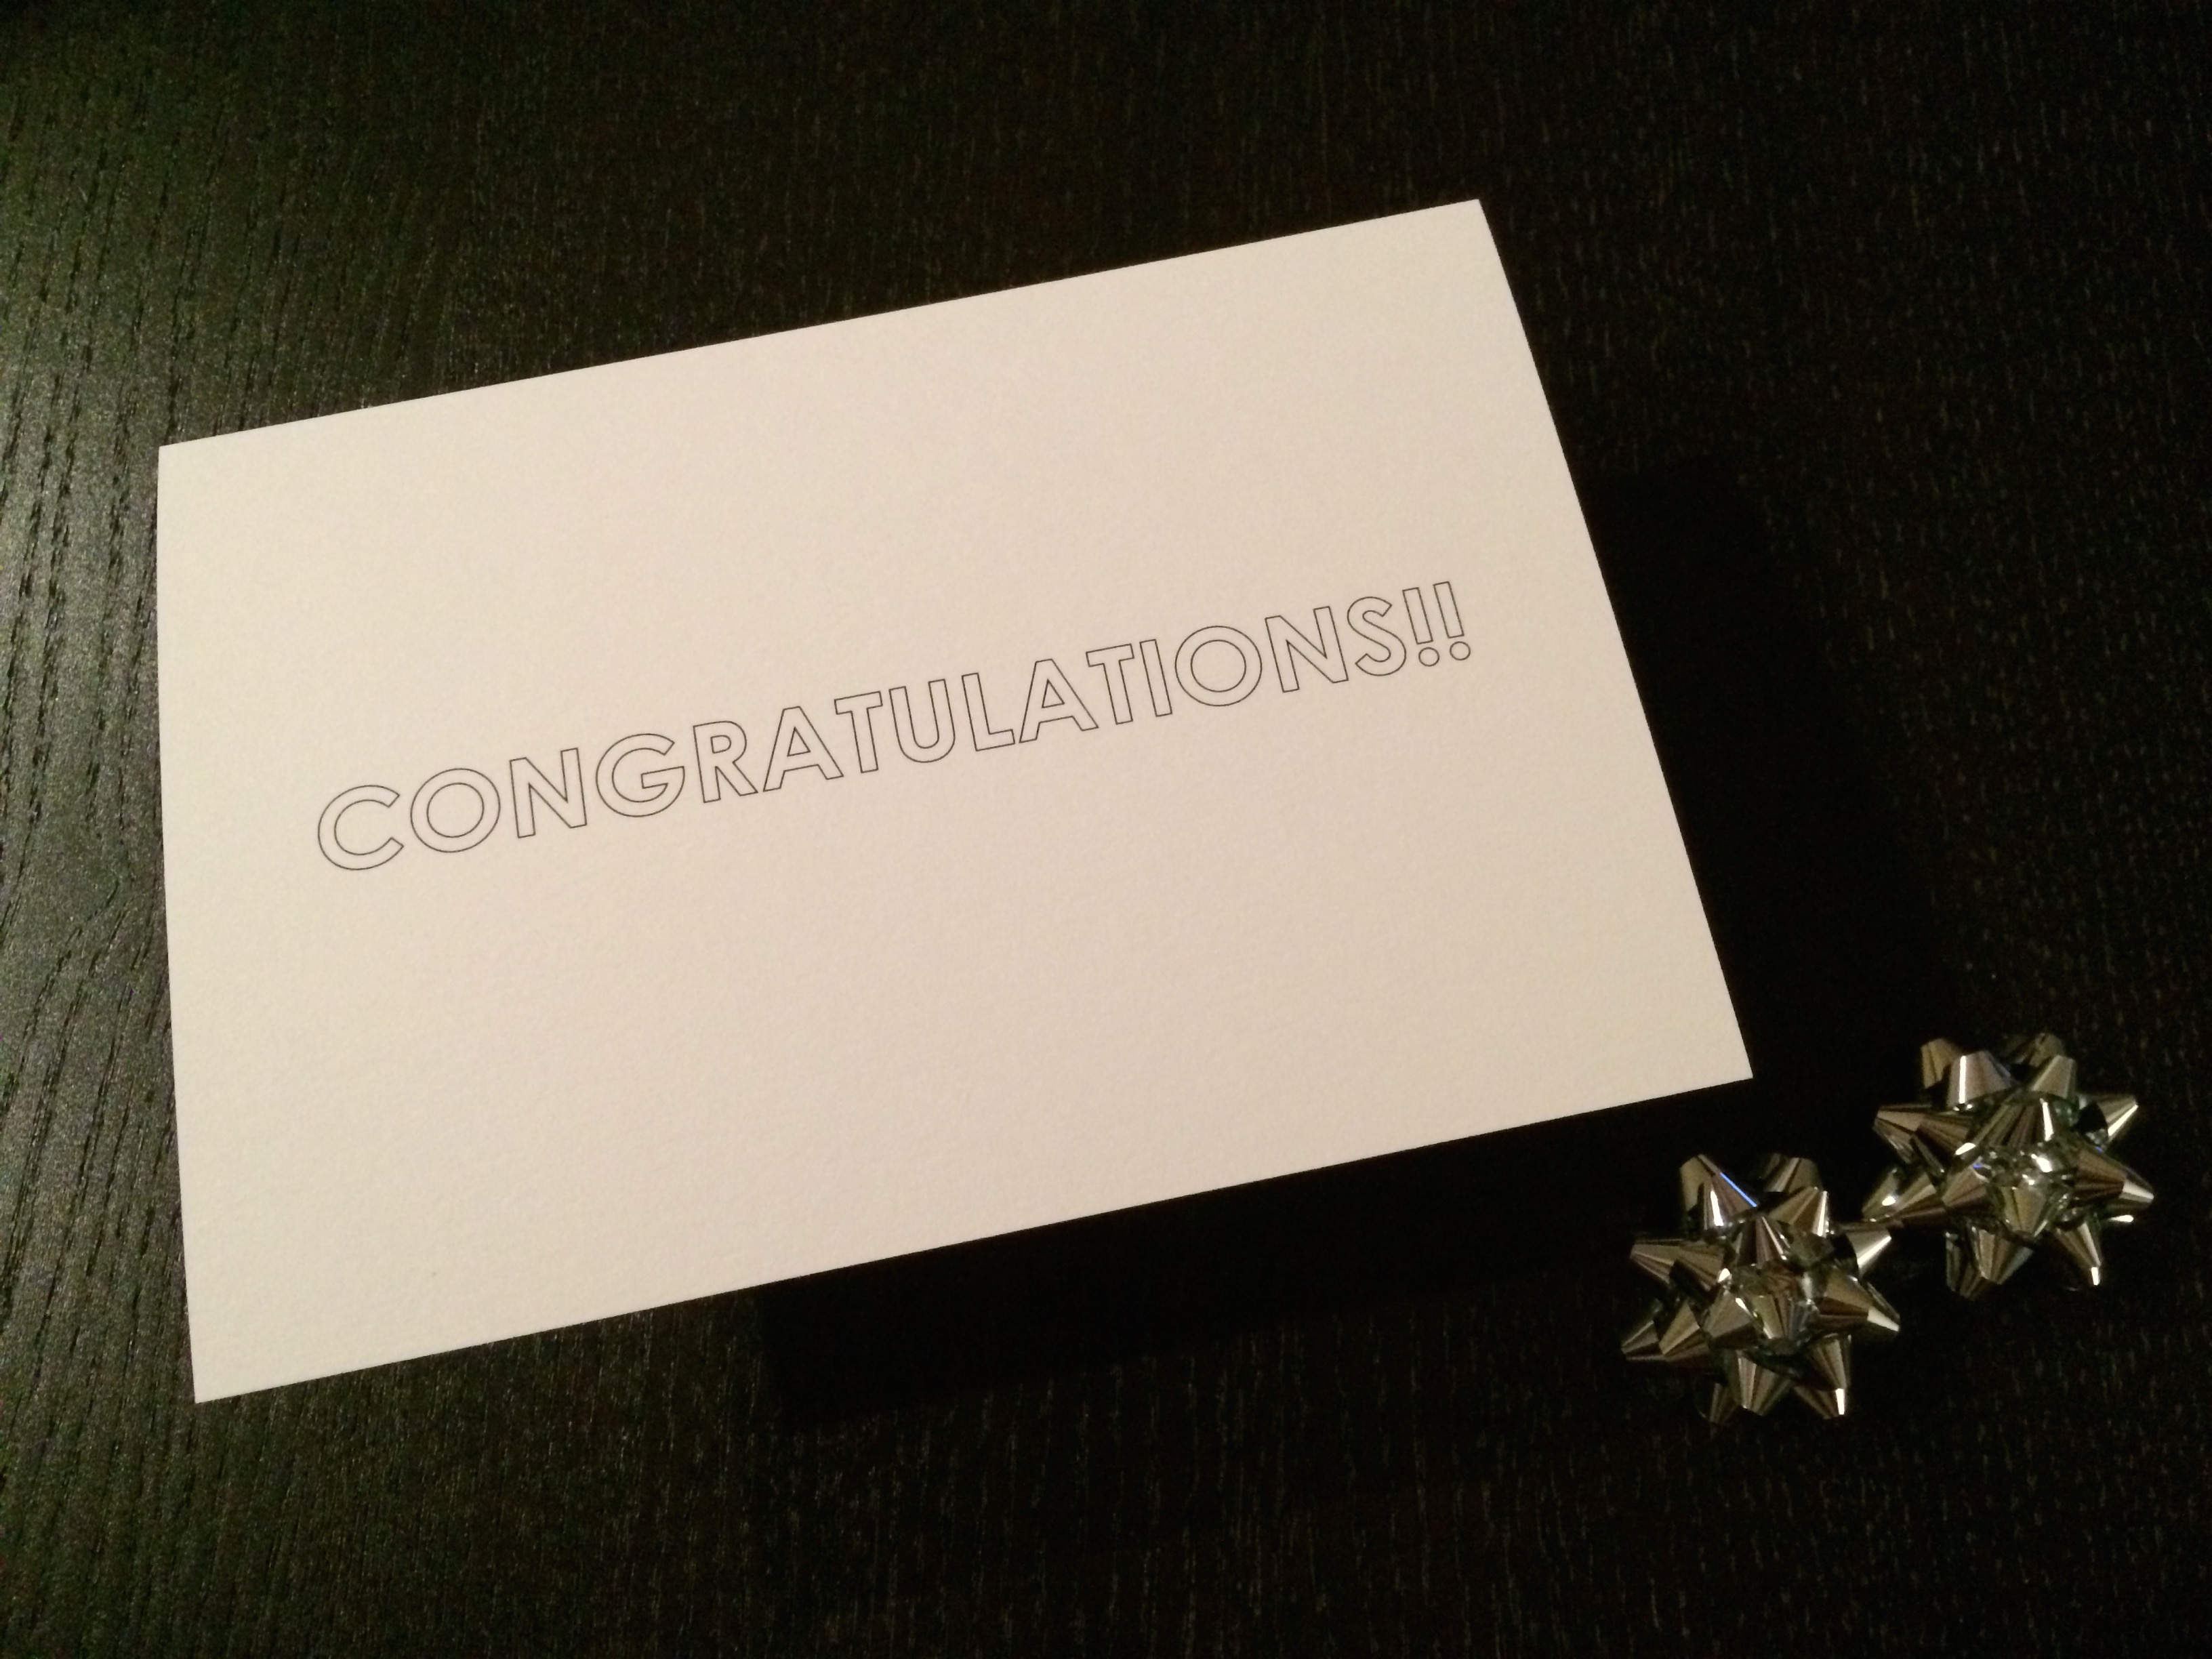
![[ETSY] CONGRATULATIONS CARDS](http://www.peacelovetokyo.com/home/wp-content/uploads/2015/04/IMG_4795-400x300.jpg)