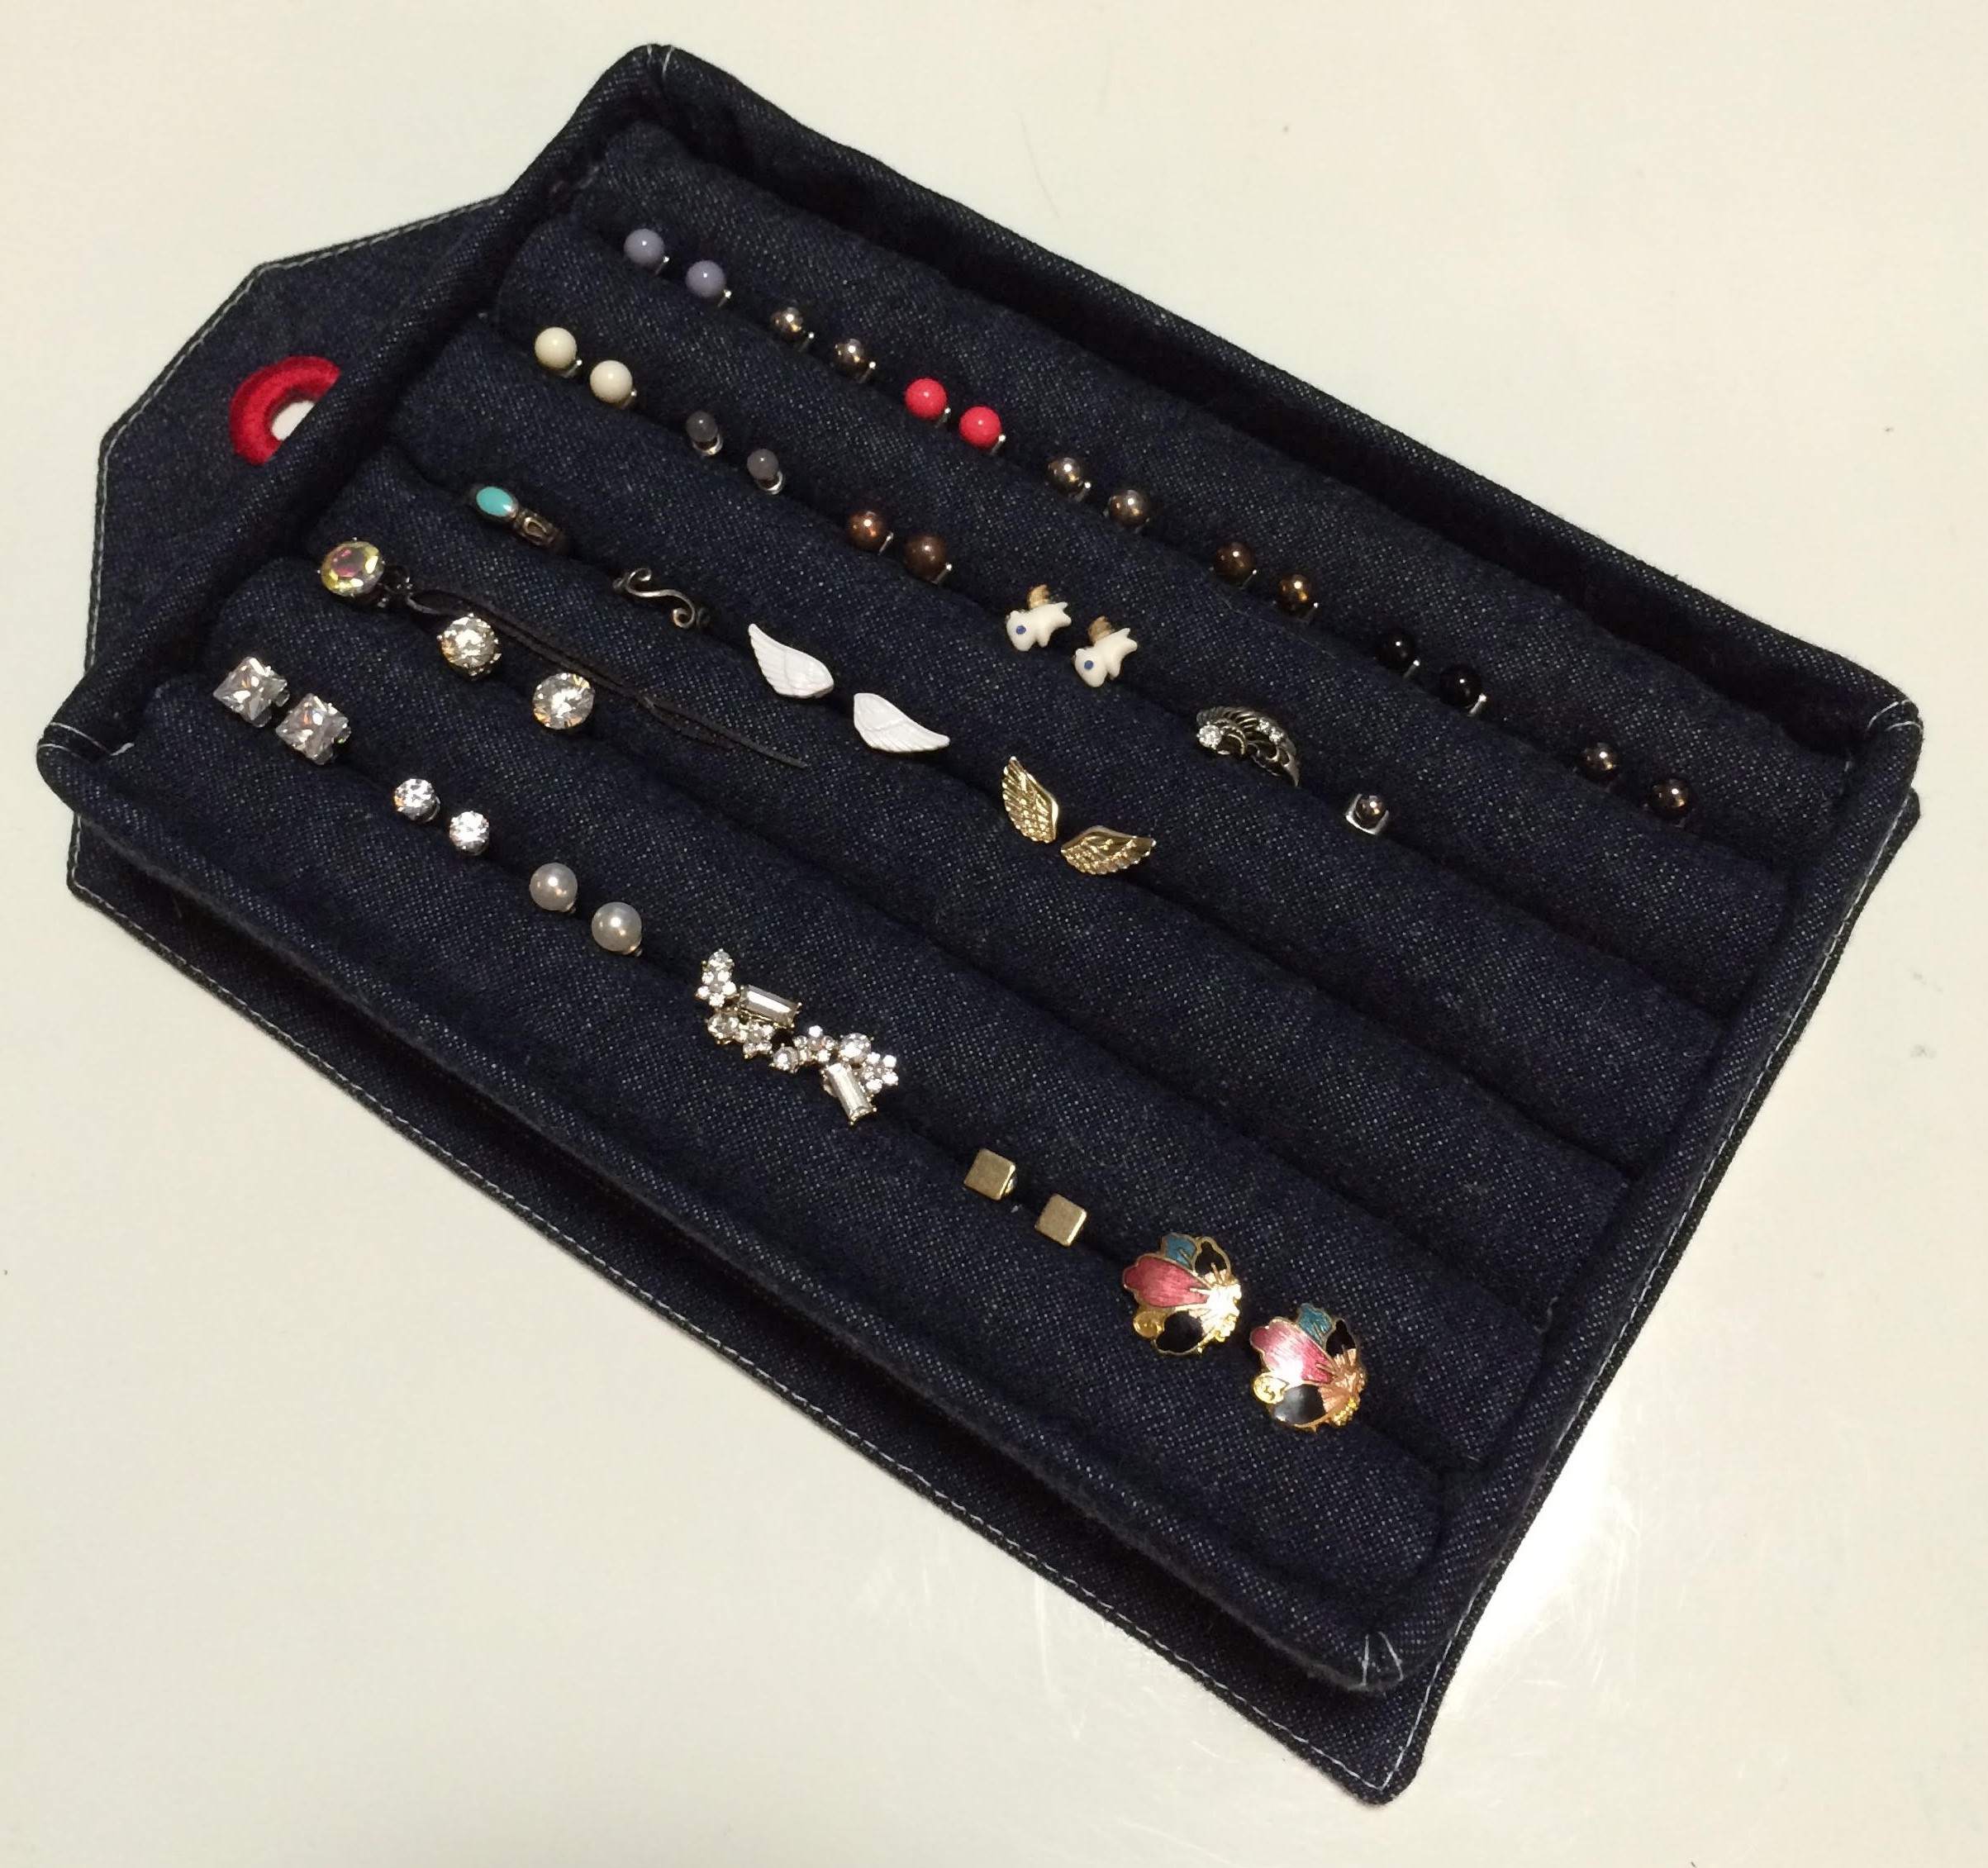
[d.i.y.] ring and stud earring holder

one day as i was rushing to get ready, i spilled a bunch of my post/stud earrings that didn’t have an organized place to rest but a scattered jewelry tray. i had spent quite a while looking for the perfect earring holder and one that i could hang on a wall to save counter space around my sink. finally, i came across delightfully diy‘s wonderful post on earring storage. based on that, i thought of attaching mine to a wall-hanging base. i apologize that this post isn’t as thorough and complete with measurements, but i hope this can at least help guide you through a d.i.y. project of your own!

ある日、出かける支度をしていたら、ごちゃごちゃのアクセサリートレイの中からスタッズピアスを探そうとして、バラバラに散らかしてしまいました。それからしばらくピアスの整理方法を色々探していました。特にポイントは洗面所のカウンターの場所をとらない壁掛けタイプの物でした。そこで見つけたのは、delightfully diyのd.i.y.ピアスホルダー。これを元に壁掛け土台つきの物を考えました。今回のd.i.y.は、寸法がないのですが、少しでも皆さまのオリジナルd.i.y.アイデアにつながれば嬉しいです。

LET’S START! / 始めよう!

what you need / 材料:
denim fabric (for base, tray covering, and “cushion” rows) / デニム生地 (土台用、トレーカバー、クッション用)
acrylic tray / アクリルトレイ
cardboard (adjust measurements according to tray) / ダンボール (寸法はトレイに合わせて)
pencils or wooden dowels (adjust number and measurements according to tray) / 鉛筆、細めの木の棒(数と長さはアクリルトレイに合わせて)
quilt batting / キルト用の綿(薄め)
ruler / 定規
scissors / ハサミ
sewing machine / ミシン
glue gun / グルーガン
grommet / ハトメ
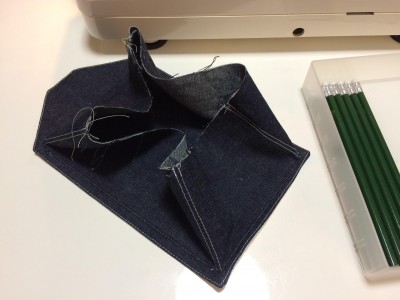

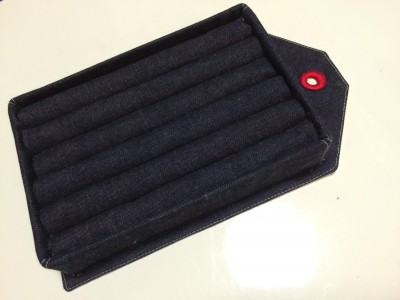
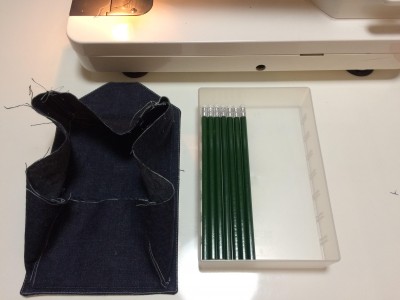
1. i started off by making a denim covering for the tray (this one from MUJI was the perfect size to fit the pencils i could find) and attached it to a denim backing that i could eventually punch a hole in. / 鉛筆の長さにちょうどあった無印良品のトレイを使っています。まずは、デニムの土台とトレイのカバーを作り、合体させました。土台は最後に壁掛け用の穴を開けられるようにトレイカバーを配置しました。
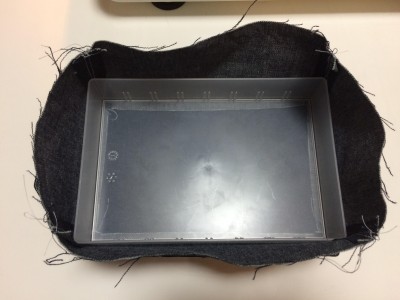

2. insert the tray into covering and fold sides in. / トレイを入れ、デニムのカバーを中に折り込む。
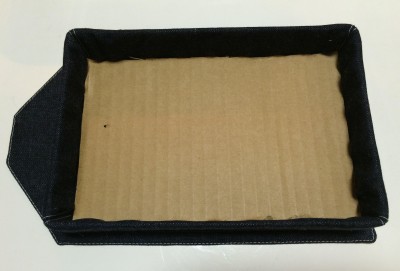

3. cut cardboard to fit snugly in the tray. i first put hot glue on the denim in the base before inserting the cardboard. without the cardboard, i was afraid the glue may not permanently attach to the acrylic tray and thus the “cushion” rows could possibly detach easily. / ダンボールをトレイの中にぴったり入るようにカットし、デニムにグルーガンで糊をつけてからはめ込む。ダンボールに糊がしっかりくっつく為、クッションも固定されます。
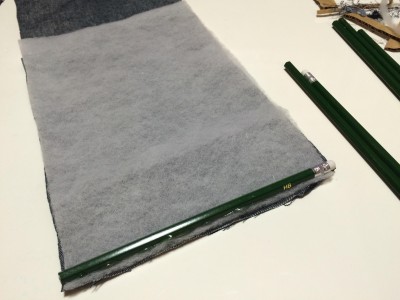

4. layer the batting on top of the denim (the batting is about 2/3 the length of the denim), place hot glue about a quarter inch/0.5 cm from the edge of the batting and denim. place the pencil on the glue and roll. finish the roll with another line of hot glue at the end edge of the denim. repeat to make 6 rows (or as many as needed to fill tray). / デニムの上にキルト綿を手前の端に合わせてのせる。(綿はデニムの2/3の長さです。)端から0.5cmの位置に平行してグルーガンで糊をのせる。糊の上に鉛筆をのせて、生地を巻く。糊で端を止める。他の6本(本数はトレイが隙間なく埋まるまで)も同じように作る。
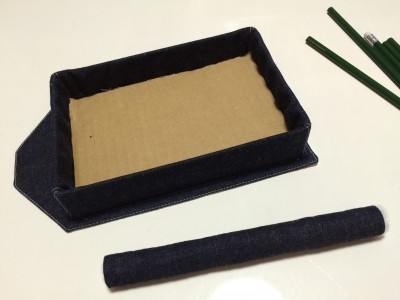

5. use glue gun to attach the 6 rows onto the cardboard base. / グルーガンで6本のクッションをダンボールに止める。
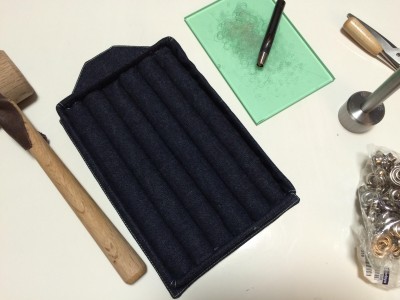


6. open hole and finish! / 土台のデニムにハトメで穴を開けて完成!

FINISHED! / 出来上がり!
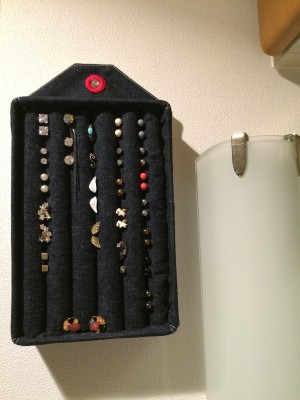
afternote / 注意点
※ when using denim, please beware that dark colored denim will most likely stain light colored walls. for this reason, i personally used a white-based fabric on the back. / 濃いめのデニムを使用する際は、壁に色移りする可能性が高いです。その為、私は、壁側にあたる裏面を白地の物にしました。

※※ ideally i would have liked horizontal rows on this holder, but i had a limited amount of space on the wall and didn’t have access to the right pencils/dowels. the best supplies i could find at the time were these pencils that fit this tray vertically. / 理想的には縦型のクッションではなく、横型の物が良かったです。が、ちょうど良いトレイ+ちょうど良い鉛筆の組み合わせはこちらしか見つからなかったので、今回は縦型にしました。

[new on etsy] simple holiday cards

come visit me in my ETSY shop! / ETSY ショップをご覧ください〜

>>> peace . love . tokyo <<<

2015 holiday cards are a new addition to the colorable greeting card series!
デコれるカードシリーズに、新商品が仲間入り♬ 2015年版クリスマスカード!

[ETSY] HAPPY HOLIDAYS 2015
H A P P Y  H A P P Y
H A P P Y  H O L I D A Y S . . .

[ETSY] HAPPY HOLIDAYS 2015
. . . T O  Y O U !


|| 2014 HOLIDAY CARDS NOW ON SALE! ||
|| 2014年版クリスマスカードはセール開催中! ||


[d.i.y.] last minute halloween garland

so Halloween this year is on a weekend… meaning a bigger turn out for your Halloween daytime parties… meaning after a week of work… you have pretty much zero time to prepare original decorations….. today, i myself in the same dilemma came up with a easy DIY for a Halloween garland, to make your holiday home feel a little more festive with a little effort. (see parentheses for simpler options to make life a little easier for you!)

今年のハロウィンは、週末になりますね…. ハロウィンパーティーを企画している方は、たくさんの方が昼間からみえることでしょう。しかし、一週間のお仕事を終えた所で、明日の飾り付けとか考えるのもやっと… 私もそんなシチュエーションの真っ只中。なので、簡単、オリジナル、ハロウィンガーランドのDIYを考えました!(カッコ内は、シンプルな材料を書いております。)

[D.I.Y.] HALLOWEEN GARLAND
LET’S START! / 始めよう!

what you need / 材料:
orange patterned card stock (B4 size) x 5 / オレンジ色の柄の厚紙 (B4 size) x 5
(as long as it’s a rectangular shape, size is not essential. smaller paper will result in smaller flags. /
紙は、長方形であればいいです。サイズが小さければ、フラグが小さくなります。)

if you have extra time you can make your own patterned card stock:
時間があればオリジナルの柄をお作りください:
B4 size water color paper × 5 / B4 水彩画用紙 × 5
newspaper / 新聞紙
water colors (i used acrylic) / 水彩絵具(アクリル)

ruler / 定規
scissors / ハサミ
halloween colored washi tape (or black colored tape) / ハロウィン色和紙テープ適量 (もしくはシンプルに黒色テープ)
black card stock (or black marker) / 黒い厚紙 (もしくは、黒いマーカー)
glue / のりやボンド
twine / 麻紐

// makes 20 flags (14 for H A P P Y H A L L O W E E N + 1 between the two words + 2 for beginning + 2 for end = 19 plus 1 left over)
計 20 フラグ (H A P P Y H A L L O W E E N で 14枚 + 間に 1枚 + あたまの 2枚 + おわりの 2枚 = 19枚 と あまり1枚) //

[D.I.Y.] HALLOWEEN GARLAND
(SKIP THIS PROCESS IF YOU HAVE ORANGE PATTERNED PAPER / オレンジ色の柄の厚紙のご用意があれば、こちらを飛ばしてください)
1. if you decided to use water colors, dry the paint. / 水彩画で柄を作られた場合は、十分乾かしてください。
the first d.i.y flag garland i did also used water colors, for a softer feel. this time, i’m using water colors to play with the bold and soft contrasts. / 初めて作ったガーランドは、優しい印象のため水彩柄にしましたが、今回はカラーの強弱をつけるために水彩にしてみました。

[D.I.Y.] HALLOWEEN GARLAND
2. once your paper is dried and ready, fold them length-wise (hot dog style). / 紙が乾きましたら、長い辺に沿って半分に折る。

[D.I.Y.] HALLOWEEN GARLAND
3. measure and cut the folded paper into fourths. / 長い辺に沿って4当分に紙を切る。

[D.I.Y.] HALLOWEEN GARLAND
4. washi-tape (or black tape) the edges opposite of the folded side. / 短い辺同士を和紙テープ(もしくは、黒色テープ)で止める。

[D.I.Y.] HALLOWEEN GARLAND
(SKIP THIS PROCESS IF YOU HAVE A BLACK MARKER / 黒いマーカーのご用意がある場合はこちらを飛ばしてください)
5. sketch letters on black card stock. if using a pencil to sketch, i recommend drawing the letters (flip the letters horizontally for P, L, E, N) on the back so as not to leave pencil marks on the front side. / 黒い厚紙に文字を描く。できれば、裏面に描いた方が、仕上がり面に出ないのでよりきれいに仕上がります。(P、L、E、Nは、左右を逆に!)

[D.I.Y.] HALLOWEEN GARLAND
6. cut out and glue letters onto flags. if you have a black marker, draw your letters directly onto flags. / 文字を切り抜き、フラグにのりで貼る。マーカー使用の場合は、直接フラグに描く。

[D.I.Y.] HALLOWEEN GARLAND
7. thread the flags with twine. / 麻紐を通す。

[D.I.Y.] HALLOWEEN GARLAND
8. tape the twine to the inside of the flags on the folded side. / フラグの折れ目の内側に麻紐をテープで止める。

[D.I.Y.] HALLOWEEN GARLAND
(without the tape on the inside, the flags will go haywire… / テープで止めないと、フラグが重なって大変なことに…)

[d.i.y.] halloween flag garland // ハロウィンフラグガーランド
FINISHED! / 出来上がり!
fast, easy, simple! i hope this helps to make Halloween preparations slightly easier for you! / 簡単、早い、シンプル!これで、少しでもハロウィンの飾り付けの準備が楽になるといいです〜

how i use my greeting cards

on both my etsy and creema shops, i feature a number of greeting cards. i originally decided to print and sell extras of the cards i wanted to send to friends and family. the most recent of them are the congratulations cards, which with the wave of newborns amongst my closest loved ones, i have made good use of. today, i want to introduce to you samples of how i’ve used my own greeting cards.

etsycreema それぞれの私のショップでは、様々なグリーティングカードを販売しています。もともと販売しようと思いついたのは、個人的にプリントして使っていたカードを世の皆さまも使えないかなー、と考えたところからです。最近では、私の周りで結婚や出産をされる家族・友人が多く、つい先日のブログでもご紹介しました『コングラチュレーションカード』(お祝いカード)が活躍しています!今日はそんなグリーティングカードの使用例をお見せしたいと思います。


h a p p y  b i r t h d a y
// on etsy | on creema //

[SHOP] HAPPY BIRTHDAY SAMPLE
this one features a family of stuffed octopi figures that my friend ordered on etsy for her wedding cake toppers (then for their baby later). i apologize that i can’t credit the etsy seller who made these figures, since i’m not sure who it is, but if anybody knows, i am more than happy to credit the seller so please email me!
こちらのカードは、友人の結婚式のケーキトッパーに使ったタコさんのぬいぐるみカップルをフィーチャリングしました。ベビーが生まれてからタコちゃんベビーも仲間入りしたので、もちろん一緒にお描きしました。

[SHOP] HAPPY BIRTHDAY SAMPLE
infinite happy birthday’s for my mother / 母へひたすらハッピーバースデー

[SHOP] HAPPY BIRTHDAY SAMPLE
flower bouquet for my bestie who moved overseas / 海外に引っ越した友人へ、絵の花束


c o n g r a t u l a t i o n s
// etsy exclusive item //

[ETSY] CONGRATULATIONS SAMPLE
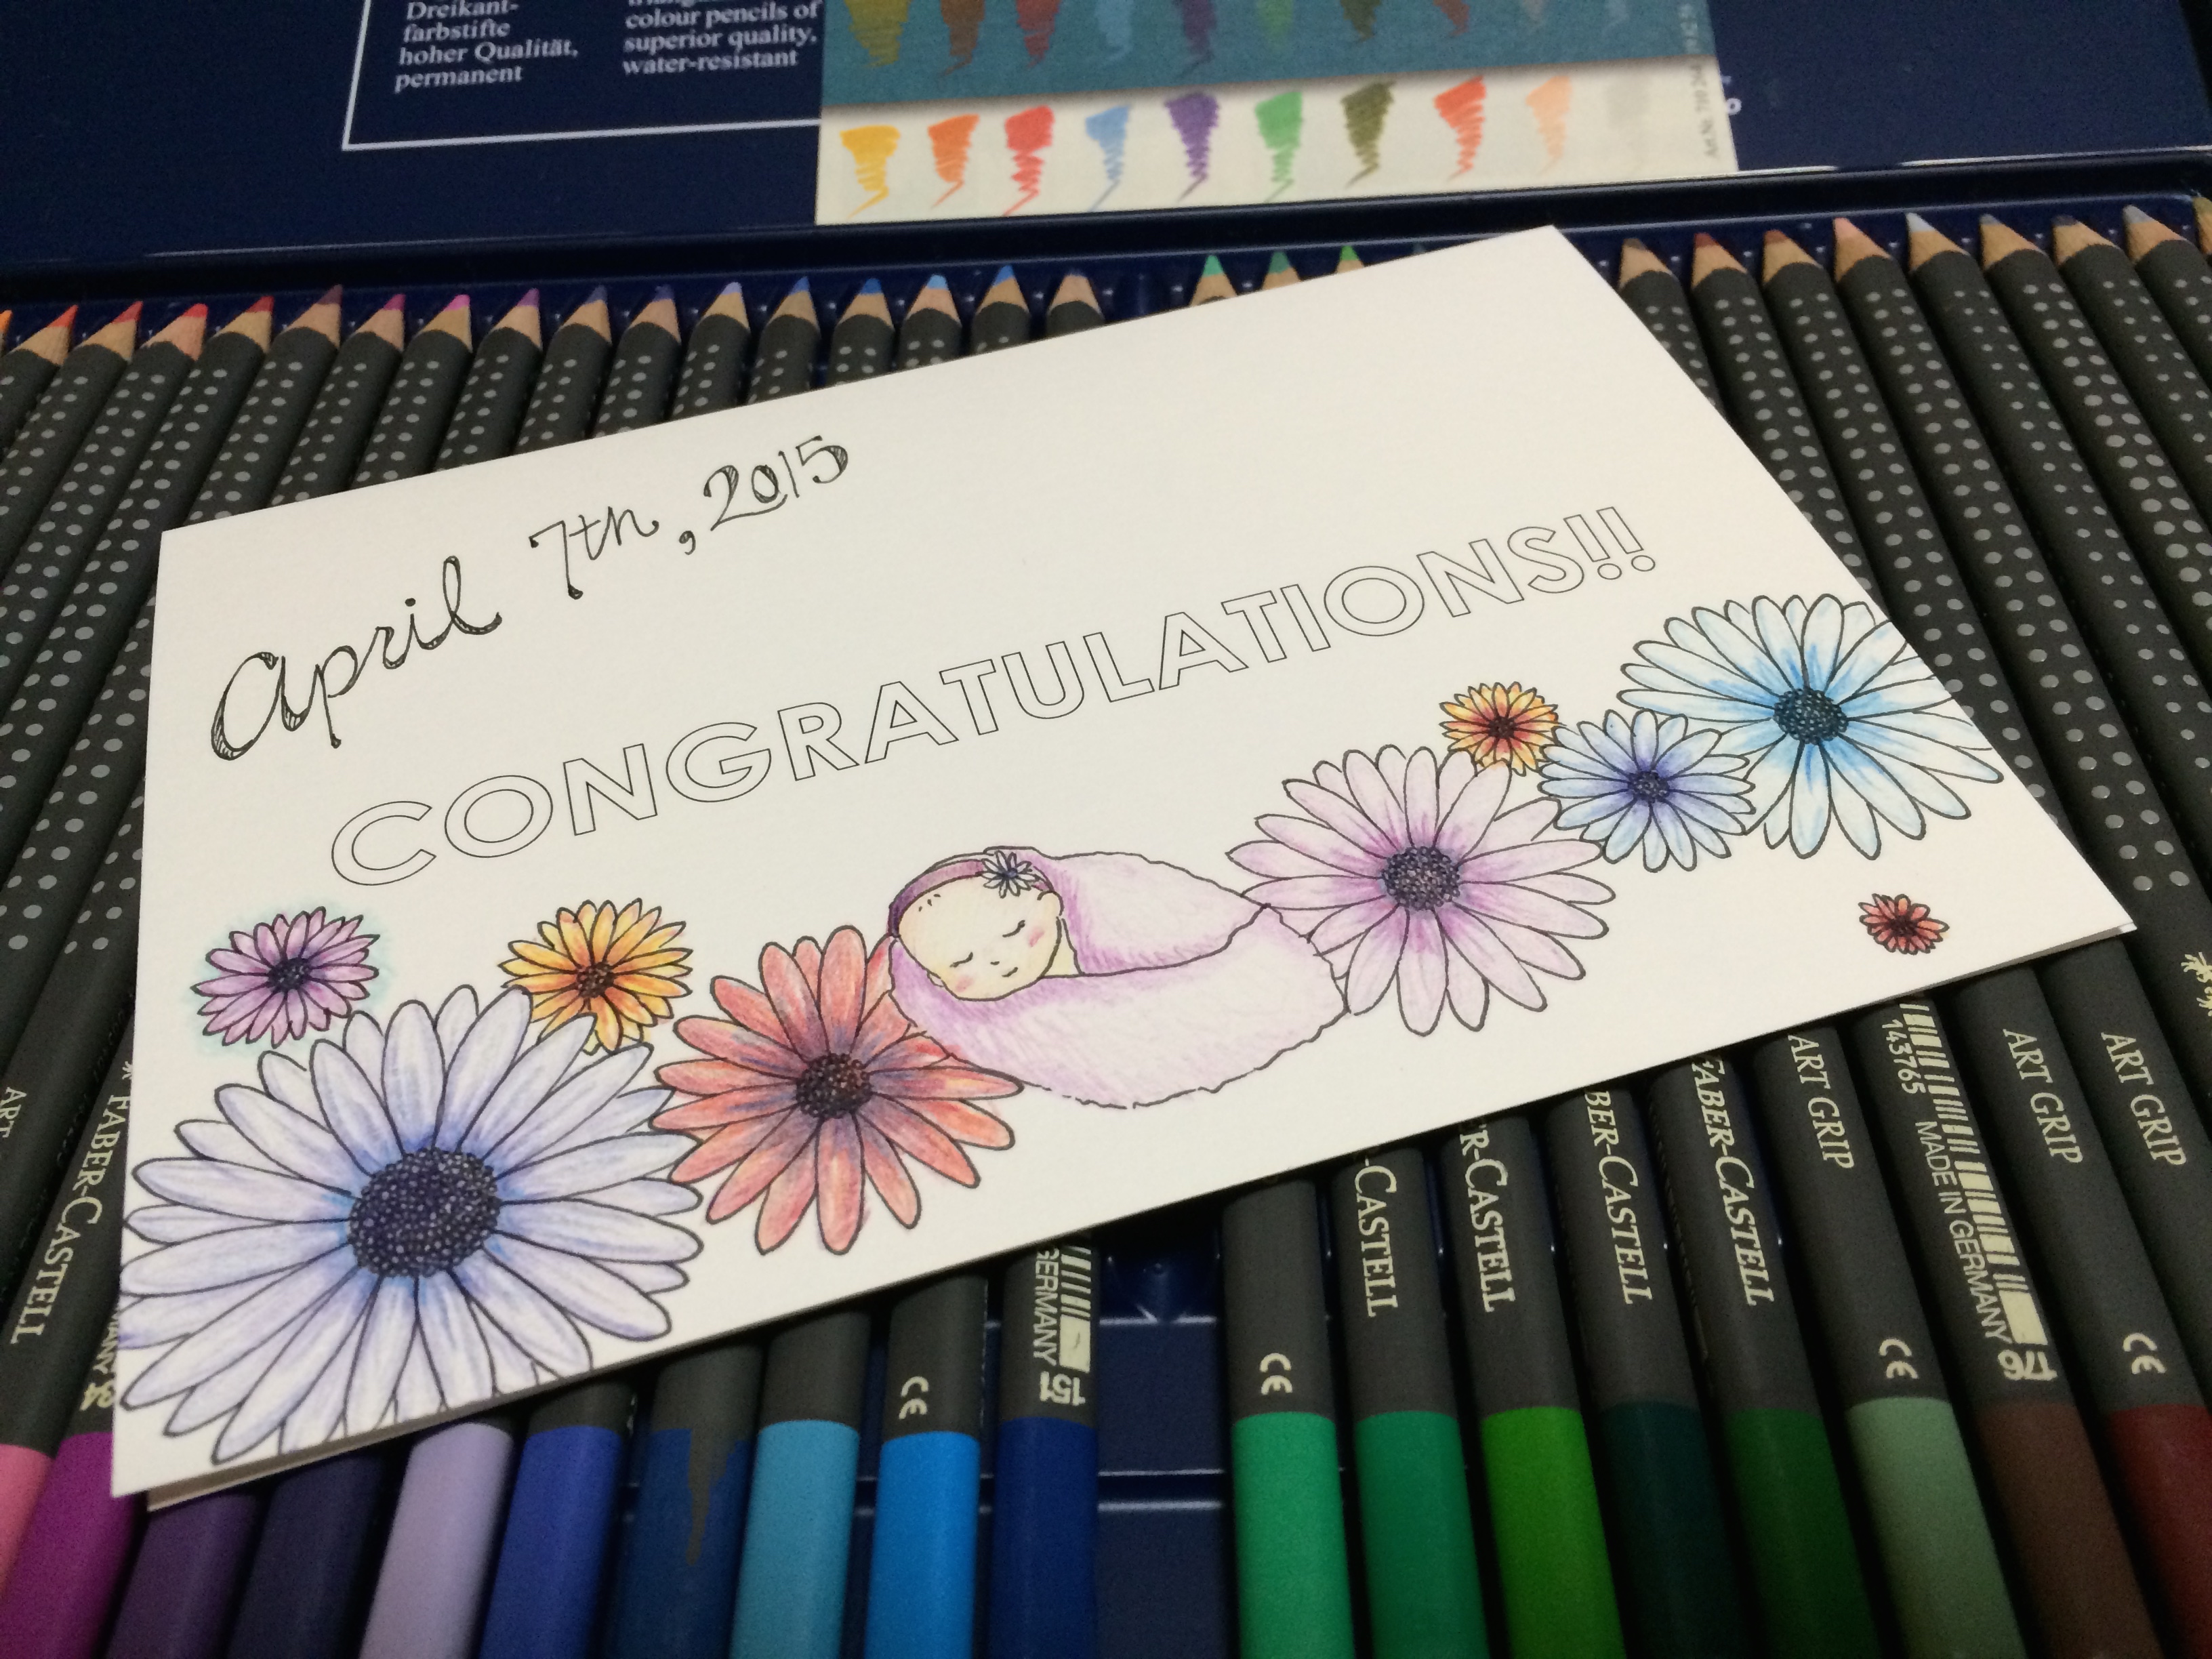
this was the first congratulations card i made! i surrounded the newborn girl with her birth flower, daisies. / コングラチュレーションシリーズの最初のカードでした!生まれたての赤ちゃんを誕生花(欧米の誕生花になりますが)のヒナギクで囲みました。

[ETSY] CONGRATULATIONS SAMPLE
and of course this one that i mentioned on my last post! / そして、前回お見せしたものです!

goodbye august | goodbye summer

before i know it, it’s already the end of august. and it seems, in tokyo, fall has peeped in and given us a sneak peak of the season to come! that said, with all the work going on, my blog was on a little bit of a summer break. so much creativity and major projects happened within the last few weeks, i wish i could tell y’all ALLLL about it!! but that would be a lot of telling, so i’ll start off with showing a couple of things today.

相変わらずあっという間に過ぎてしまうような毎日すが、今回は知らぬ間に8月の最後!東京では、夏の残暑を通り越してそのまま秋が来てしまった気分です。この1ヶ月でたくさんのお仕事をして来て、ブログは夏休みになっていました。クリエイティブでメジャーな8月で皆さんに全てご紹介したい気持ち満々ですが、長くなってしまうので、今日は少しだけお見せしたいと思います。

[[ i added a couple photos of this year’s summer memories! ENJOY! / 今年の夏の思い出の写真と共にご覧ください〜⭐︎ ]]

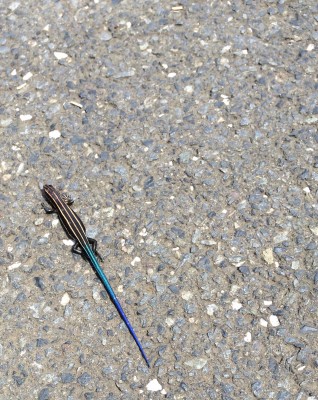
lizard

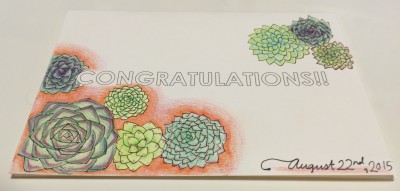
last week, my cousin got married in the states. unfortunately, i couldn’t be there, but i made sure to have a part of me present for the wedding (no, no body parts). i was able to gather some information from his sister about their theme and colors. some key words were: succulents, coral, natural.

先週末、アメリカで従兄弟が結婚式を挙げました。残念ながら私は出席できなかったのですが、代わりになるプレゼントを贈りました。事前に従姉妹に結婚式のテーマを聞き出しまして、キーワードは:多肉植物、コーラルカラー、ナチュラル。

CONGRATULATIONS SAMPLE
[ the card ] added some “succulent” illustration to a congratulations card.
[ カード ] 多肉植物をメインにしたイラストをコングラチュレーション カードに加えました。

WEDDING BOARD
photo credit: my cousin (sister of the groom)
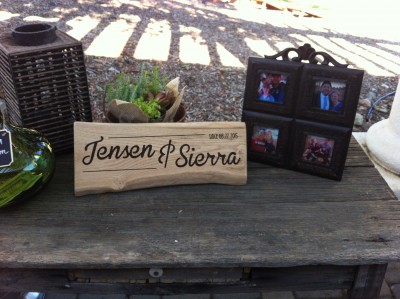
[ the gift ] upcycled wood wedding board with custom name and date.
i was able to find a place that could laser print my design into the wood. after using it for the wedding reception, it can have a place in their new home together!
[ プレゼント ] 廃材になる木材にレーザー印刷でデザインしたネームと日付を印刷してもらいました。
ウェルカムボードとして使用後、新しいお二人の家に飾っていただけます。

summer sunset

g o o d b y e  s u m m e r

illustrated wedding invitations – envelope

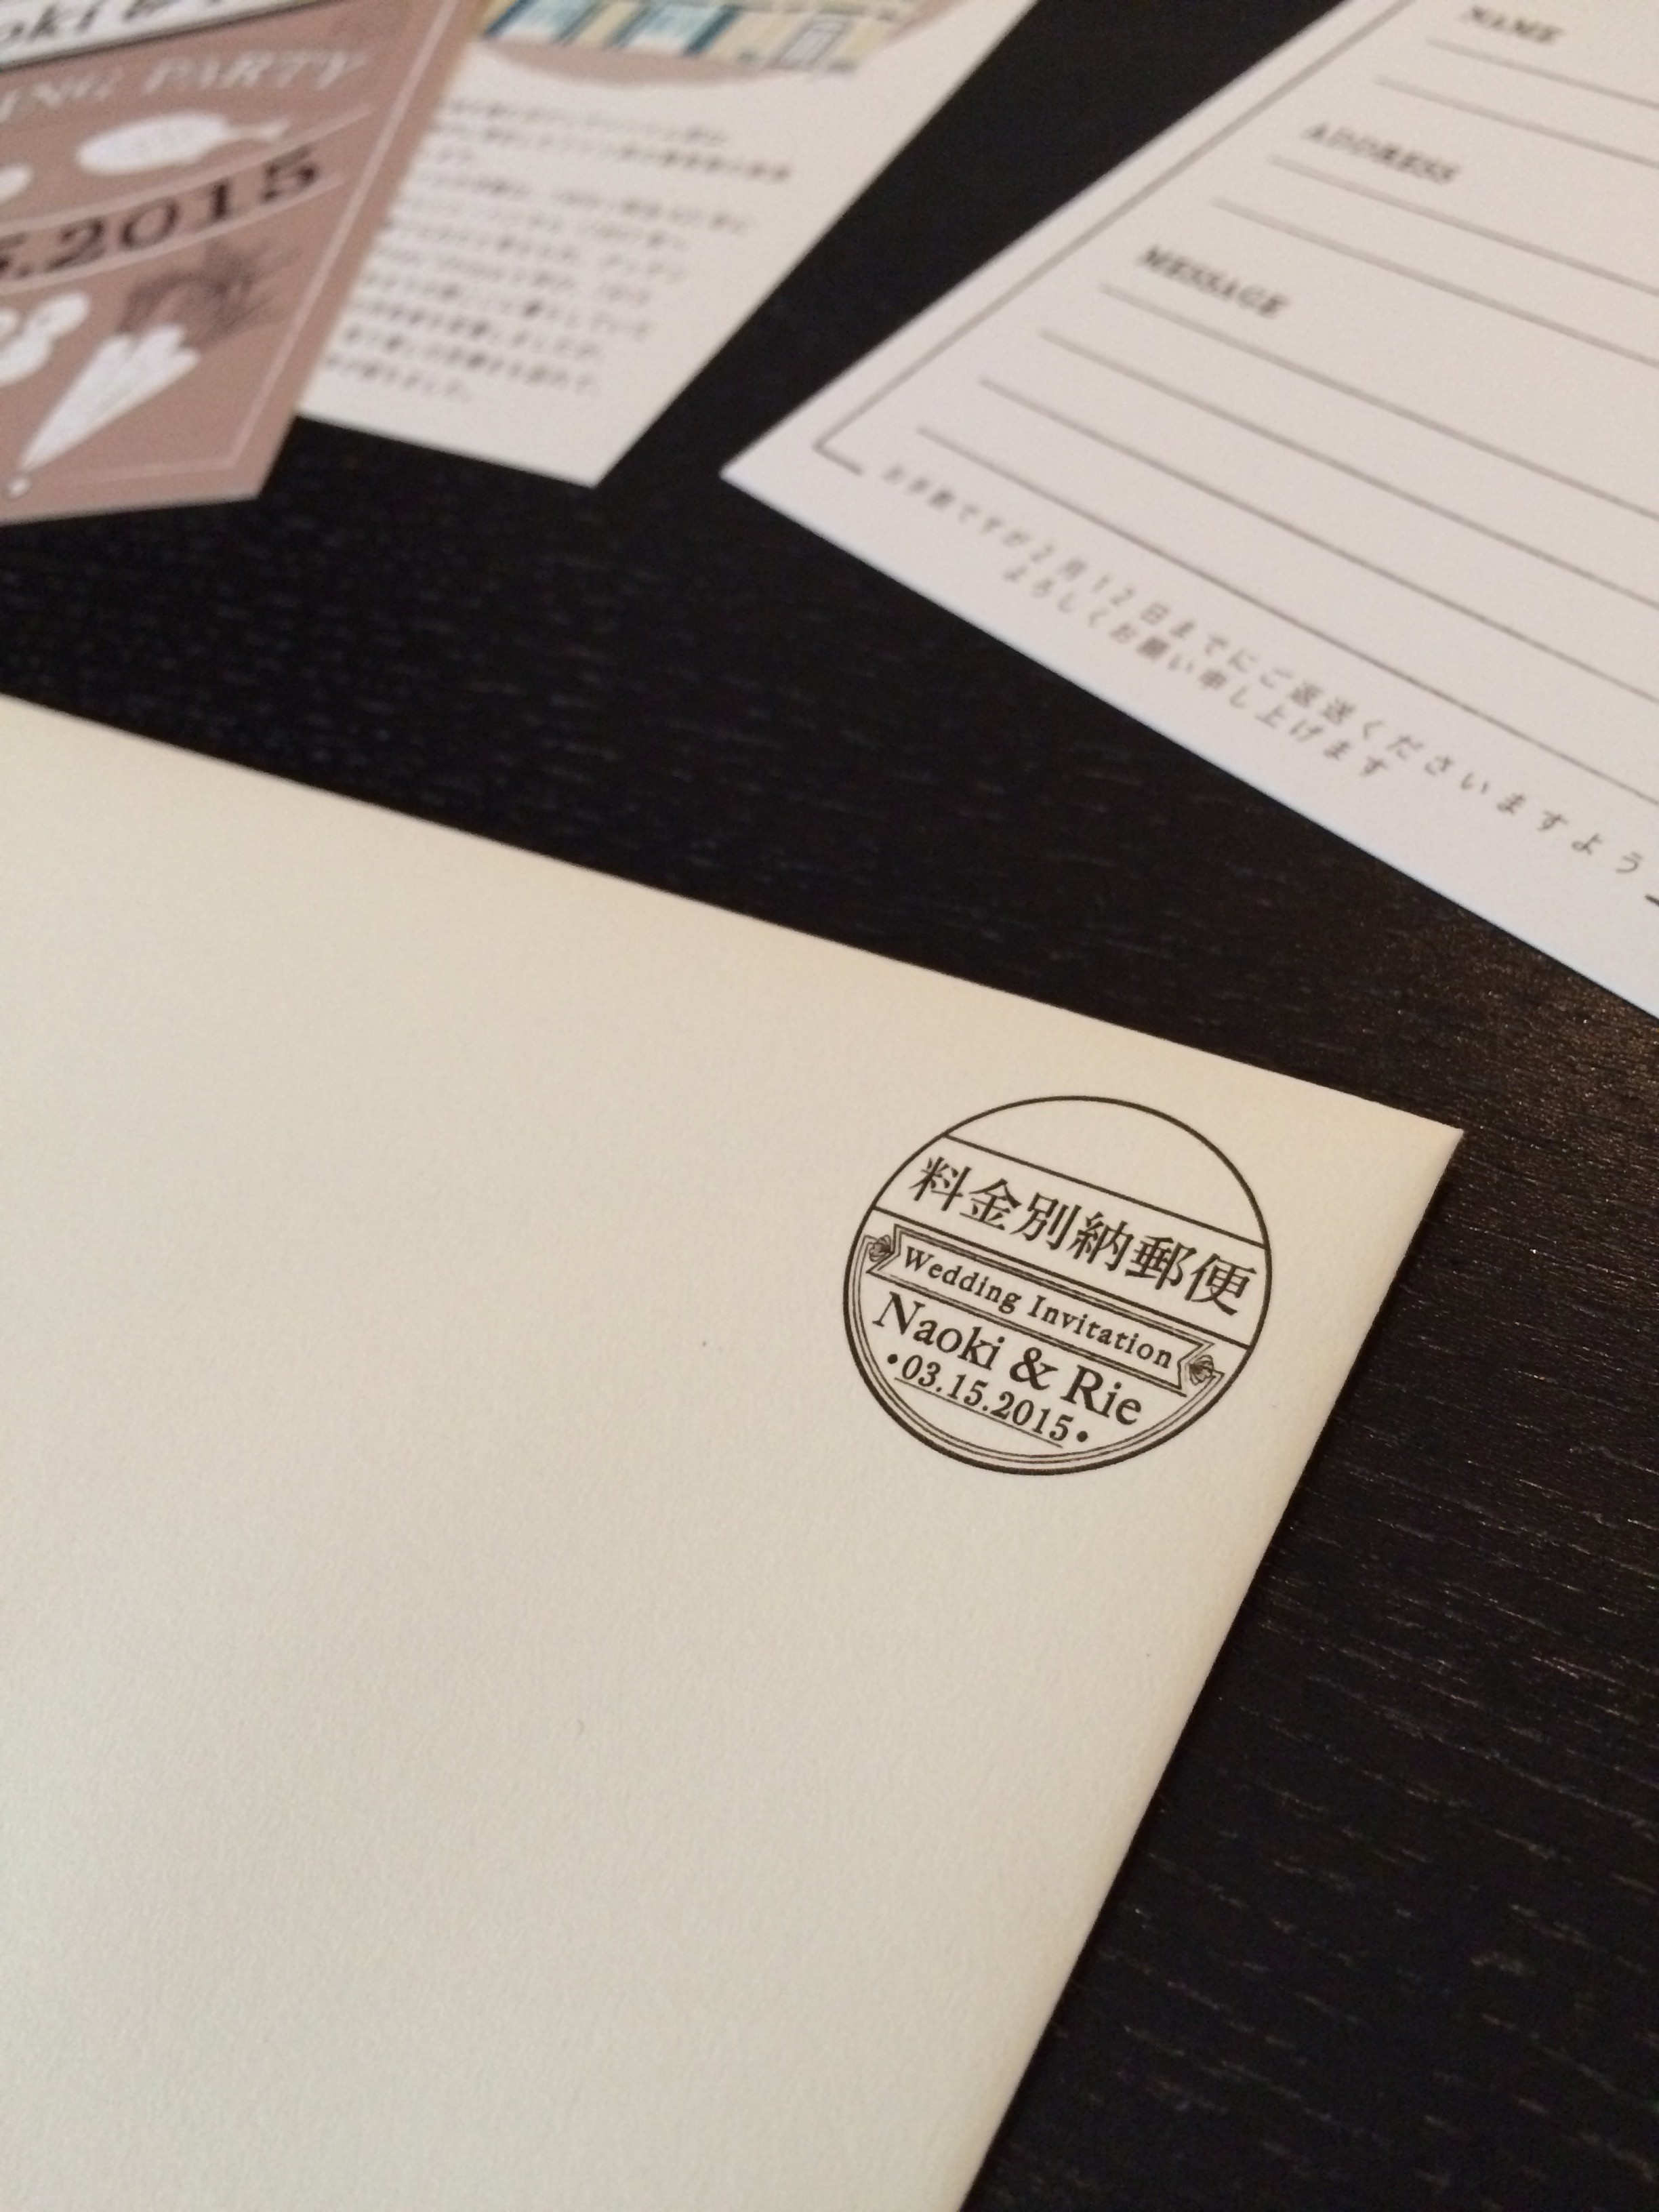
today for #tbt #fbf, i introduce the final piece of the illustrated wedding invitations! the envelope and postage stamp.
今日の #tbt #fbf は、イラスト風招待状シリーズの最終で、封筒をご紹介します!料金別納表示を特別にデザインいたしました。

[WEDDINGS] ILLUSTRATED ENVELOPE

working on this project, i had learned for the first time that designing an original postage stamp was even possible! how sweet is having your own wedding postage stamp?? my clients were so thrilled with how it turned out. when they took it to the post office, the postman even complimented them!

今回の招待状を作るのがきっかけで料金別納表示をデザインする事が可能だというのを初めて知りました。ウェディング招待状で二人のオリジナル料金別納マークを持てるというのは本当に嬉しい事ですよね!お二人は仕上がりをとても気に入っていくださり、更に郵便局で招待状を出した際も褒められたらしく、自分のお仕事のやりがいを改めて感じました。

[WEDDINGS] ILLUSTRATED ENVELOPE

[WEDDINGS] ILLUSTRATED ENVELOPE

with this, i’ll be taking a break from posting the #tbt #fbf wedding series. in the meantime, i’ll be blurbing here and there, so please come by and check it out! 🙂
これを持って、しばらく #tbt #fbf の ウェディングシリーズをお休みします。他の作品のご紹介やブログも書いていきますので、是非是非見にいらしてください⭐︎

illustrated wedding invitations – access card

on this week’s #tbt #fbf post, i will be explaining the access card in the illustrated wedding invitation series.

今週の #tbt #fbf もイラスト風ウェディング招待状セットの続きをご紹介いたします。今回はアクセスカード!

[WEDDINGS] ILLUSTRATED ACCESS CARD

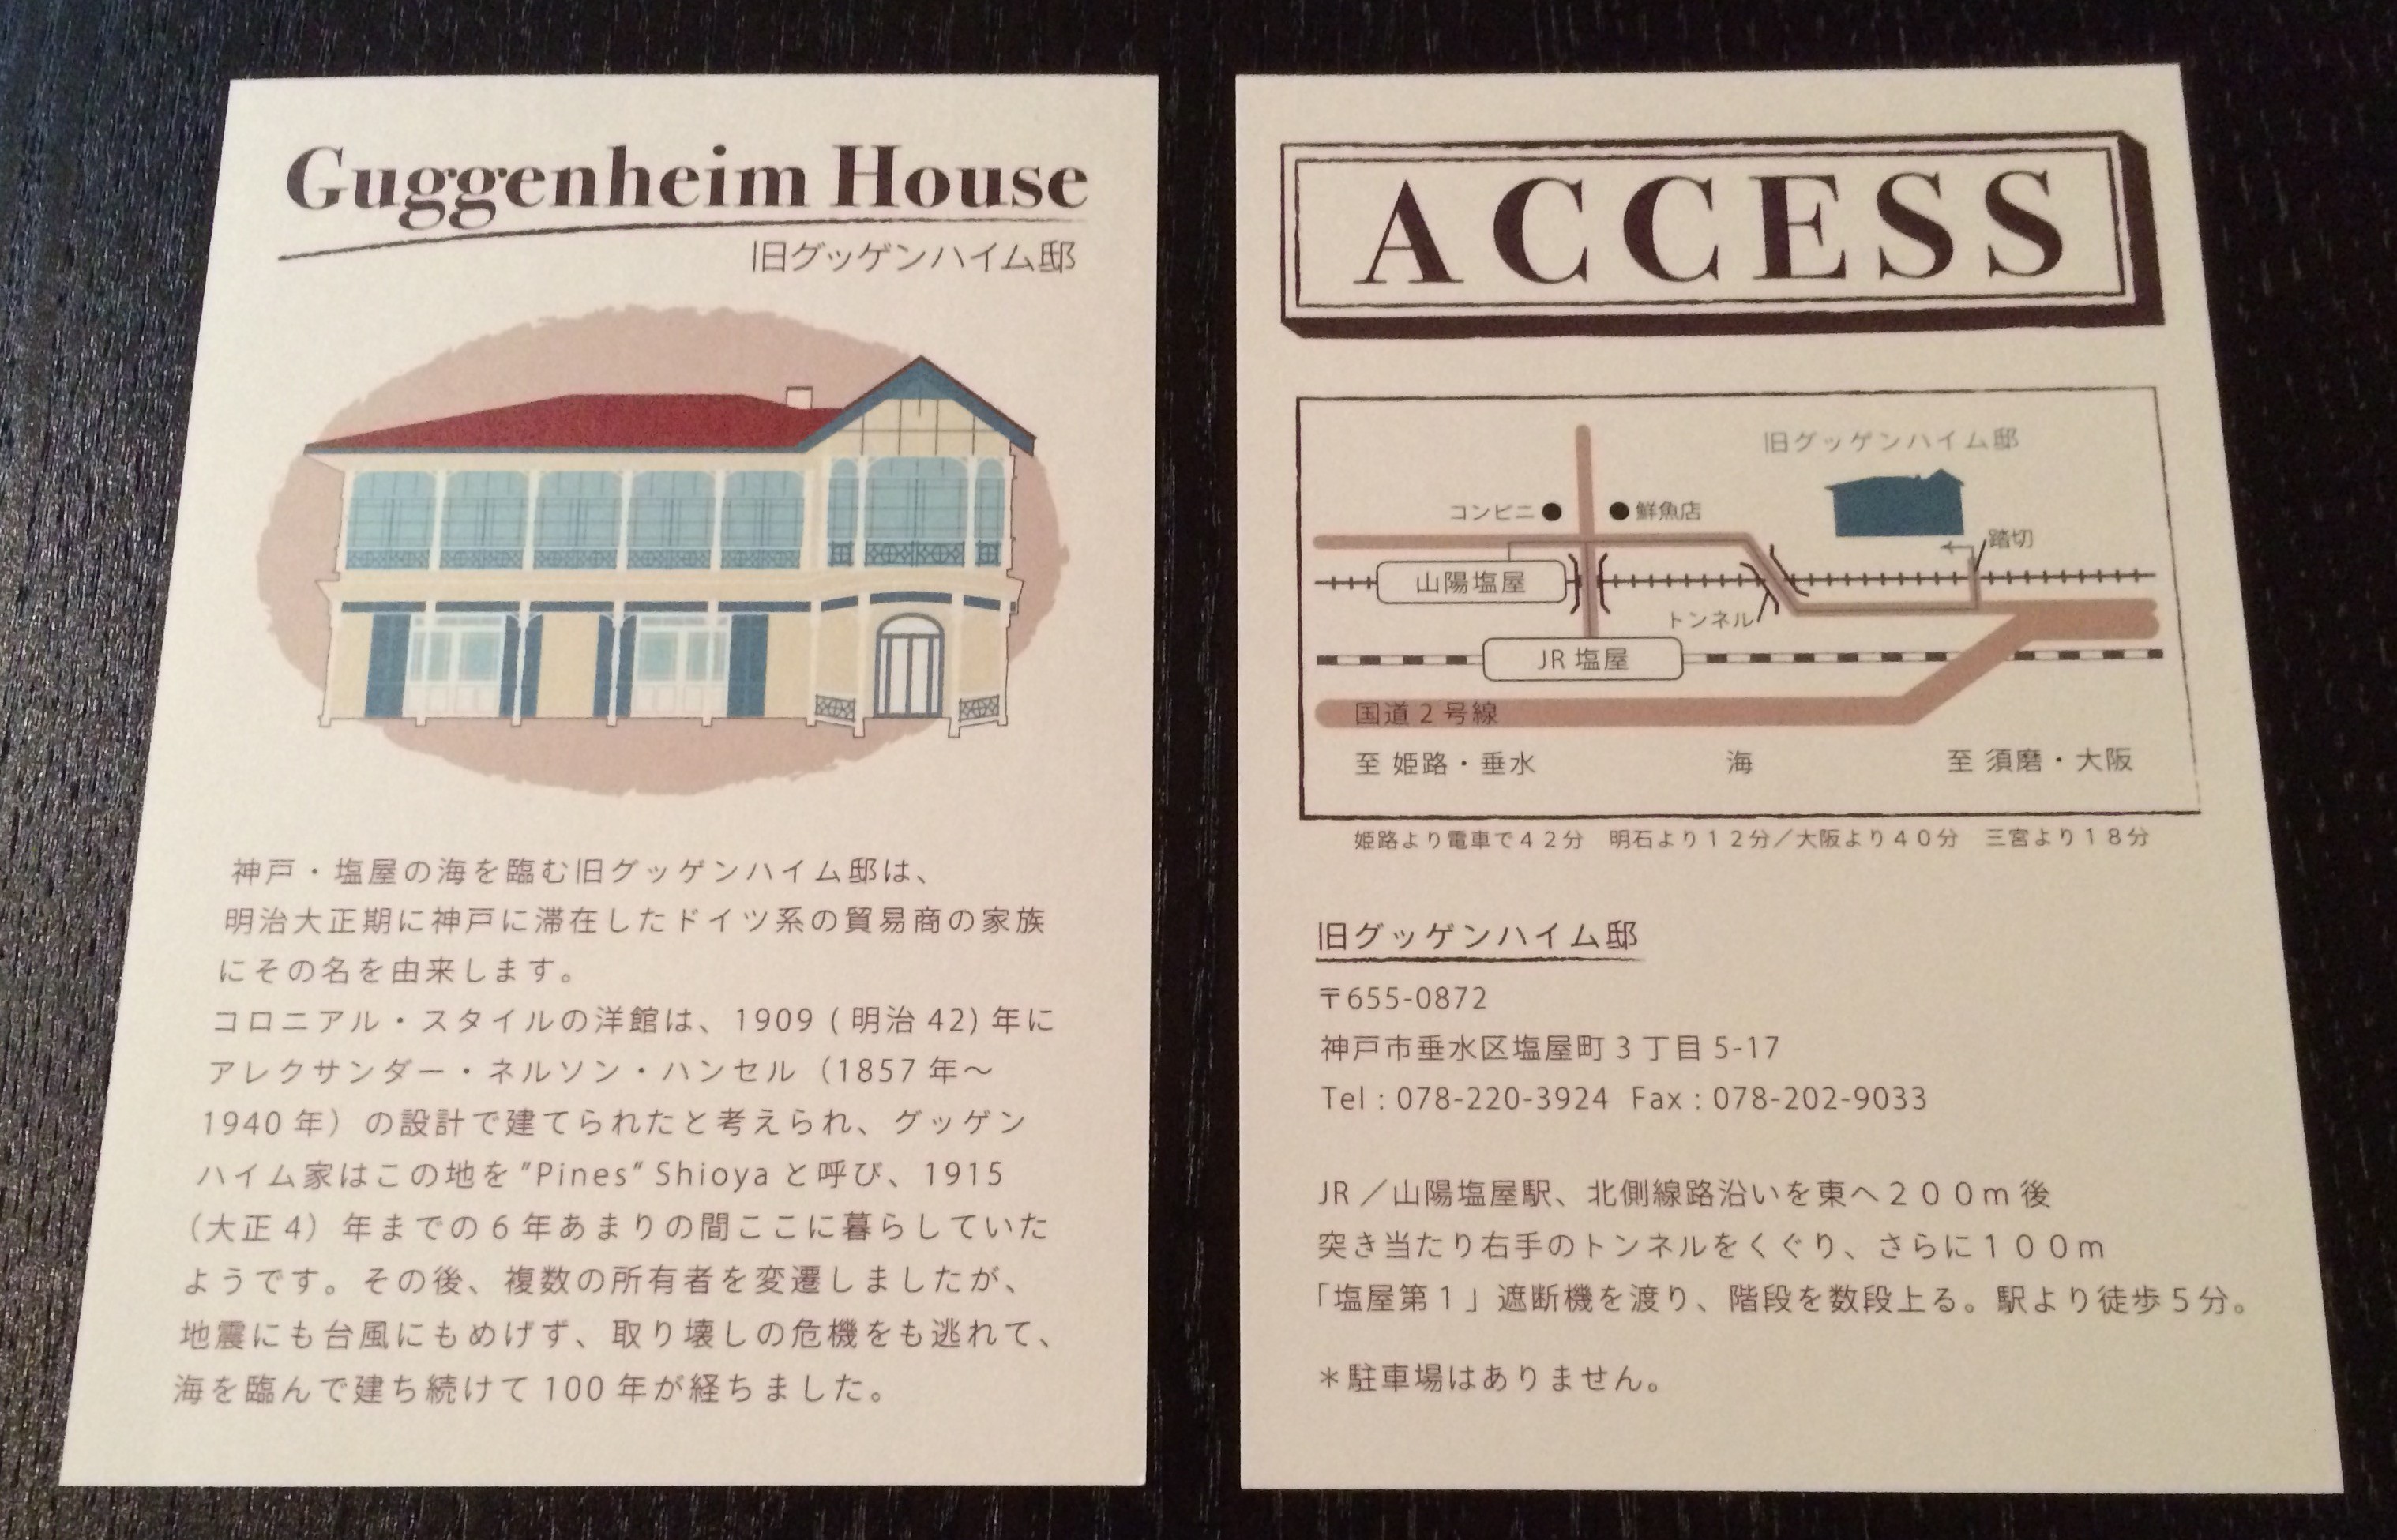
often times i see invitations that use the map straight off of a venue’s website. which is fine, but it doesn’t always match the theme of the invite itself and just doesn’t seem to fit in. it’s very simple to re-work a map and i really believe that this attention to such a minor detail will take an invitation set to a different level.

招待状セットで良く見る光景なのですが、アクセスマップをそのまま会場のホームページからコピー&ペーストしている事があります。そうしますと、画質が不十分だったりカラーなどが招待状のテーマと合わないケースが多く、とってももったいなく感じます。そこで、私は必ずテーマに合わせたフォントやカラーを使用し作り直します。小さなディテールですが、細部までこだわる事によって、より一層デザインがまとまるのです。

[WEDDINGS] ILLUSTRATED ACCESS CARD

for this access card, i spent a lot of time reproducing the Guggenheim House in digital illustration form. it is somewhat monotonous, but so much fun (for me at least!) to repeatedly draw lines and shapes evenly. call me crazy, but it’s so therapeutic! 🙂

アクセスカードで時間をかけた部分はこちらです!旧グッゲンハイムハウスをデジタルで再現しました。単純作業ではありますが、たくさんの線や形を繰り返し並べていくのが、どこか癒される作業でもあり、とっても楽しいのです。?